Torn Paper Flower Card
Thanks for your support!

Suggested Materials
- Sewing Machine - I used white cotton
- Card Stock - I used dark brown & medium brown
- Patterned Paper
- Paper with a large flower pattern - the flowers need to be separate from each other so that an individual flower can be torn out
- Embellishments - I used Self adhesive Rhinestones
- Cutting Tools: Paper Trimmer
- Tracing Wheel
- Double Sided sticky Tape
Instructions
1. Make the card base - Cut a piece of cardstock to 300mm x 150mm. Score and fold in half. Set it aside for now.
Tutorial on Scoring and Folding Card
2. Use a paper trimmer to cut a piece of your patterned Paper 142mm x 142mm.
3. Tear out a flower from your chosen flower paper.
Tutorial on Tearing paper
4. Attach the flower to the patterned paper using a small piece of double sided tape in the centre of the flower to hold it in the right position.
You don't want the double sided tape to go near the edges of your torn flower as the stickiness will create problems if you sew over it.
5. Use your sewing machine to sew zigzag style around the outside of the torn flower (attaching it to the patterned paper)
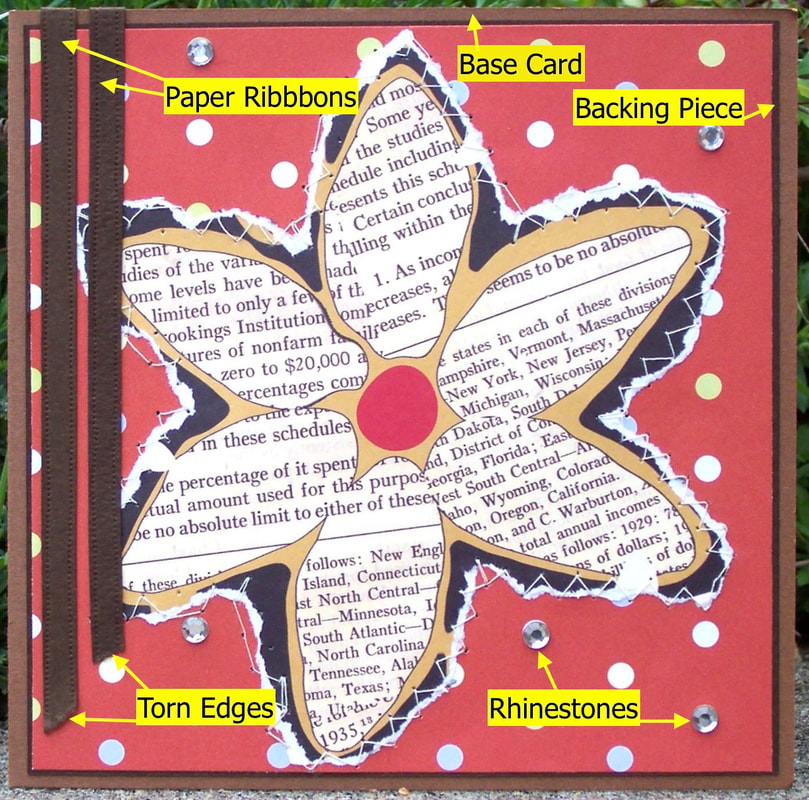
6. Cut another piece of cardstock 145mm x 145mm. This is your backing piece. Using double sided tape attach the patterned paper (with the flower sewn on it) onto the backing piece - make sure that it is evenly centred.
7. Now attach the backing piece onto the card base that you made at the start, make sure that it is evenly centred.
8. Cut two strips of cardstock to create paper ribbons (the same colour as the backing piece) 6mm wide and approximately 160mm long. Run a tracing wheel along the long edges.
Tutorial on using a tracing wheel
9. Tear the ends on the strips on the diagonal. Attach them to the card using double sided tape.
Use the photo above as a guide to placement.
The top ends of the strips can either fold around the card and attached to the inside of the card, or you can trim then level with the top of the card.
6. Embellish as desired - I randomly attached some rhinestones over a few of the the spots on my patterned paper.