Microfleur
Microwave FLower Press
Thanks for your support!
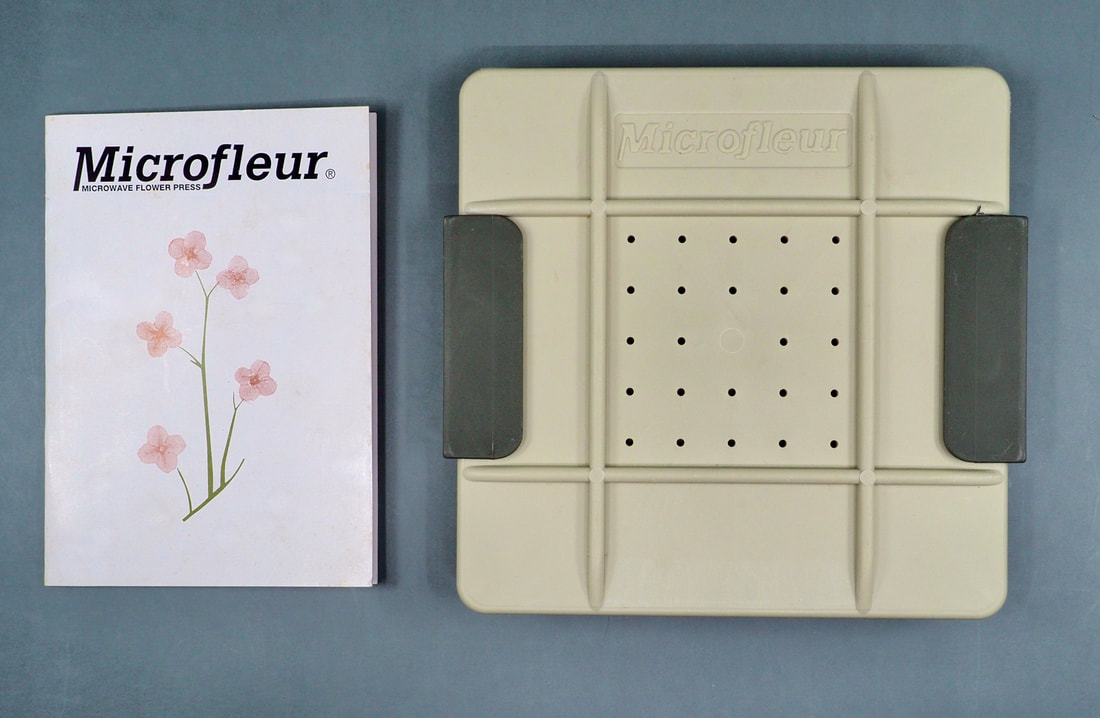
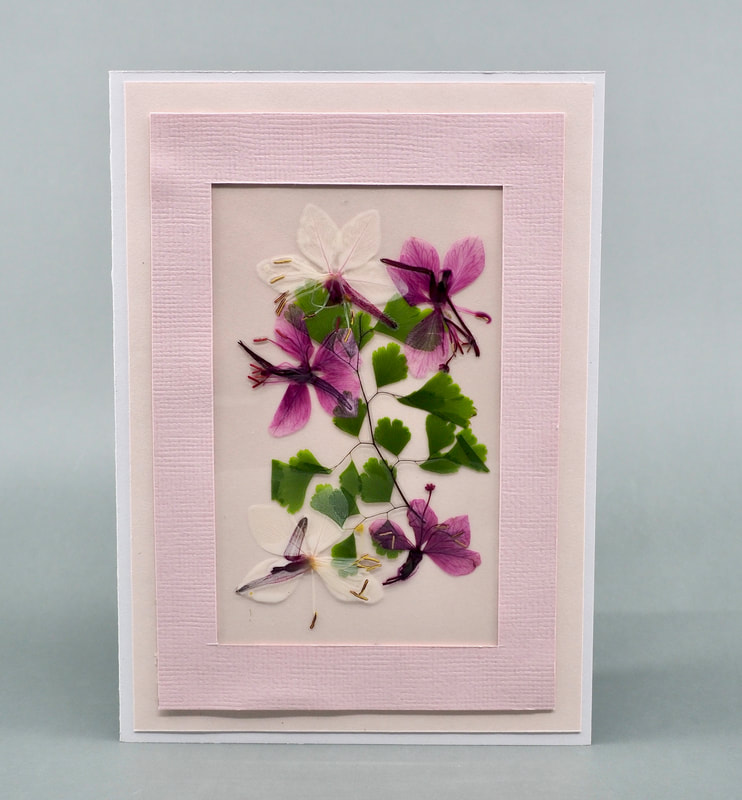
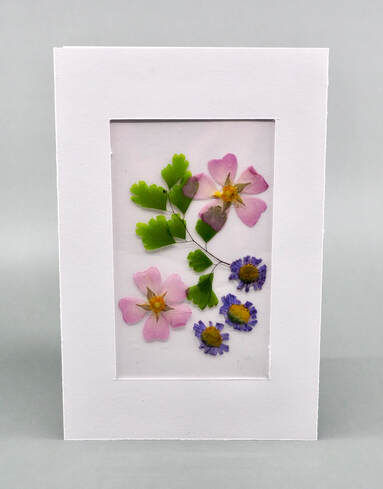
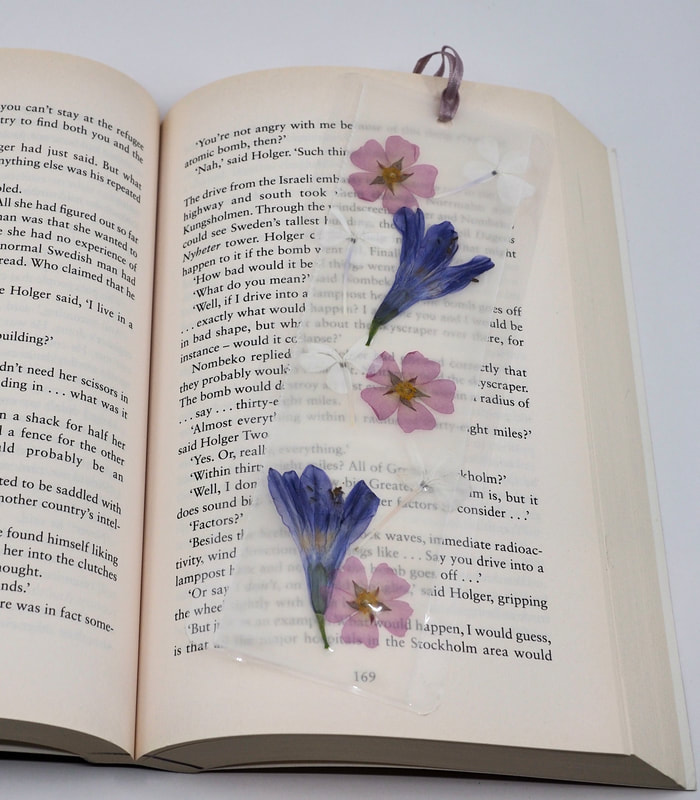
Using the Microfleur Microwave Flower Press is easy - you can press & dry flowers for your craft projects in minutes (or sometimes seconds). My Microfleur Press is now over 20 years old (yikes!) and still going strong... though it is showing the stains from all those years of flower pressing, as you will see below. It can be used to create wall art, card, scrapbooking, bookmarks, to decorate soap and candles and for preserving flowers that have a special memory attached.
The Microfleur Press comes two sizes
- The Regular 5" x 5" (13cm x 13cm)
- The Max 9"x9" (23cm x 23cm)
I have the regular size, which will fit well into any microwave, but I would recommend considering the Max if you have a larger microwave.
The main reasons for recommending the larger press
The main reasons for recommending the larger press
- You can press more flowers at one time
- You can fit longer stems into the press, great for creating wall art
- Grasses and longer or larger flowers are more likely to fit in the larger press.
The Press Parts
The press consists of
- 2 platens (the hard plastic sides of the press)
- clips (2 for the Regular, 4 for the Max)
- 2 pads - which look & feel like felt
- 2 fabric liners / sheets
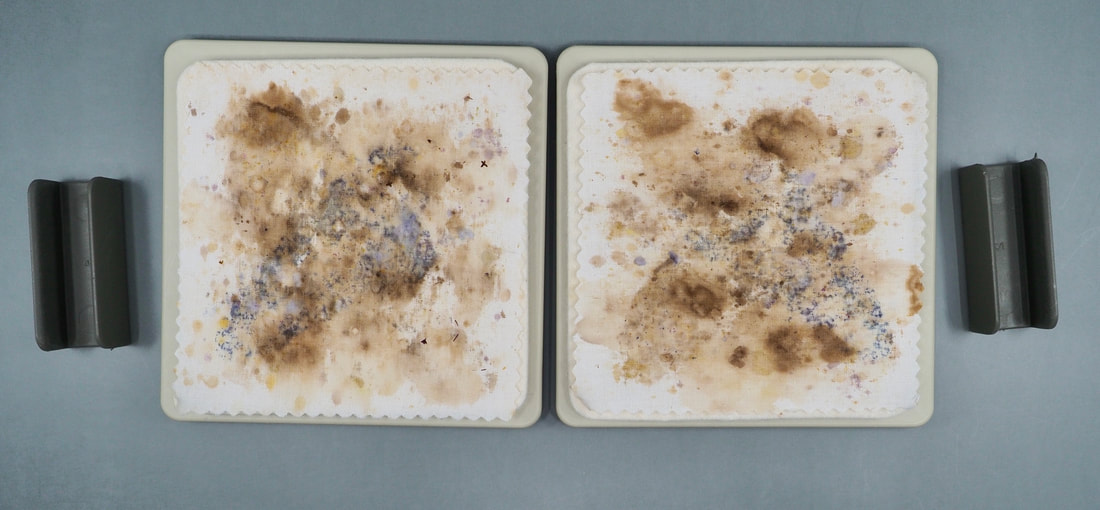
There are replacement kits available for the pads and liners, but I've had the same ones for over 20 years and the quality of the pressed flowers is not affected by the flower stains.
Using the MIcrofleur Press
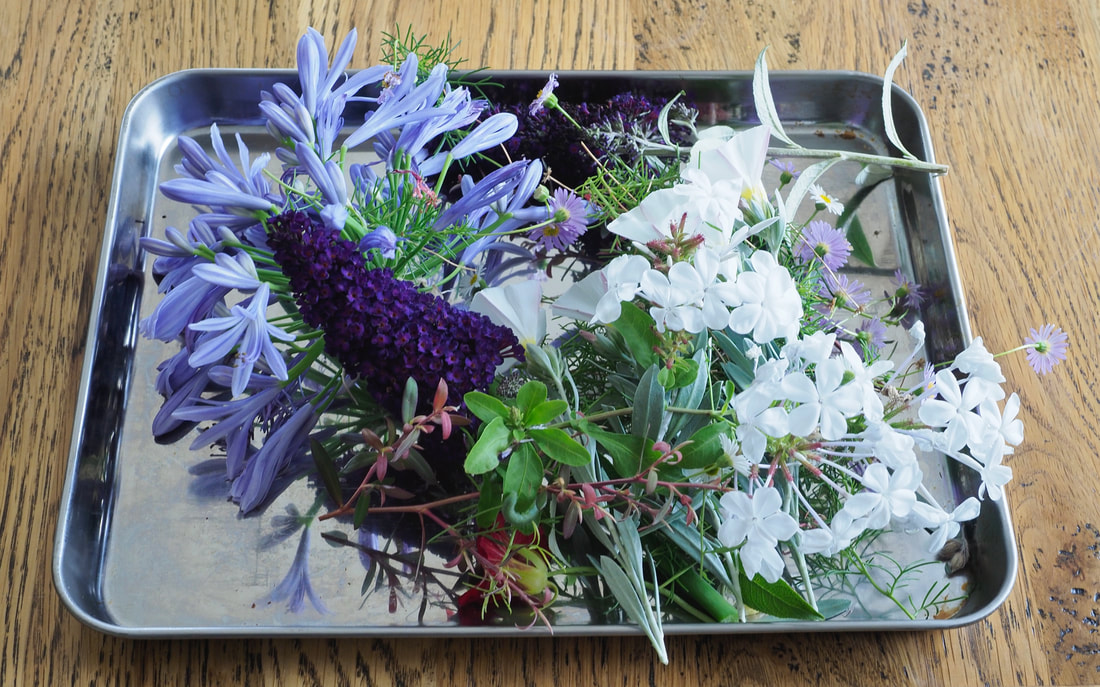
Collect your flowers, leaves & grasses.
Not all flowers will press well in a microwave press.
Not all flowers will press well in a microwave press.
- Thicker & fleshier flowers (with more moisture) are harder to press.
- Thinner & drier flowers will take a lot less time to press.
- Bulky flowers are hard to compress.
- Larger flowers, especially with stems, may not fit in your press
- Think about what you are using the flowers for. Thin papery flowers are good for laminating in bookmarks, larger flowers for wall art.
- Consider your colour scheme - which flowers colours will go well together?
Start the pressing process.
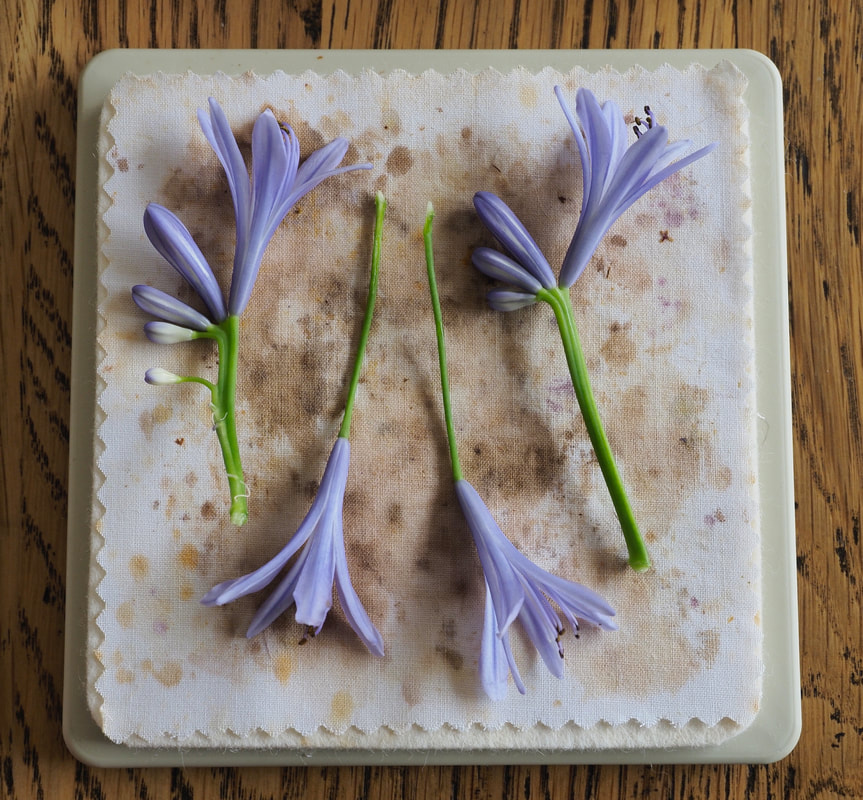
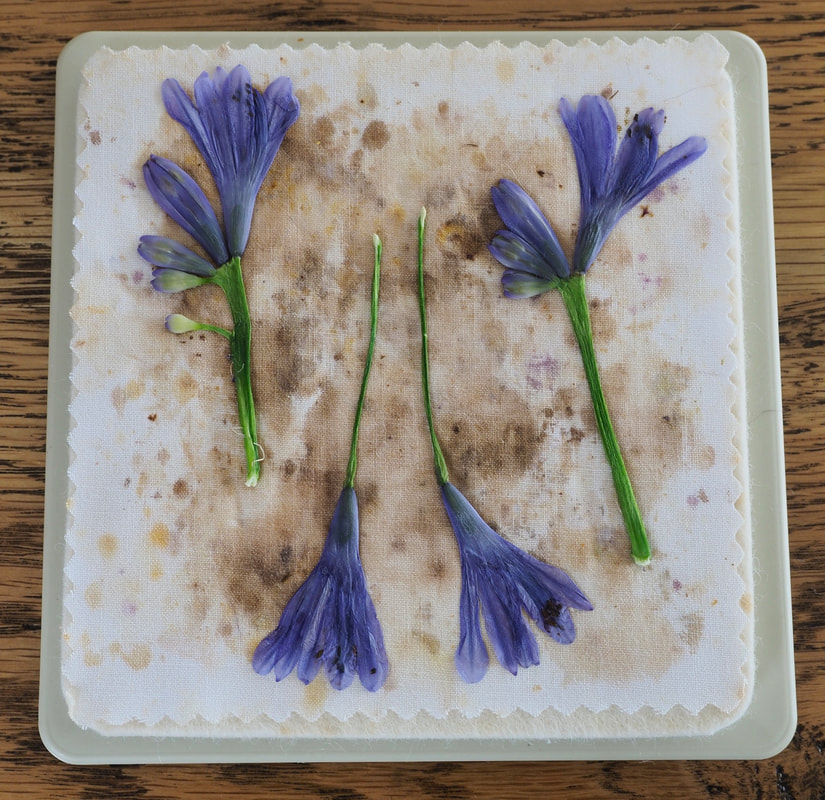
I've used some Agapanthas flowers as my main example - they are a thicker fleshier flower and will be slightly more difficult to press
I've used some Agapanthas flowers as my main example - they are a thicker fleshier flower and will be slightly more difficult to press
|
1. Arrange the flowers onto one side of the press (platen + pad = liner)
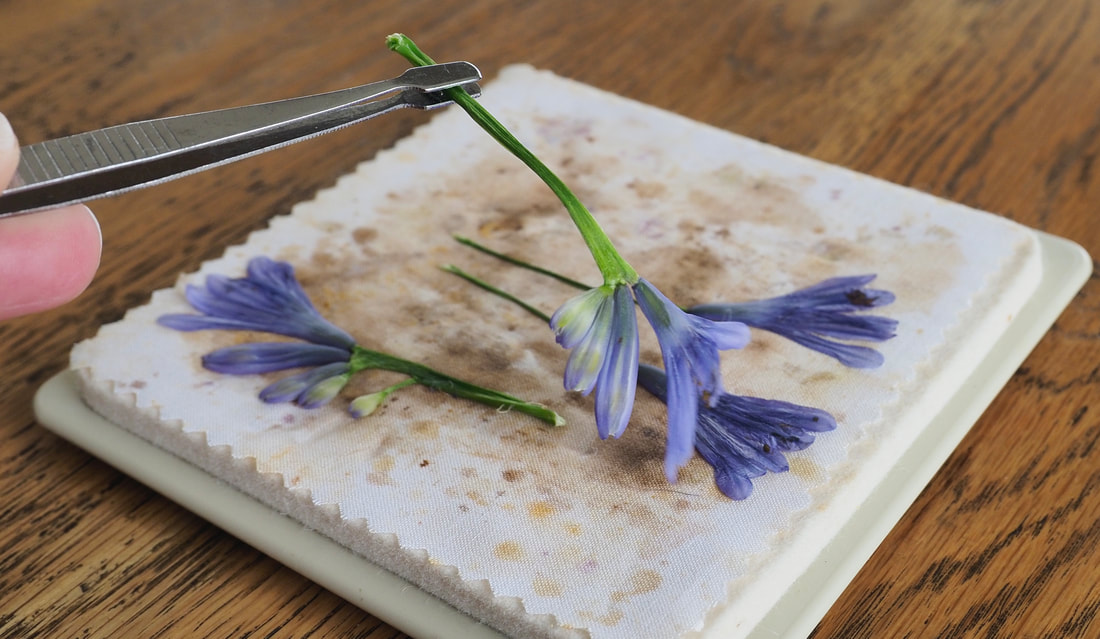
I cut individual flowers off the aAgapanthus flower head as it was too large, fleshy and bulky to fit in the press whole. It would also be very difficult to arrange the flowers for a good outcome with so many present on the whole flower head. Hints
|
|
Arranging your Flowers on the Press
Here is a couple of examples of arranging the same flower in different ways on the press
Example 1 - Plumbago

|
|
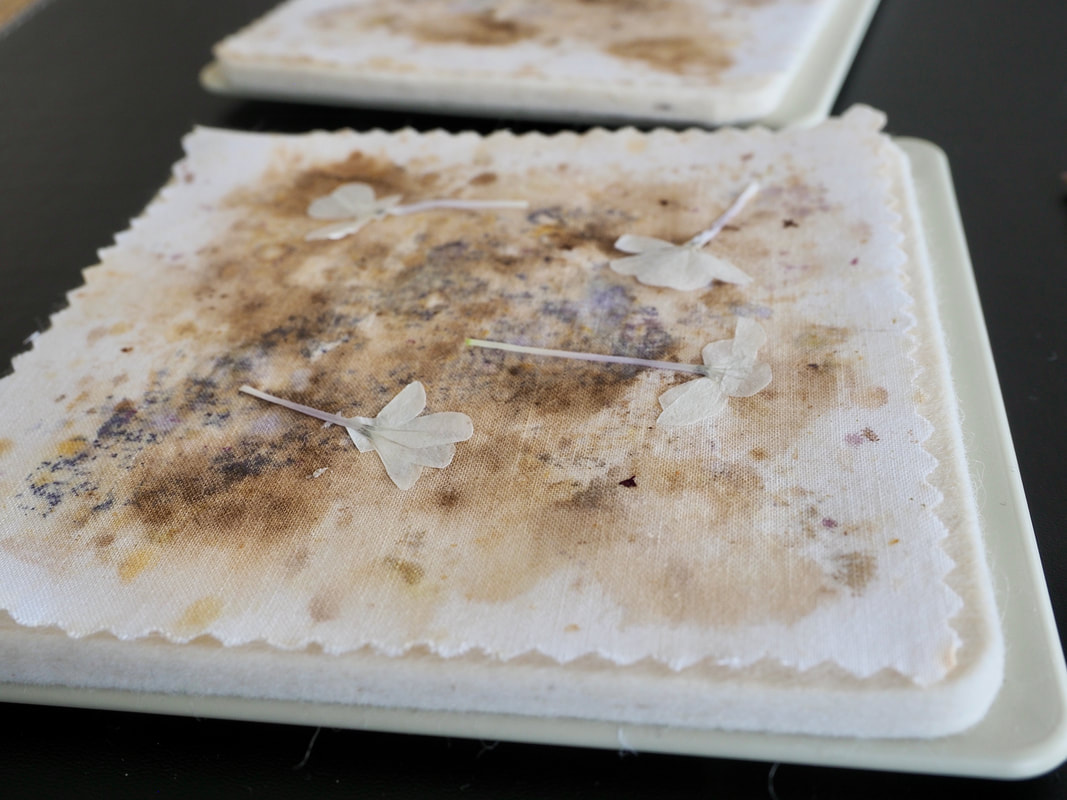
The plumbago flowers come in large groups which is hard to press, so I cut the individual flowers off the stem
|
One group of flowers (below left) I placed face down

I cut the stems off the backs of the face down flowers
|
The second group of flowers (below right) I placed lying on their sides
|
Both groups were microwaved for 30 seconds in total
|
|
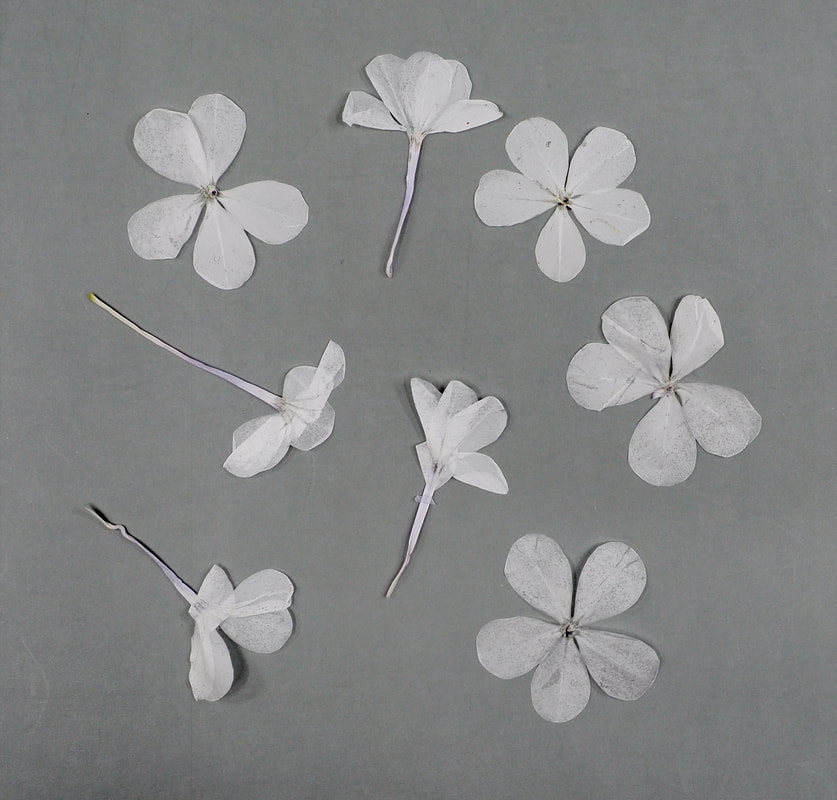
You can see below that the different placement created a very different looking pressed flower
Example 2 - Gaura
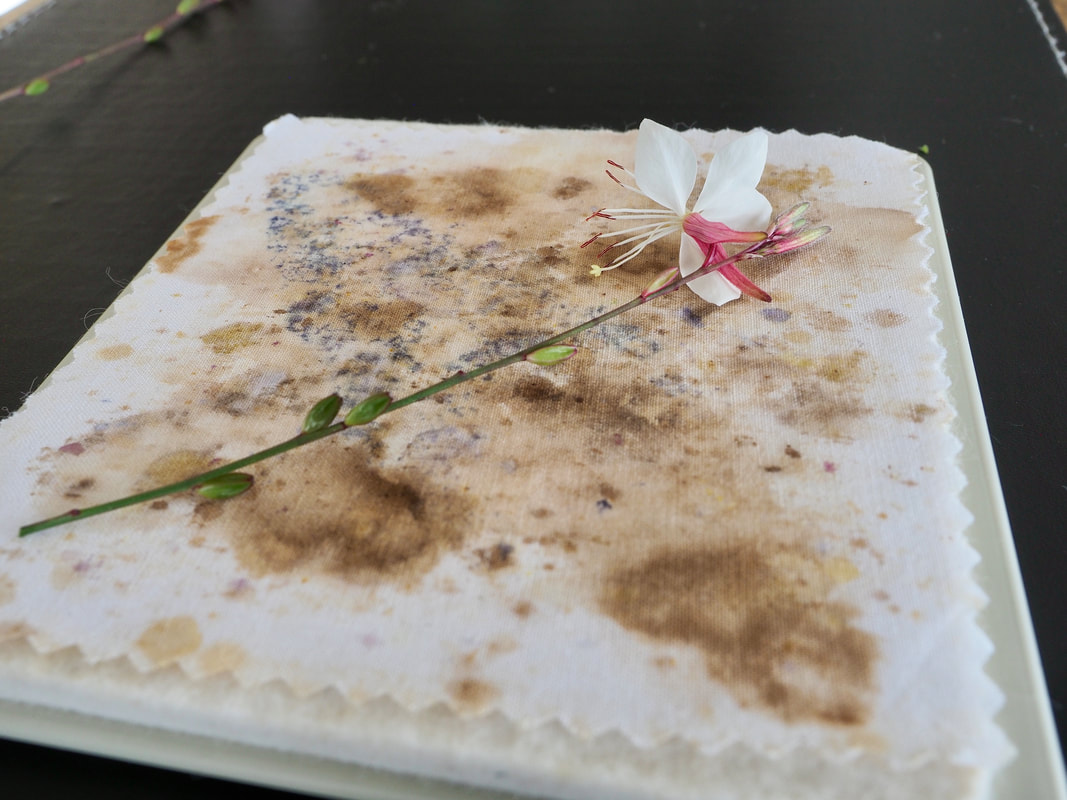
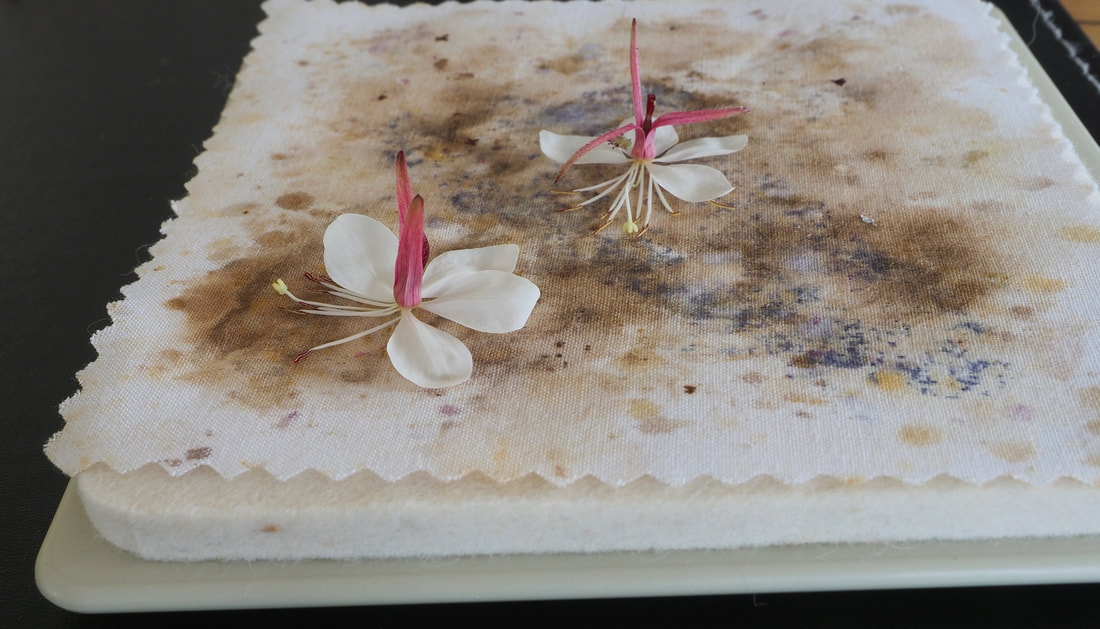
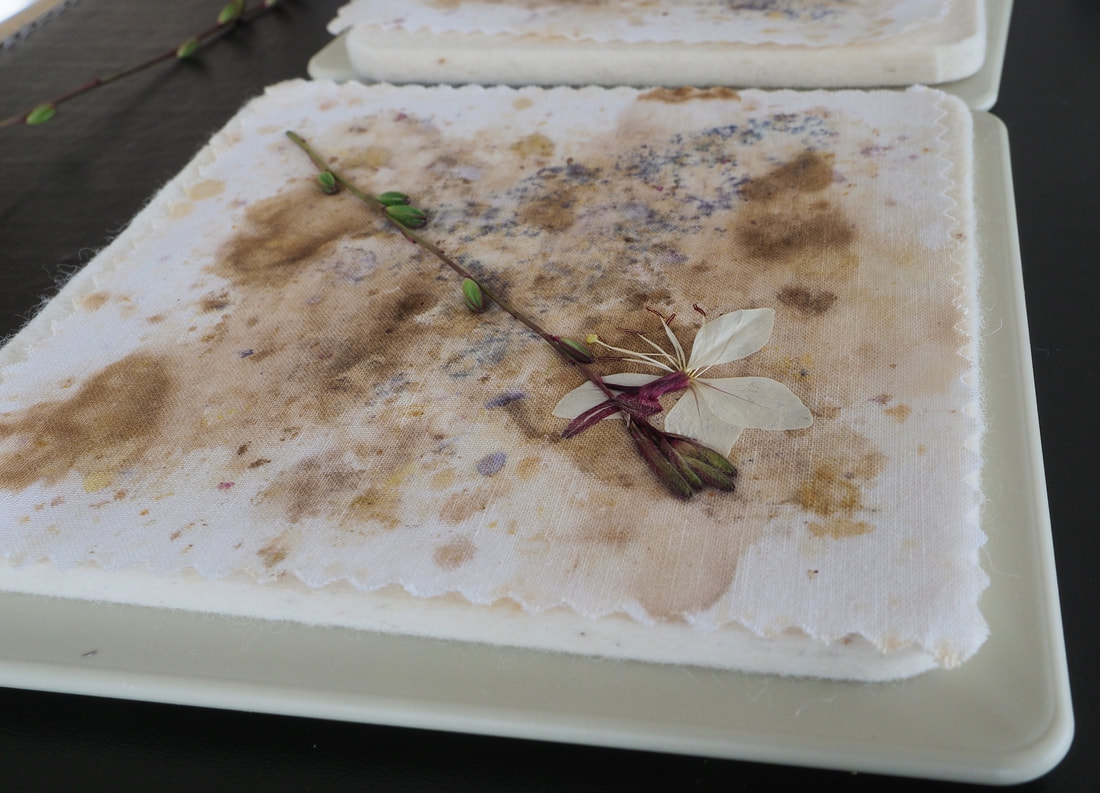
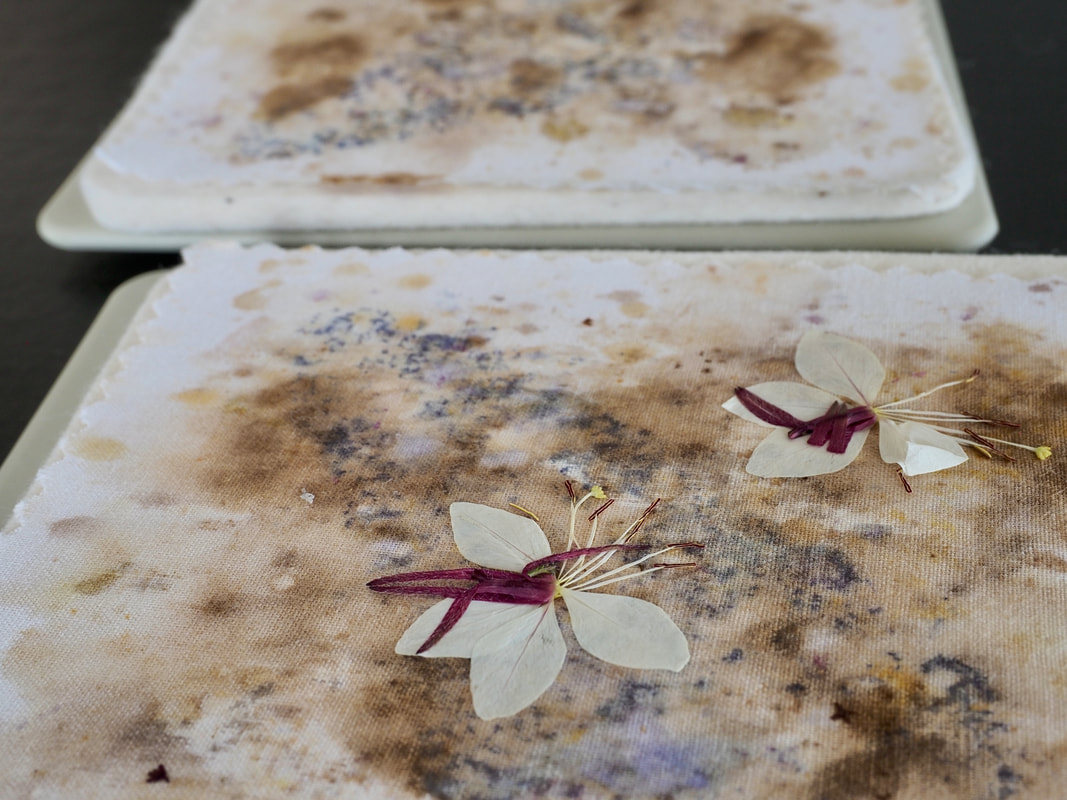
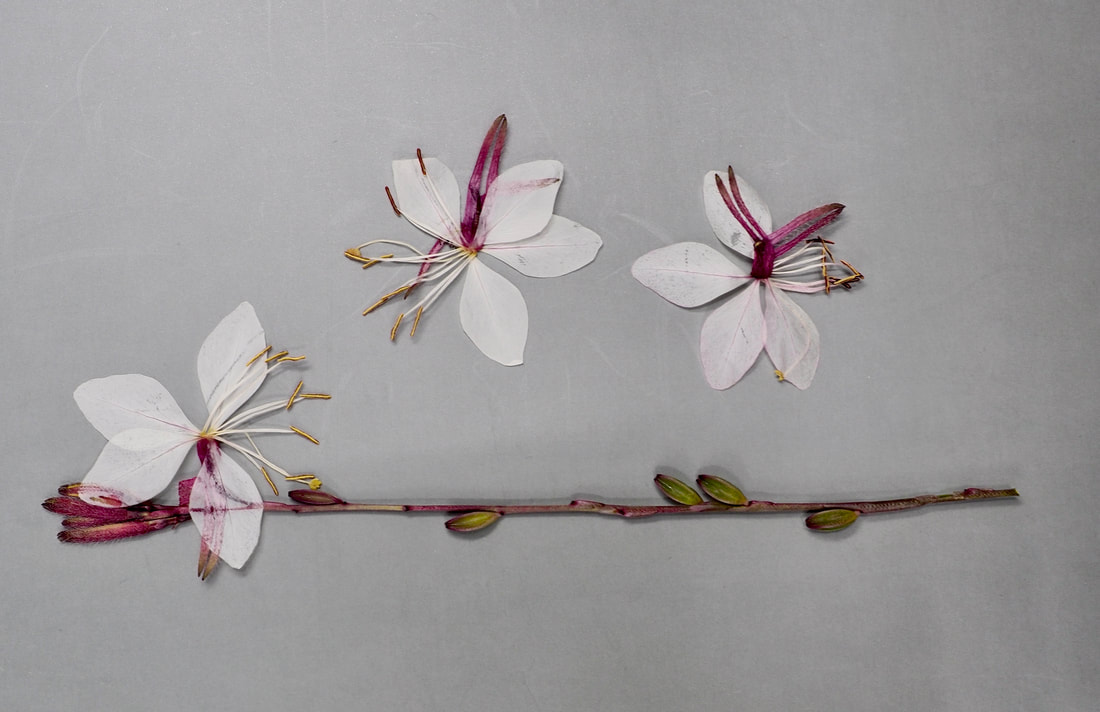
The Gaura flowers come on a stem which can either be left attached or removed.
|
One flower (below left) I left on it's stem, and lay it on it's side
|
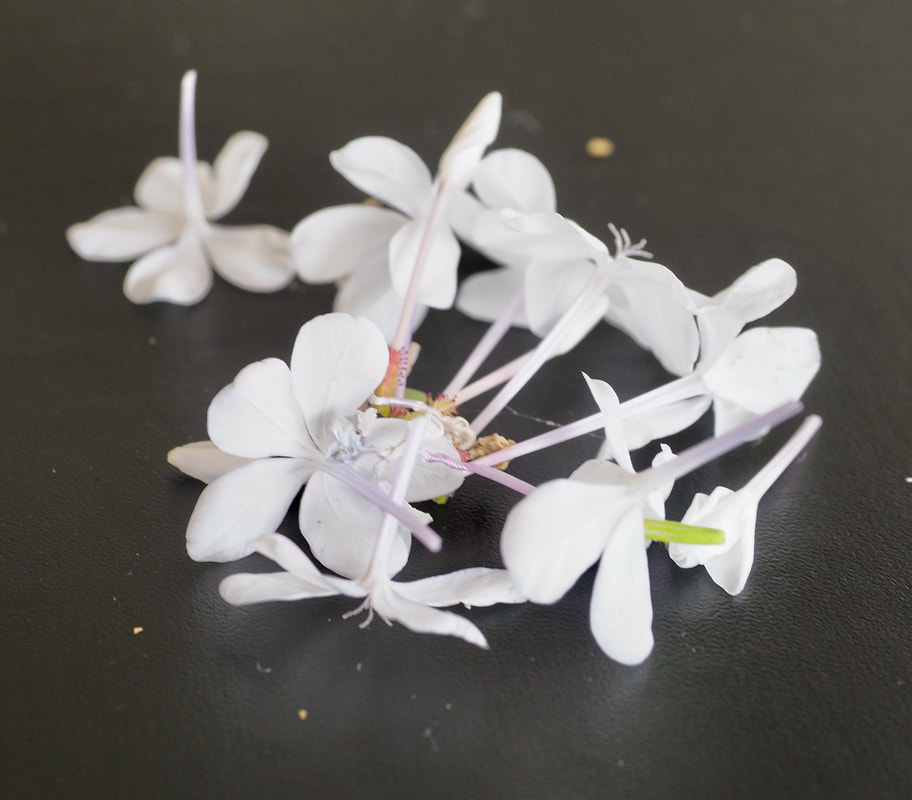
Other flowers (below right) I removed from their stems and placed them face down
|
|
|
Both lots of flowers were given 30 seconds total in the microwave
|
|
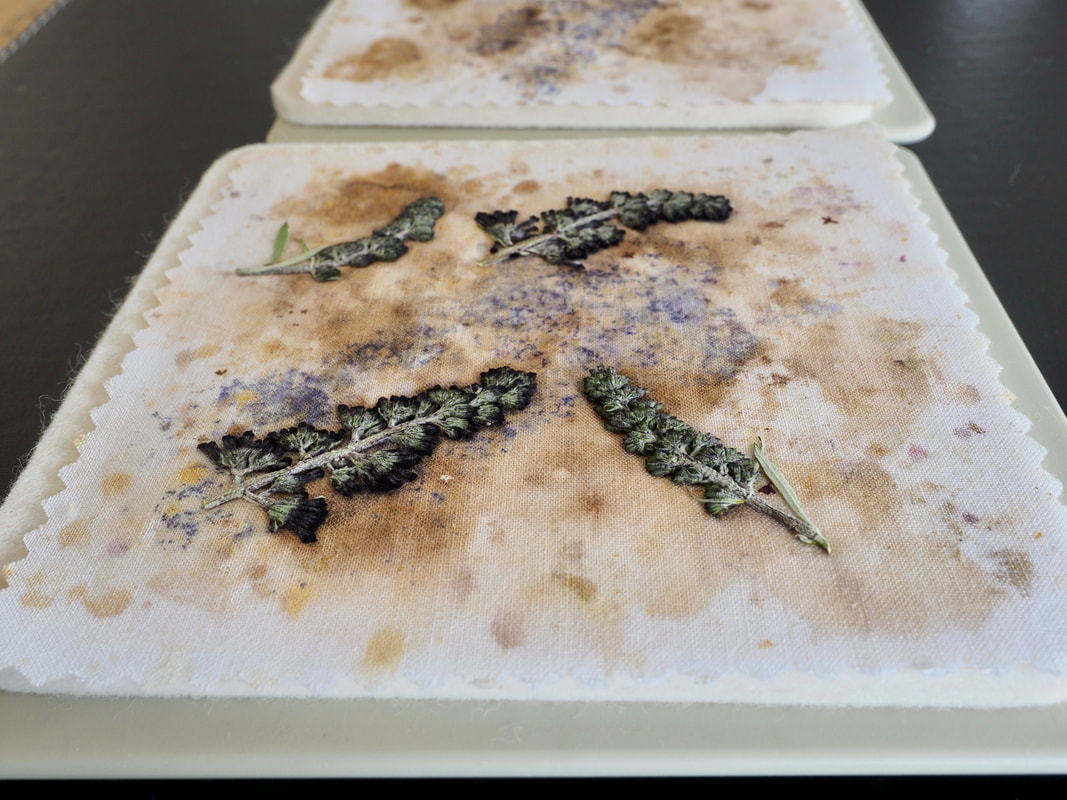
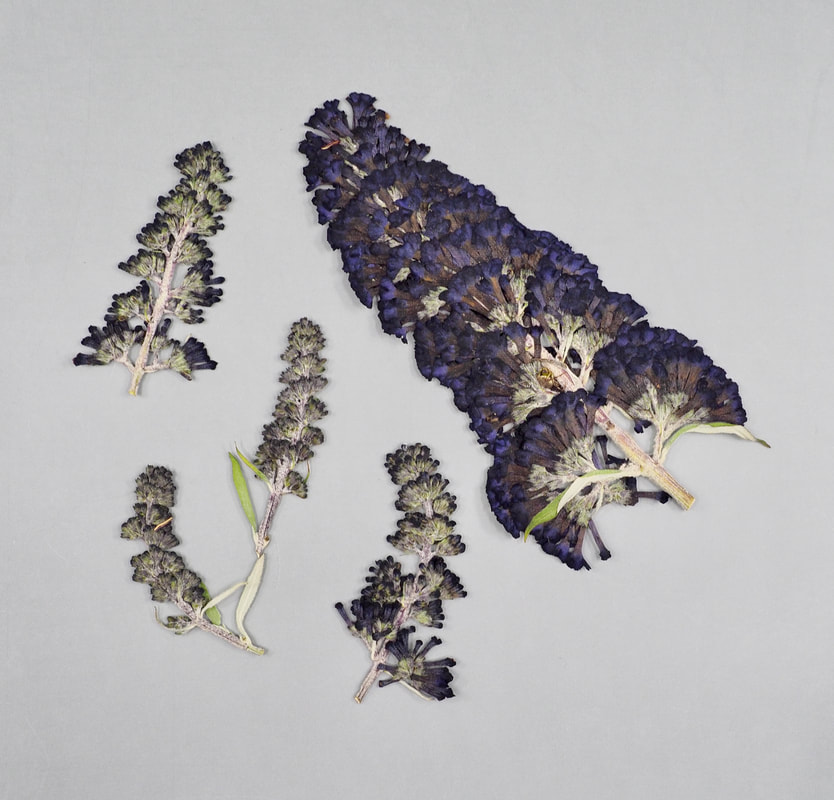
Example 3 - Butterfly Bush
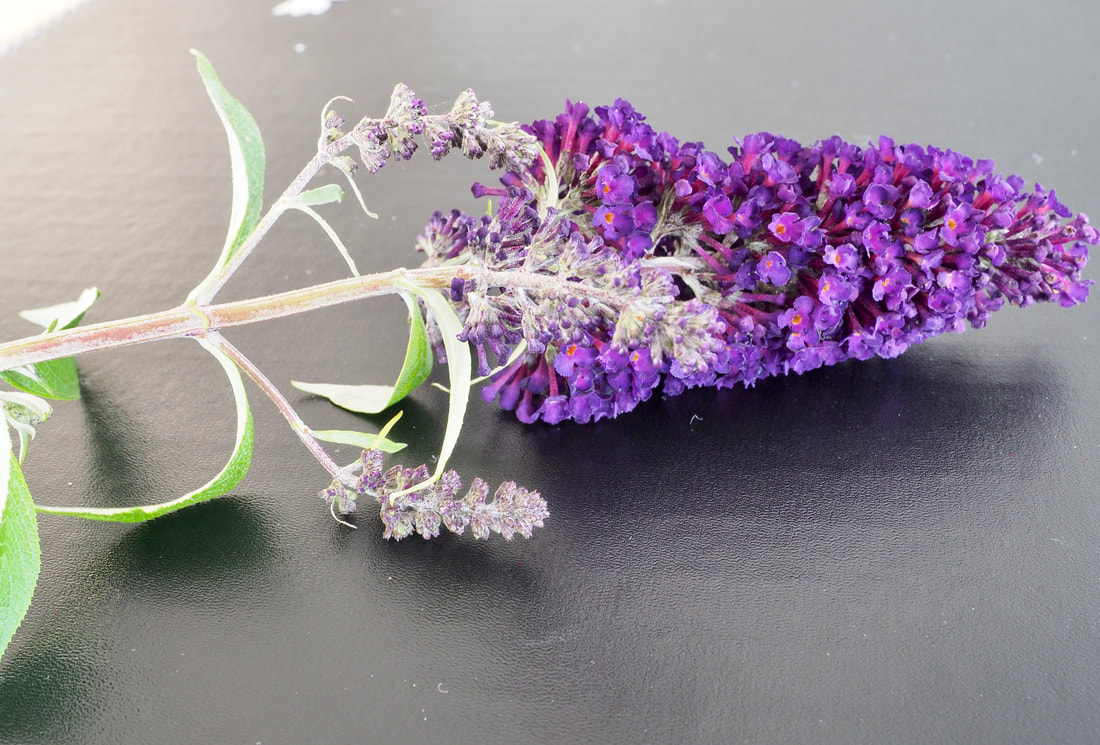
The butterfly bush flower head had one large central piece, but also several side shoots. I cut the central head, and the smaller side shoots off and pressed them separately.
|
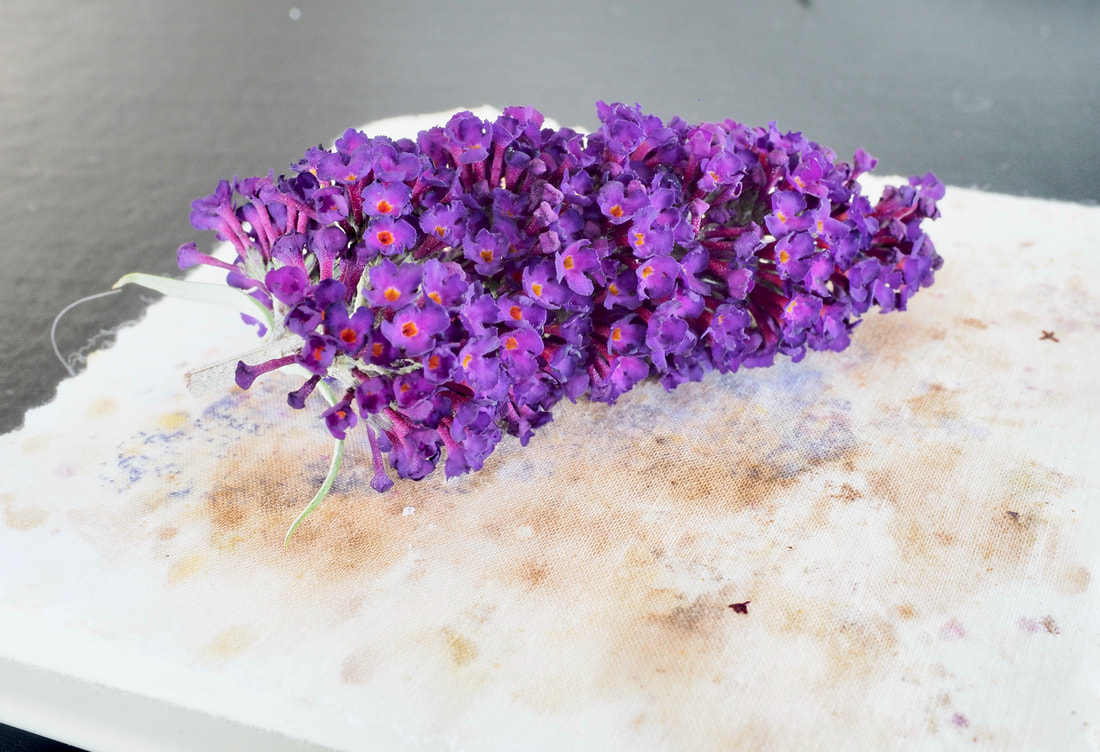
The large flower head (below left) I lay on its side in the press
|
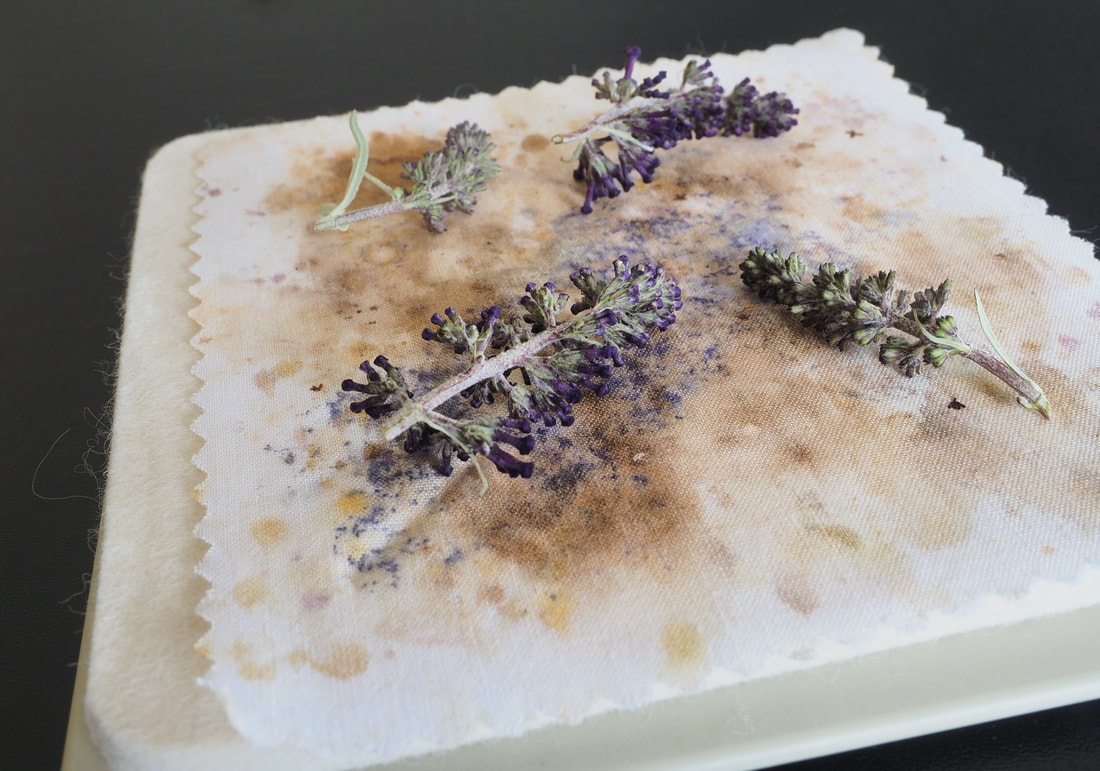
The smaller side shoots (below right) I laid out together in the press, again on their sides
|
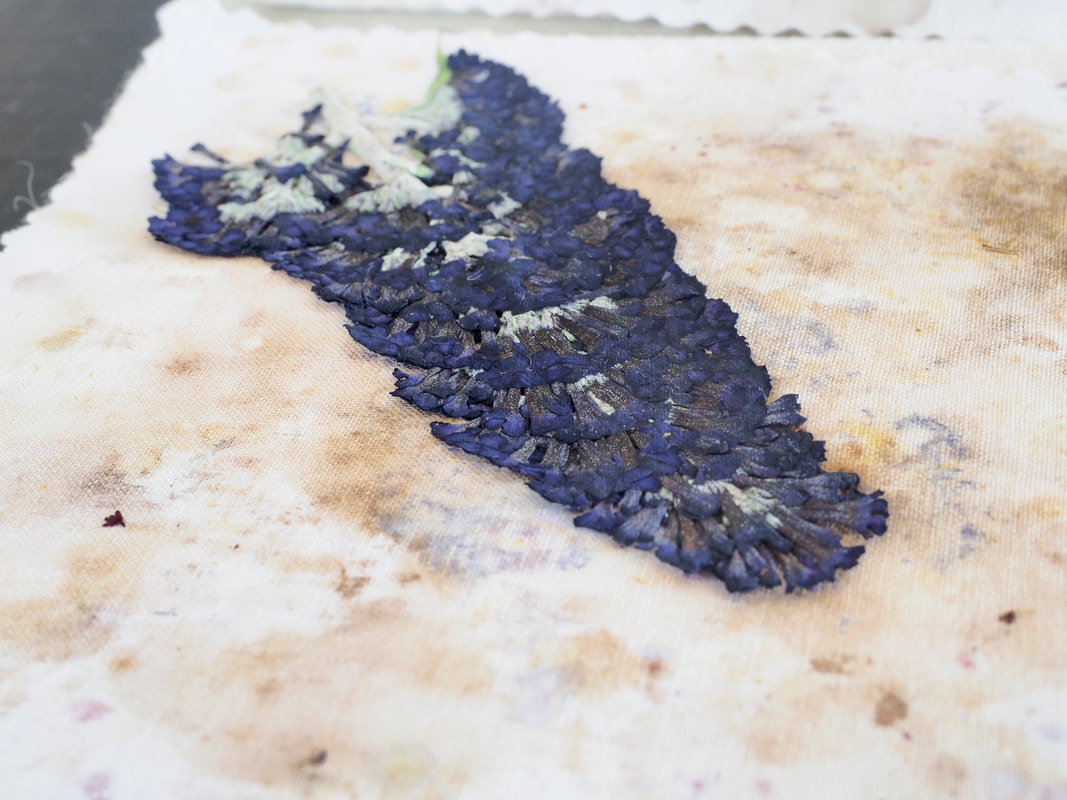
Both lots had a total of 60 seconds in the microwave
|
|
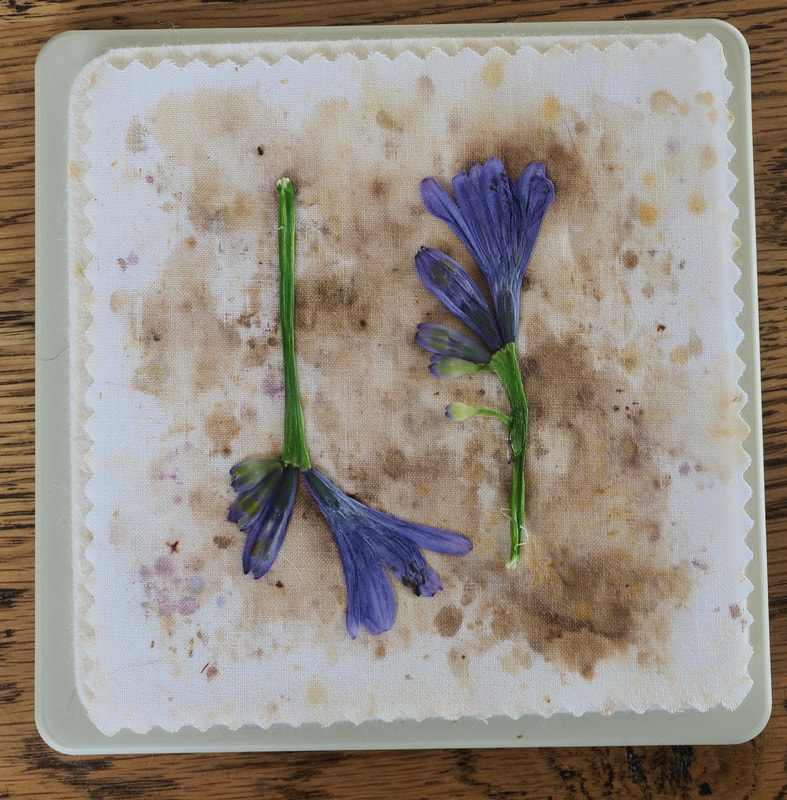
Back to the Agapanthus...
|
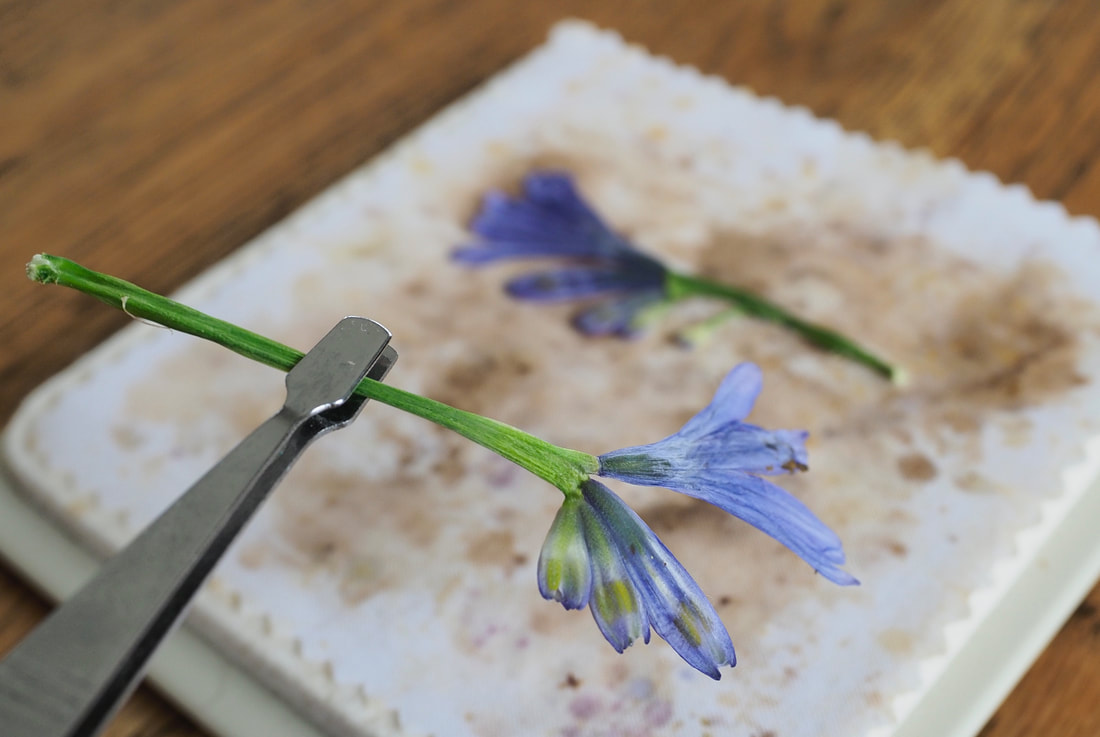
2. Once you are happy with the flower arrangement, carefully place the other liner, pad and platen on top. Apply pressure and slip on the clips to hold everything in place.
Now we start microwaving. The recommendations for the first burst in the microwave vary with lower powered models (500 watts) requiring longer press times than higher powered models (1000 watts). Start with a shorter time initially (about 20 seconds) until you get to know your microwave, and then increase the initial burst time if required. Further bursts should usually be 1/3 to 1/2 the amount of time of the initial burst. Again, you will work it out as you experiment with more flower pressing. After the initial 30 seconds, the Agapanthus are still very fleshy, & they definitely need longer in the microwave. In comparison, some thin & dry flowers (like the Plumbago and Gaura examples above) are fully pressed at this stage. |
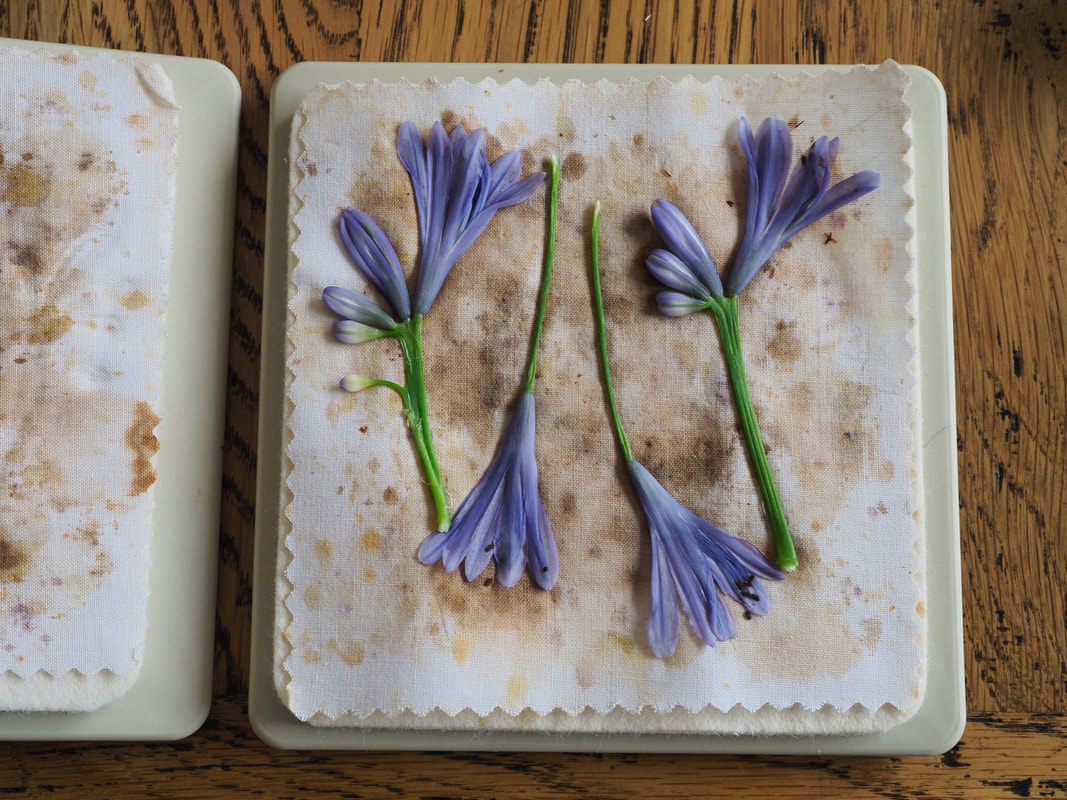
Agapanthus after an initial 30 sec burst
|
|
3. Now we continue with shorter bursts in the microwave with checks of the flowers until they are done.
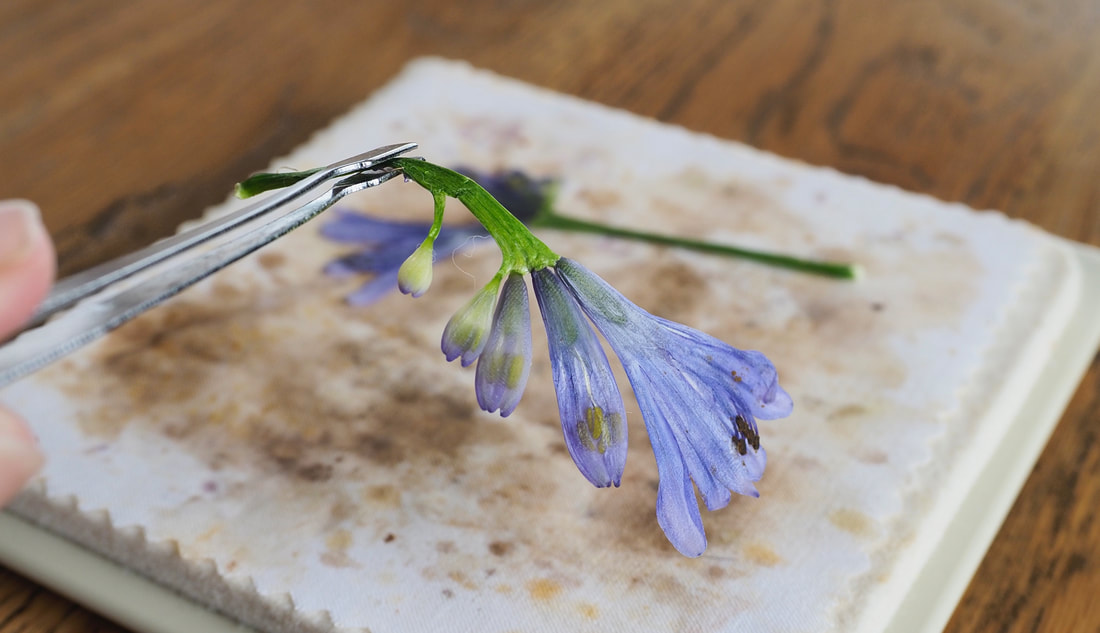
After the initial burst the photos were still very fleshy, so I put them in for another 30 seconds. Replace the liner, pad, platen & clips carefully before each microwave. |
|
|
Again, they were still quite fleshy, though the stems were starting to dry out. I put them back for a shorter 15 seconds.
At this stage the flowers were starting to stick to the liner, so I carefully lifted them off the liner, & placed them down again. They were still looking too wet at this stage |
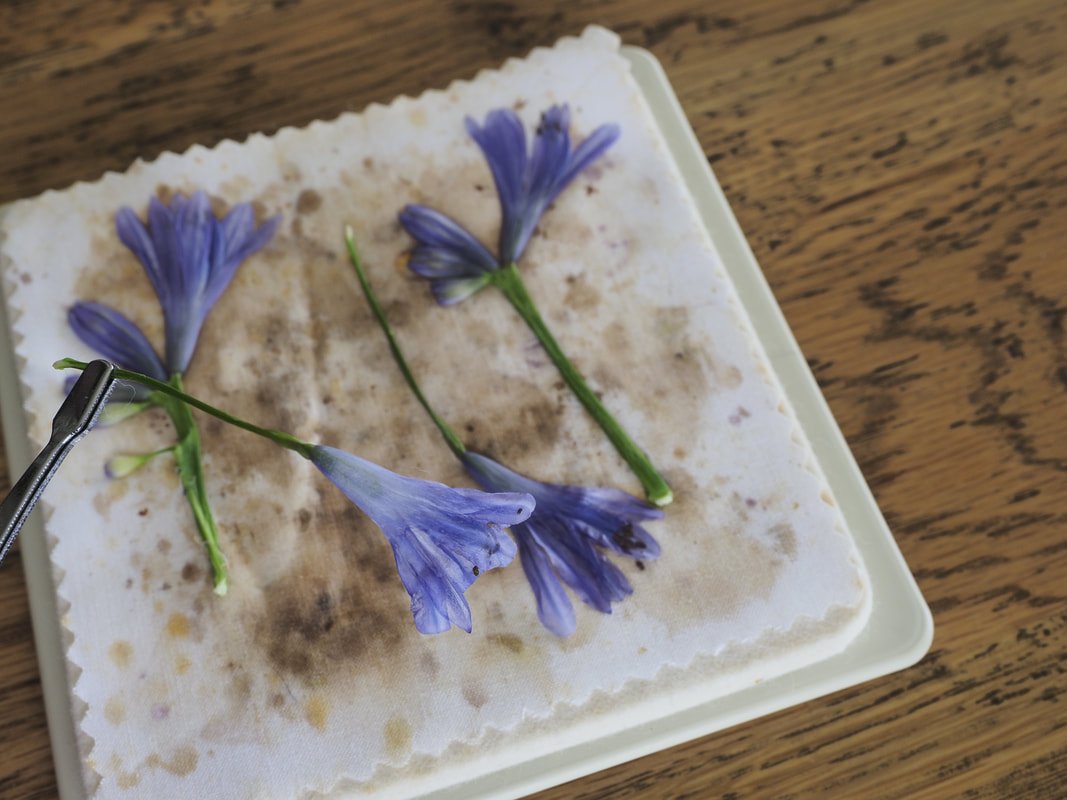
|
|
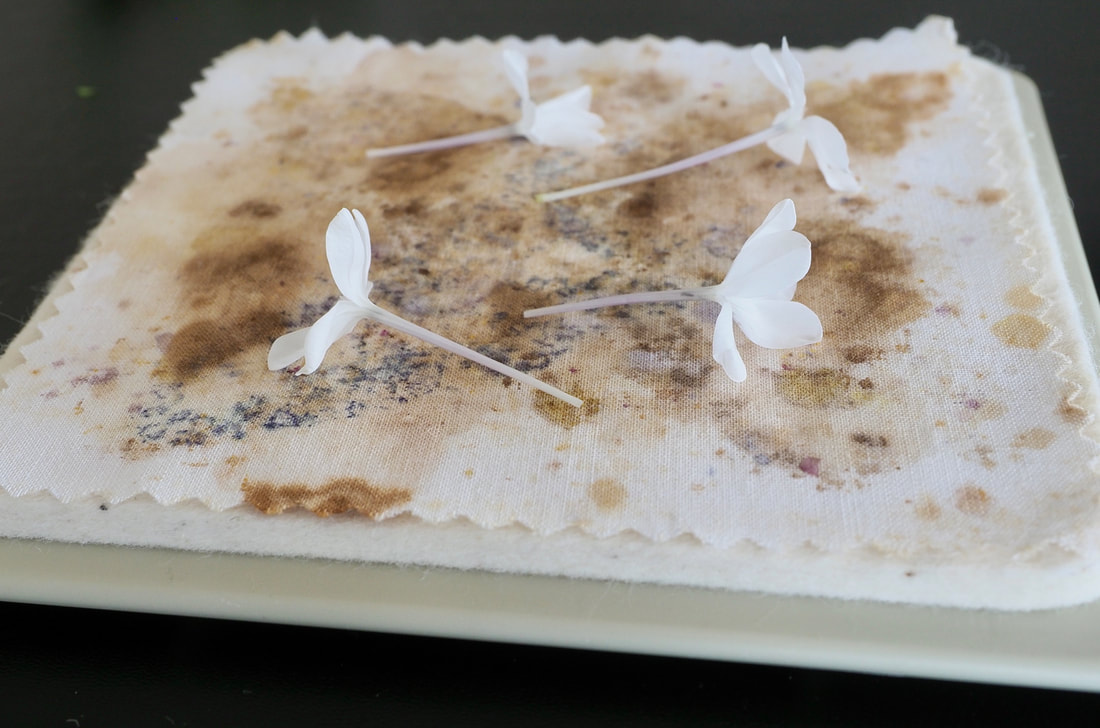
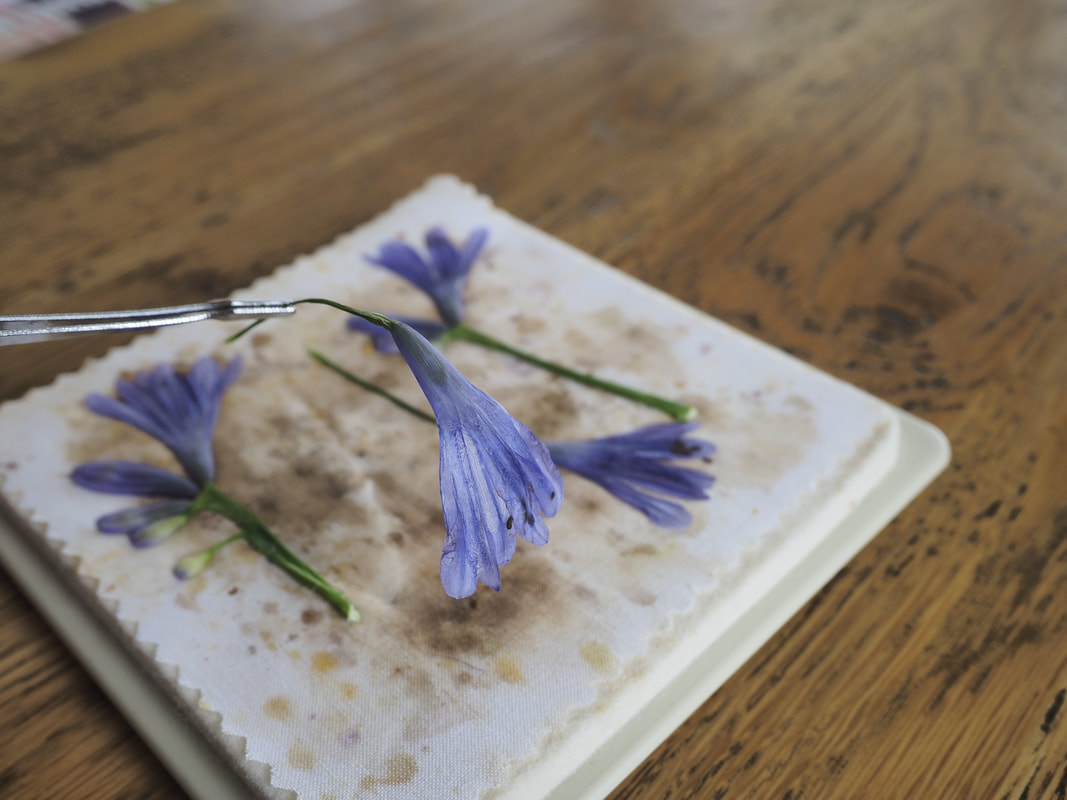
A fourth burst with another 15 seconds in the microwave.
After each burst I carefully lifted the flowers off to stop them sticking. You can see the flower was still wet & droopy so it needs more time in the microwave |
|
|
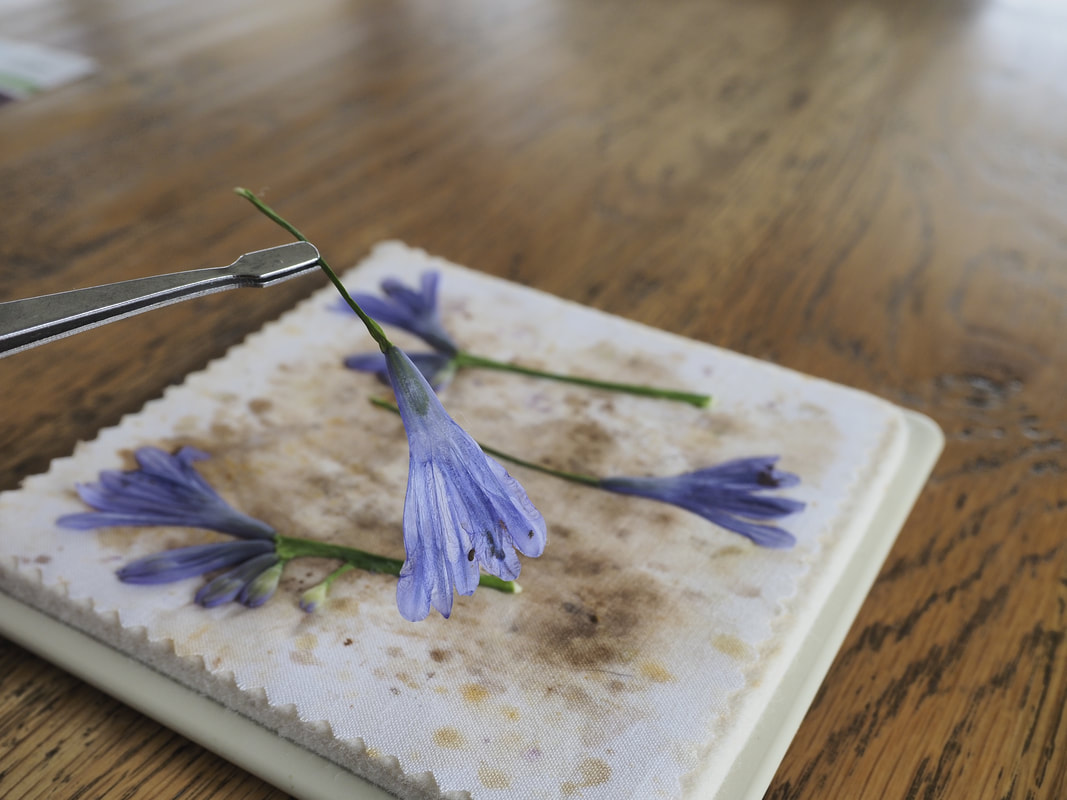
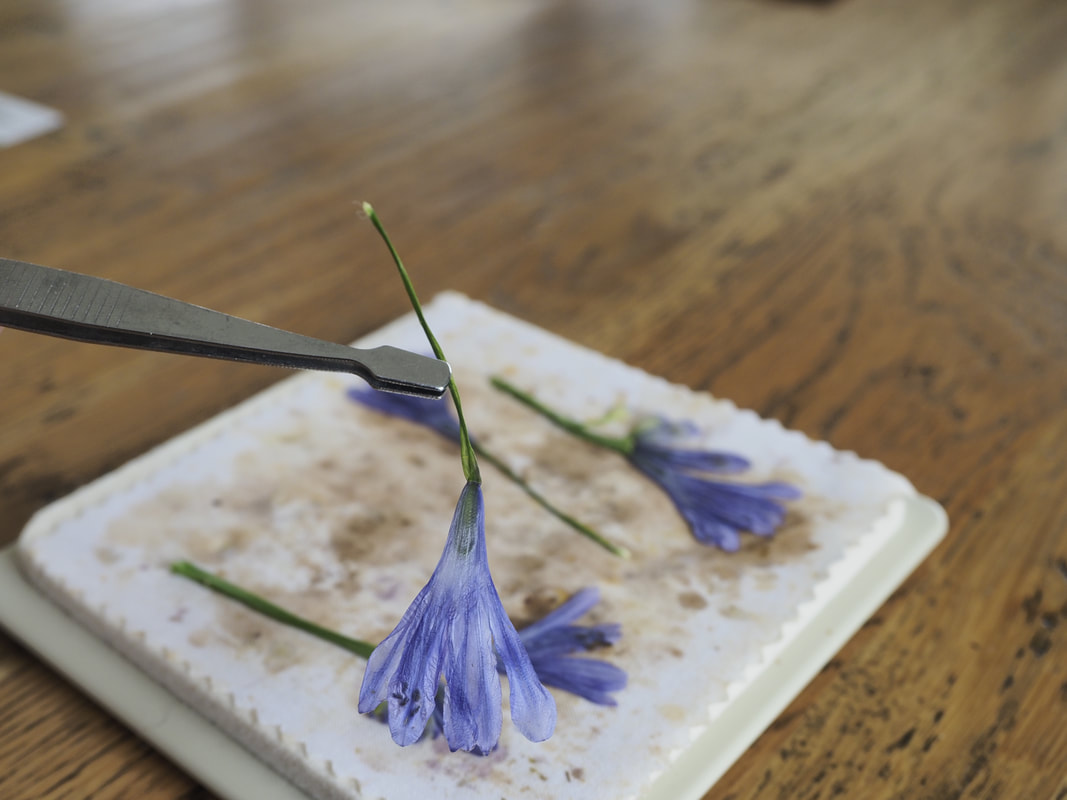
A fifth burst of 15 seconds in the microwave.
The flowers are drying out, but still not stiff and paper-y. |

|
|
A sixth burst of 15 seconds in the microwave.
The stem is much stiffer and more dried out, but just not enough. |
|
|
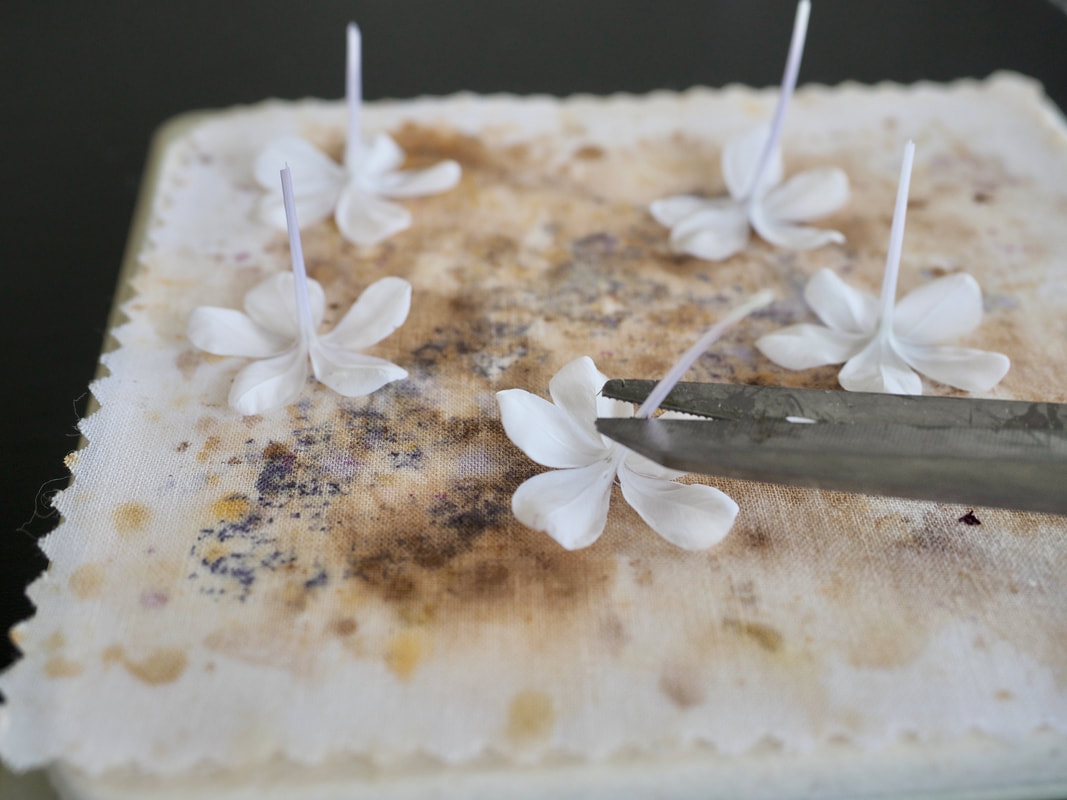
A seventh burst of 15 seconds in the microwave.
The two smaller flowers were finally dried out and papery, but the two larger flowers needed a little more time, as they still drooped a little. So I removed the smaller flowers from the press at this stage. |

|
|
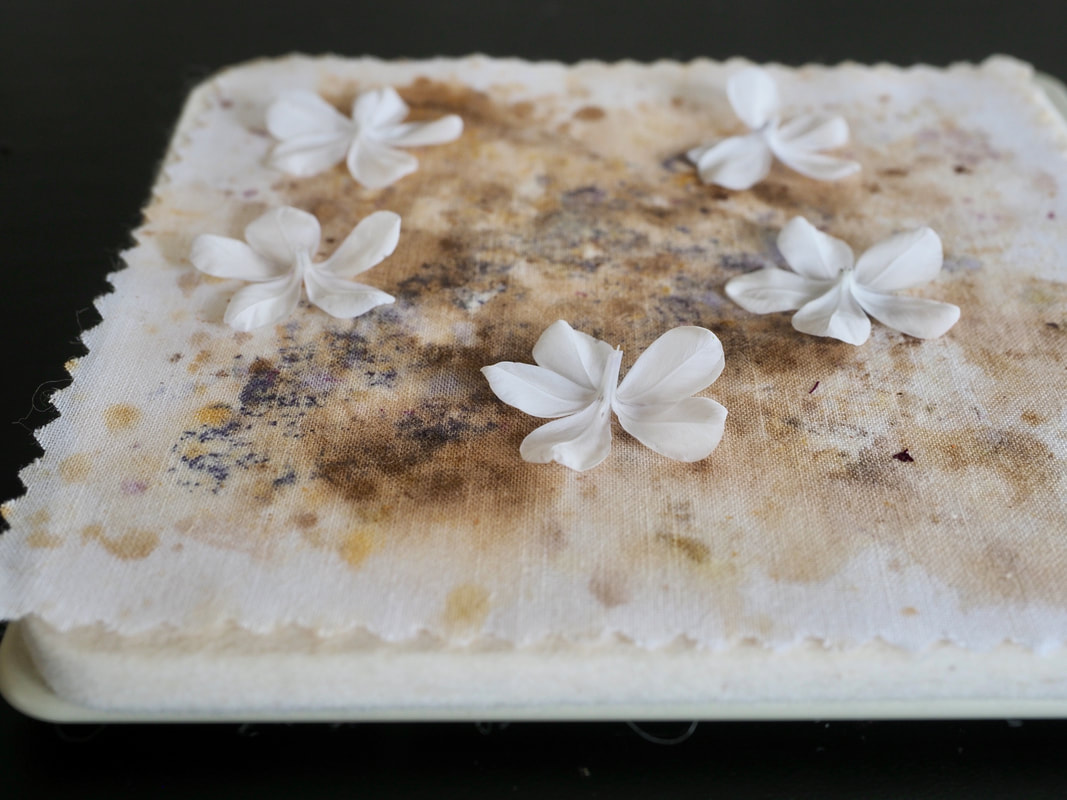
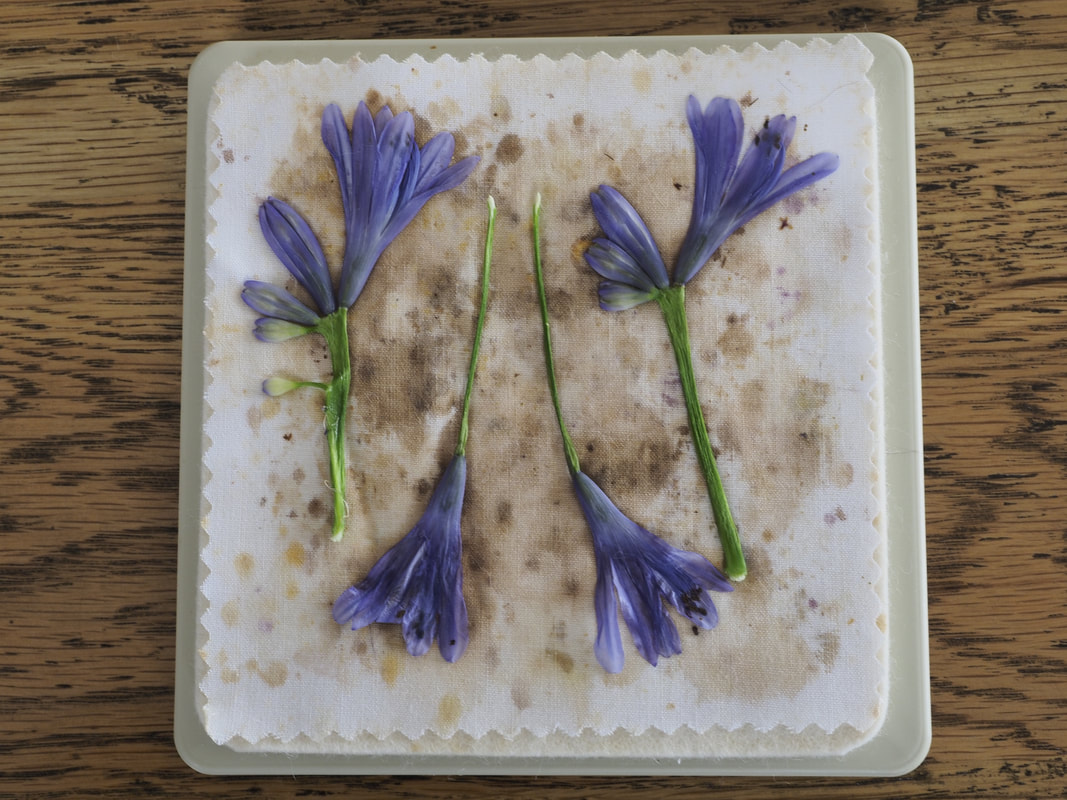
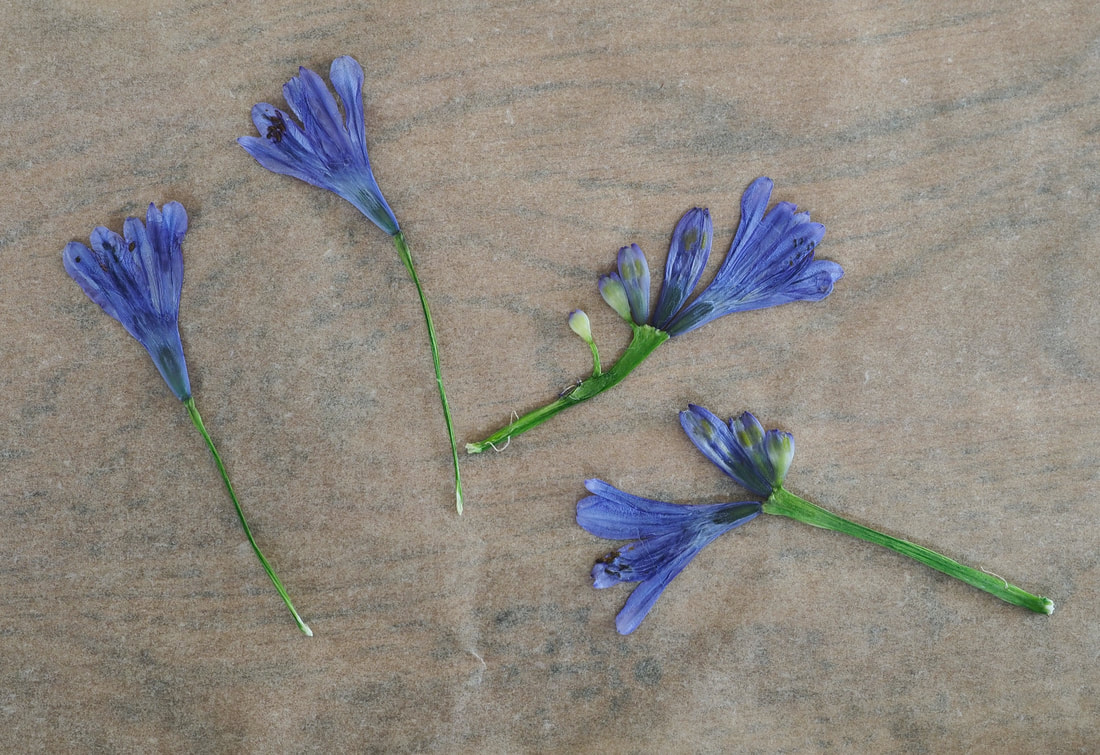
One last eight burst in the microwave of 20 seconds.
The large flowers were finally stiff and paper-y. |
|
|
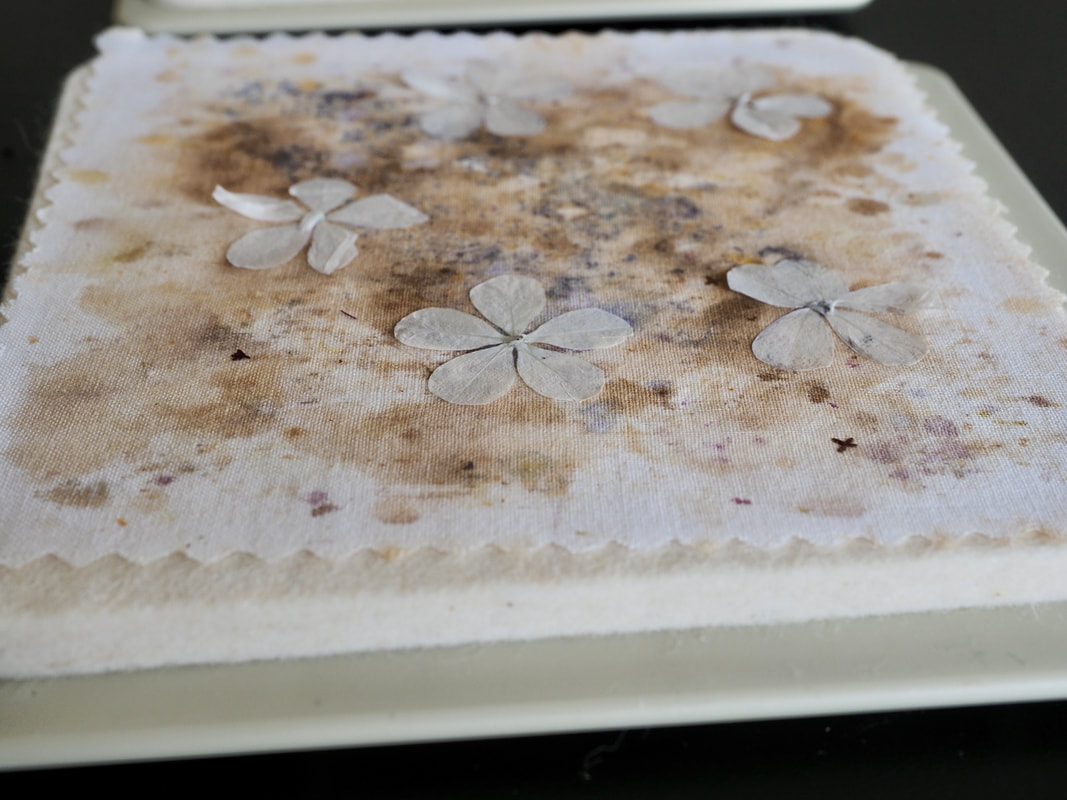
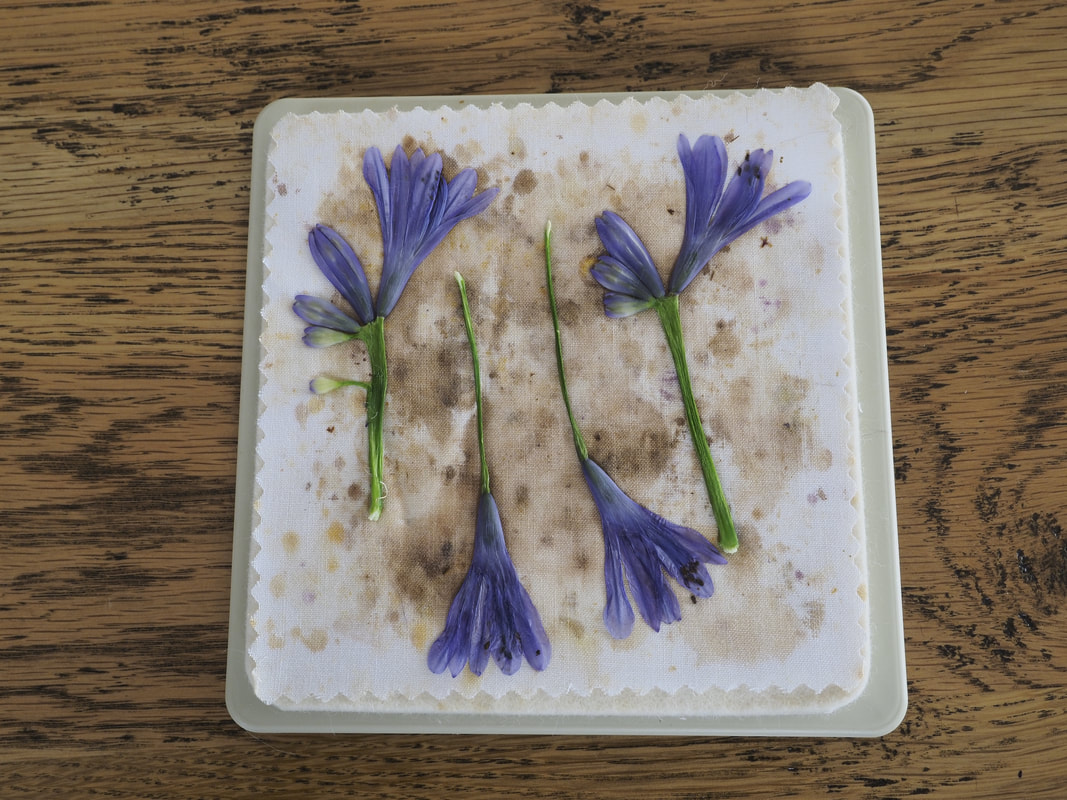
The finished flowers
|
|
Your flower are now ready for your creations