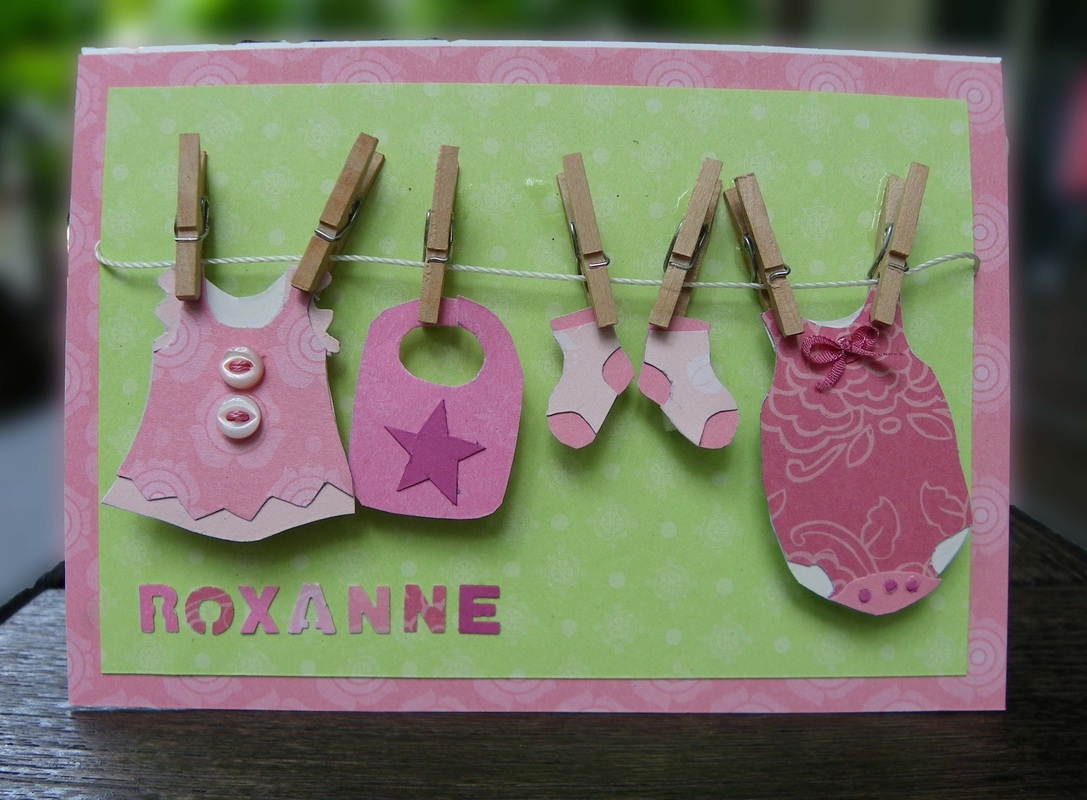
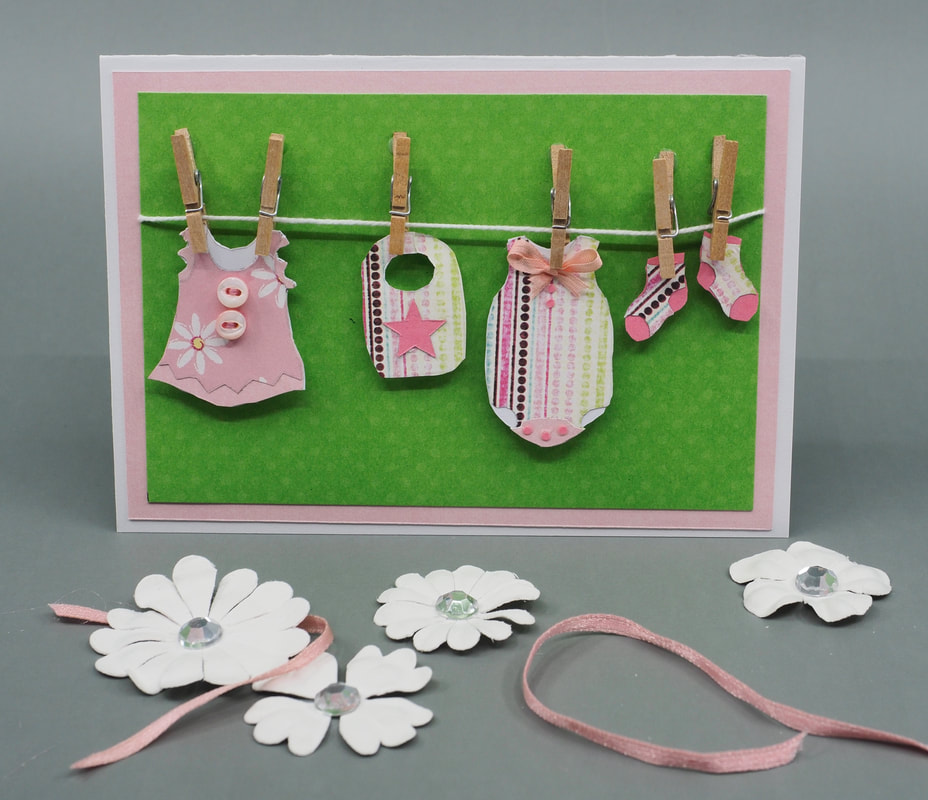
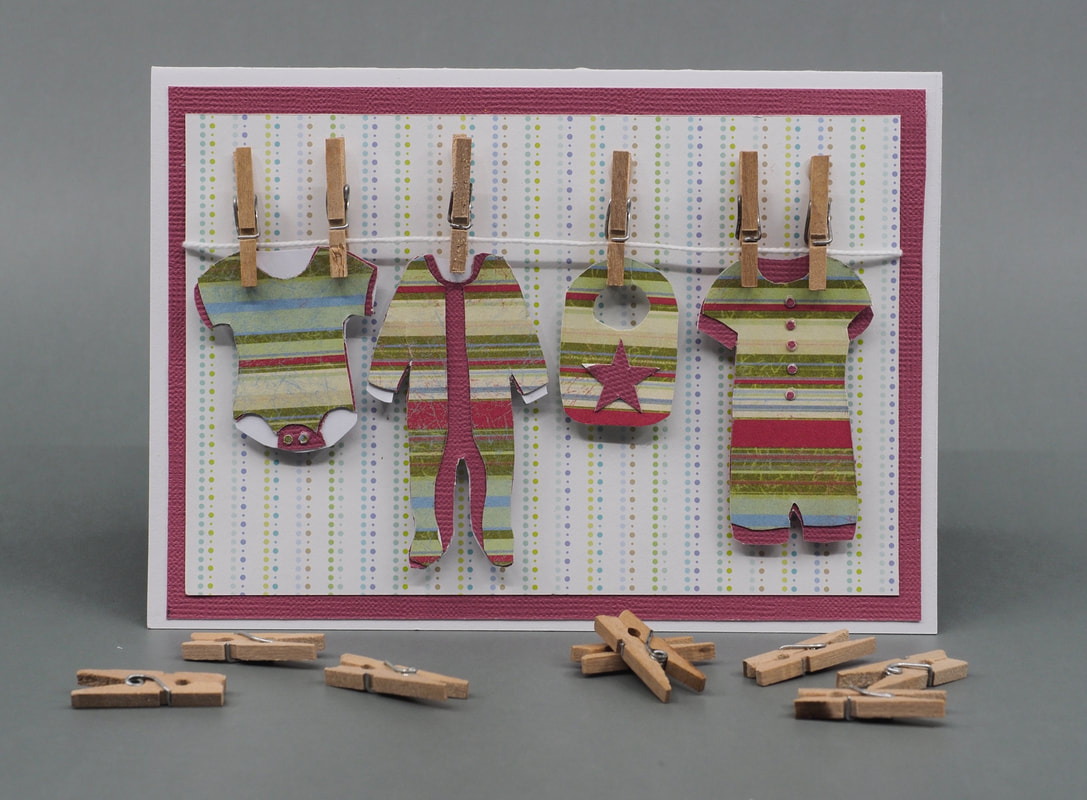
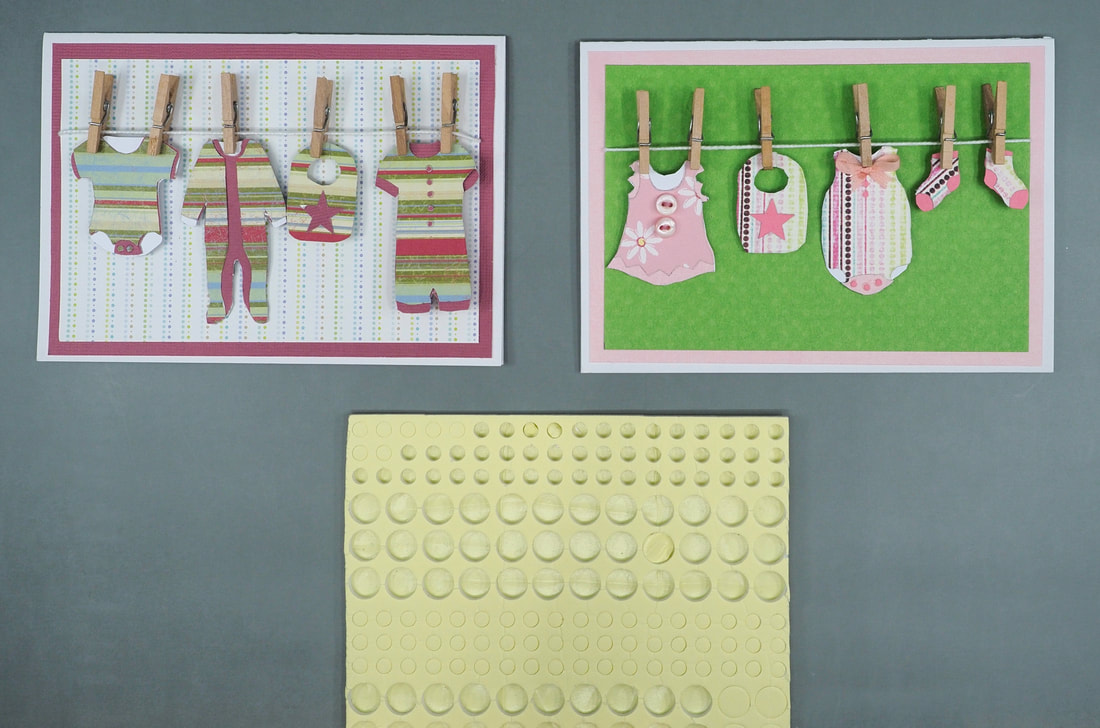
Welcome Baby Card
Thanks for your support!
|
|
Create a cute washing line filled with baby clothes and turn it into a welcome baby card.
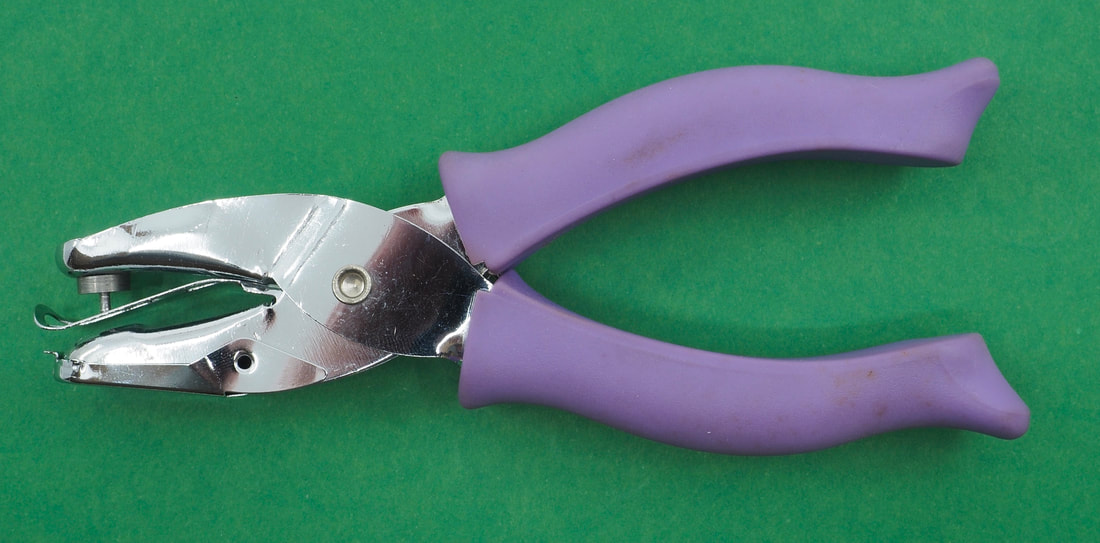
Suggested Materials
I highly recommend a dissection kit for an accurate craft knife and scissors for fine cutting. I've been using one to do my paper craft for years and find the scissors, tweezers, scalpel and other instruments accurate, durable and helpful.
- Printer (if printing out the patterns)
- Light box (if tracing the patterns over)
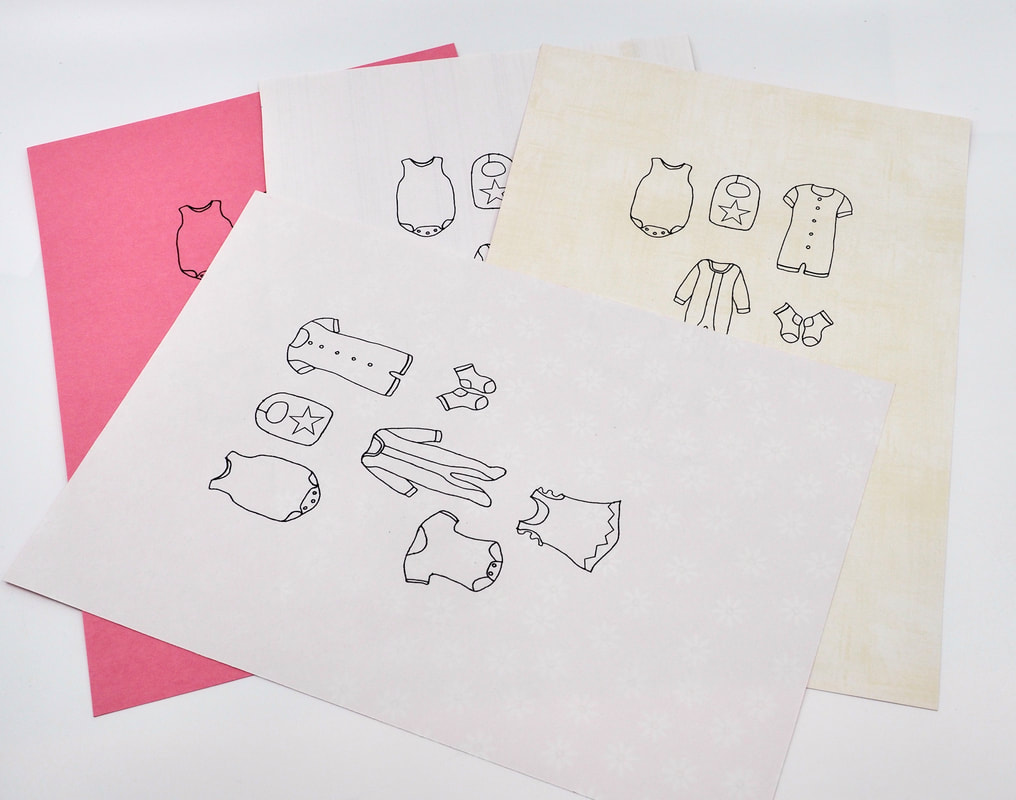
- A4 craft papers in different pattens with matching colour schemes
- Craft glue with fine tip applicator
- Fine scissors
- Craft knife
- Tiny craft pegs
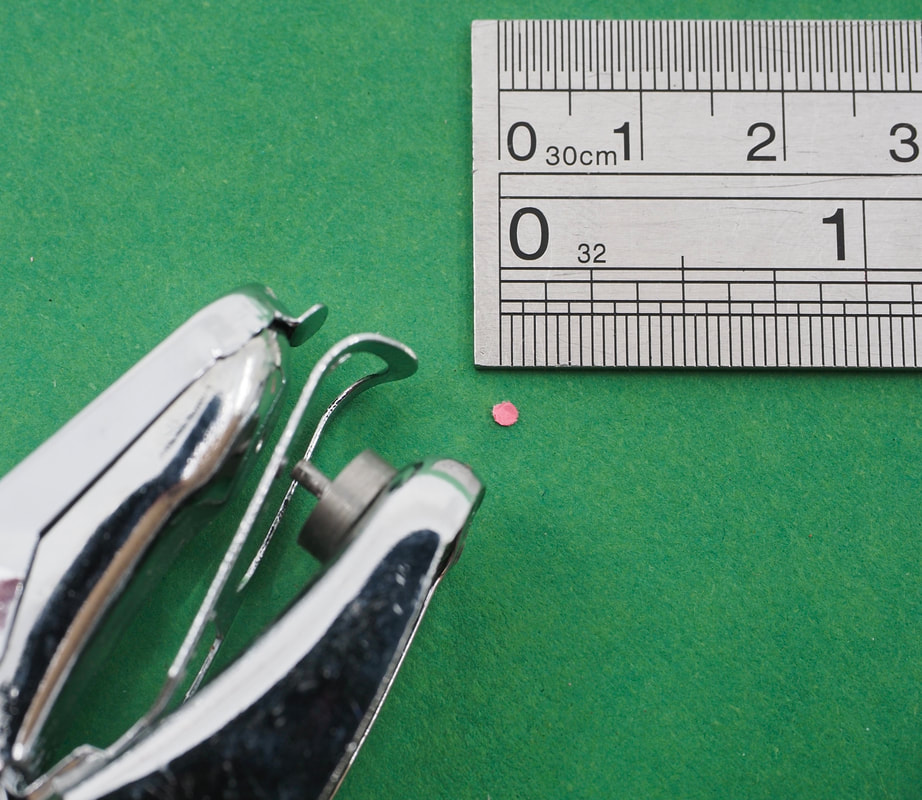
- Paper punch with circle diameter 1-2mm (1/16")
- Tiny Buttons
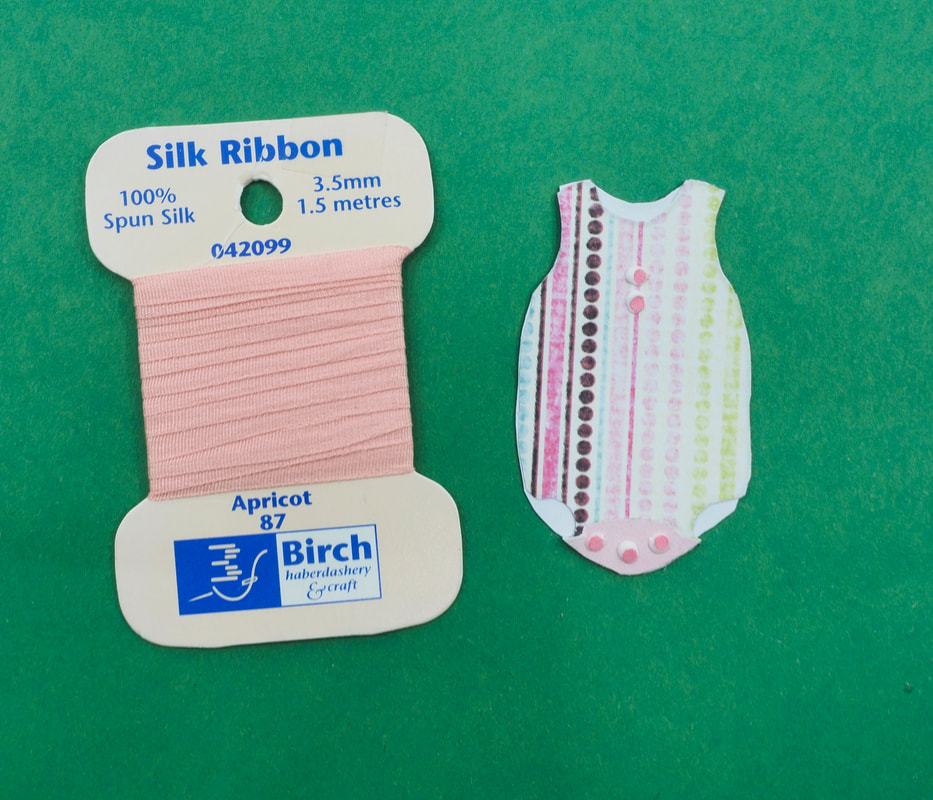
- Thin ribbon - Silk embroidery ribbon works well
- Needle and thread
- A piece of string (for the clothesline)
- Cardstock (craft card)
- Double Sided Sticky tape
- Sticky tape
- Foam craft dots
I highly recommend a dissection kit for an accurate craft knife and scissors for fine cutting. I've been using one to do my paper craft for years and find the scissors, tweezers, scalpel and other instruments accurate, durable and helpful.
|
|
Instructions
1. Print out the TEmplates
|
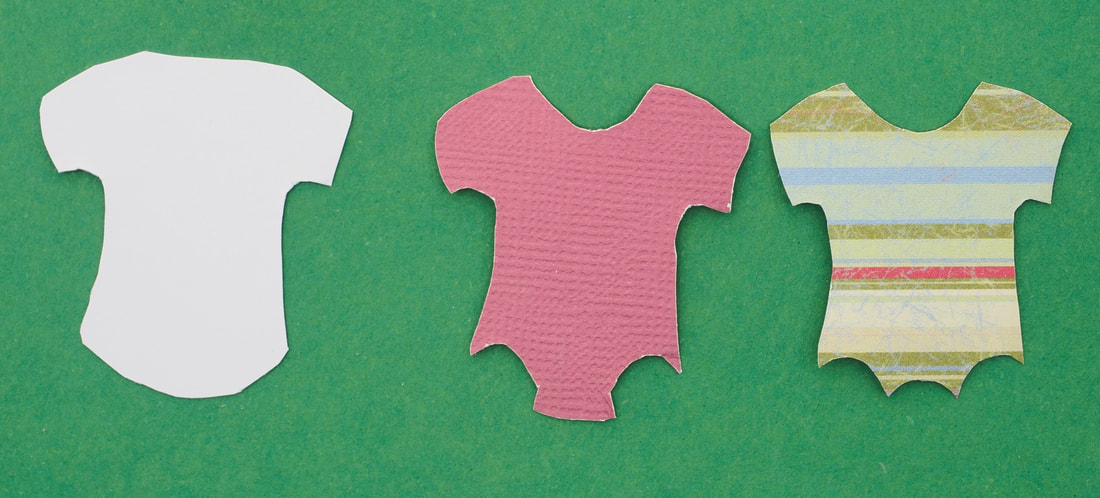
1. Print (or trace) the template onto your papers.
Remember to print them onto the reverse side of the paper so that the marks won't show. To print the template - Download the pdf doc (below) and select print. You will need to print or trace the template onto three or four pieces of paper, depending on your chosen clothes items and colour/pattern scheme.
|
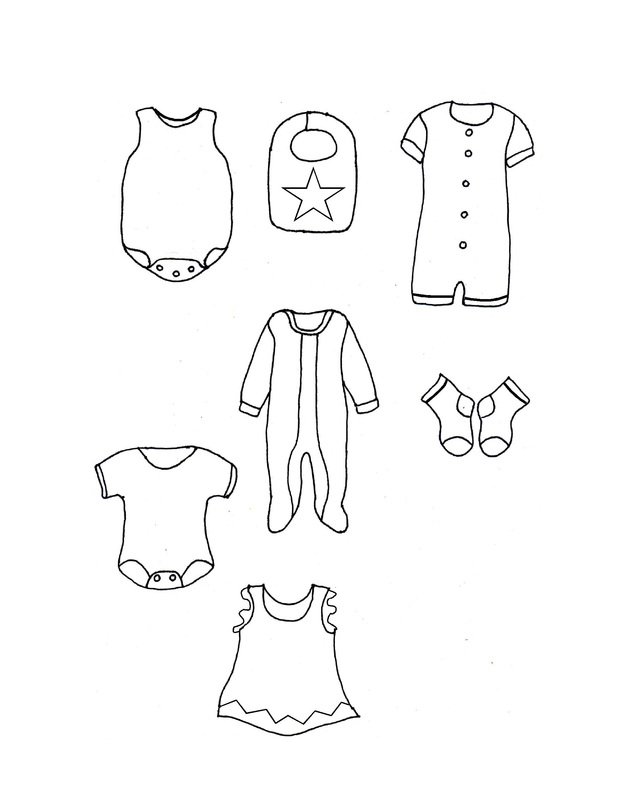
Baby Girl Clothes Template
| ||
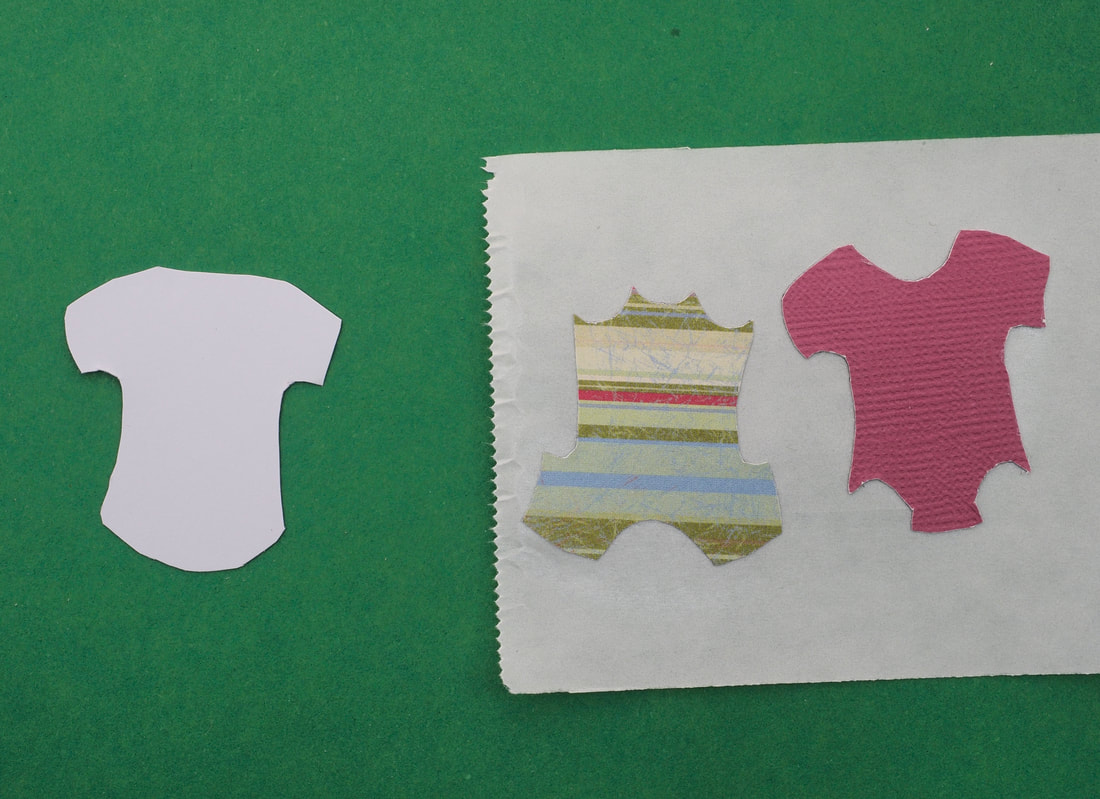
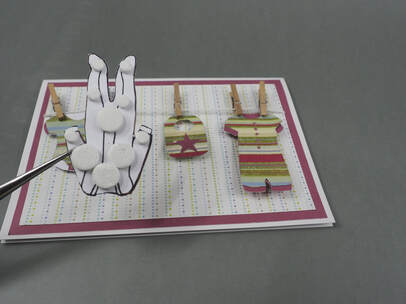
2. Assemble THe Items of Clothing
Use a craft knife and scissors to carefully cut out the pieces.
Use a sticker maker or craft glue to assemble the pieces.
Clothing items include:
When making each item there are several layers of paper used. Each subsequent layer of paper has less of the original image included than the previous layer.
Full illustrated instructions for how to cut each piece and assemble them are below and include photos of:
Use a sticker maker or craft glue to assemble the pieces.
Clothing items include:
- Bib
- Socks
- Dress
- Jumpsuit
- Romper
- Bodysuit with sleeves
- Bodysuit without sleeves
When making each item there are several layers of paper used. Each subsequent layer of paper has less of the original image included than the previous layer.
Full illustrated instructions for how to cut each piece and assemble them are below and include photos of:
- The reverse side of the pieces cut out
- The front side of the pieces cut out
- Which bits to turn into stickers
- The order in which to assemble them
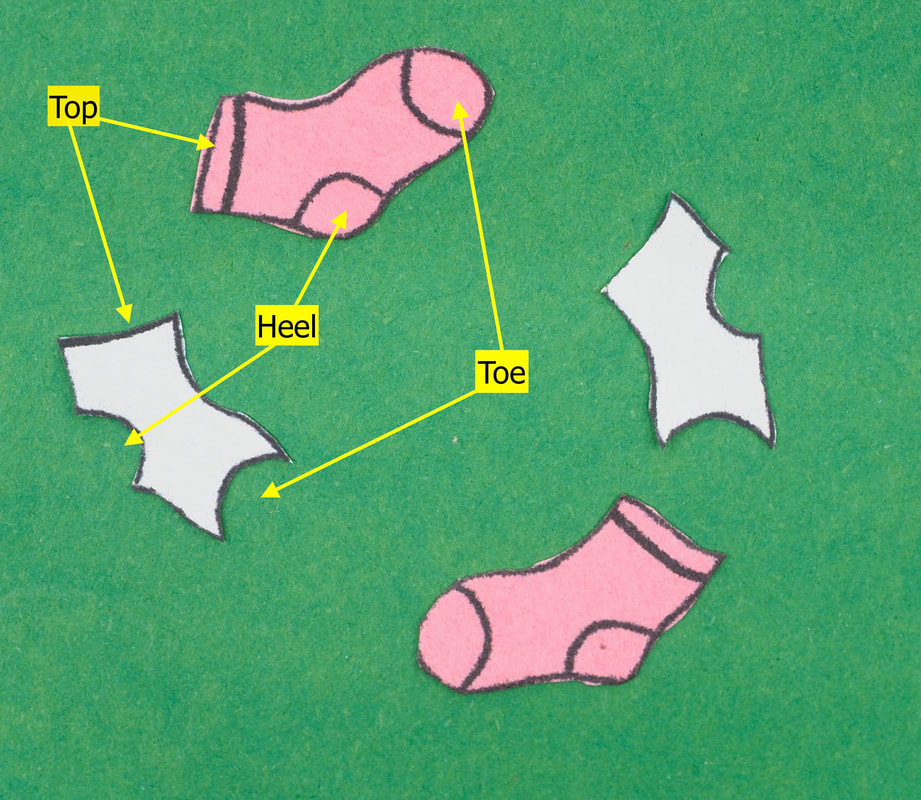
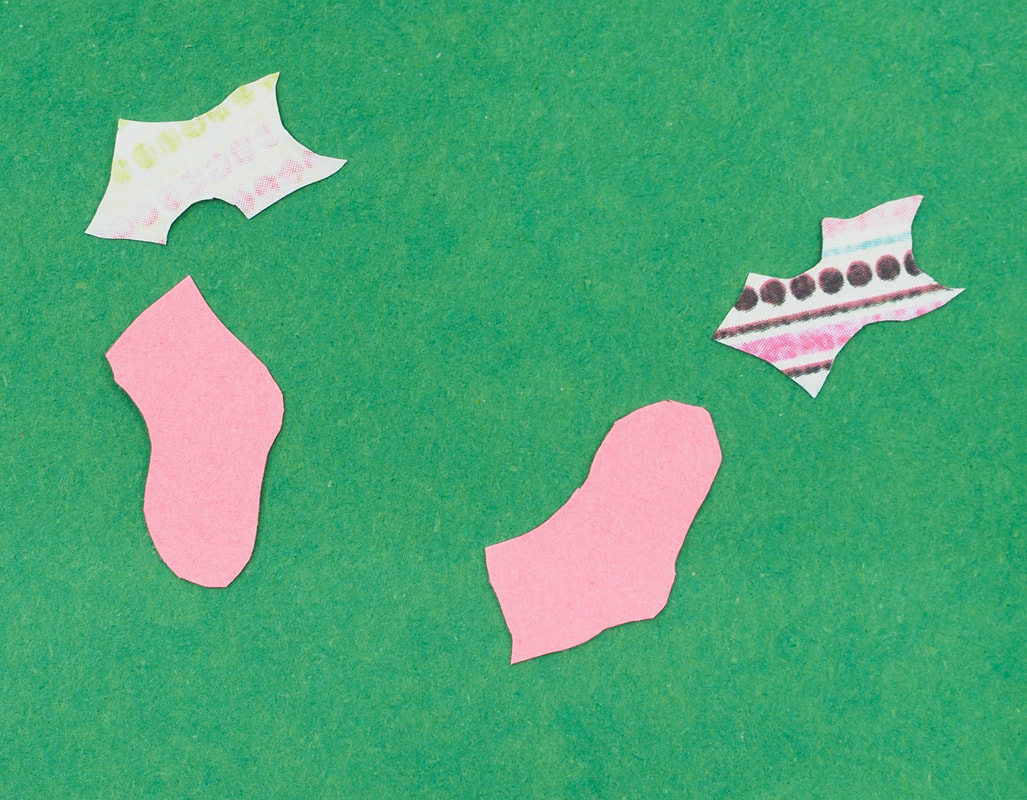
Socks
You will need to cut out:
- Bottom layer - The full sock, (right and left socks)
- Top layer - The sock minus the top, heel & toe (right and left socks)
Reverse Side
|
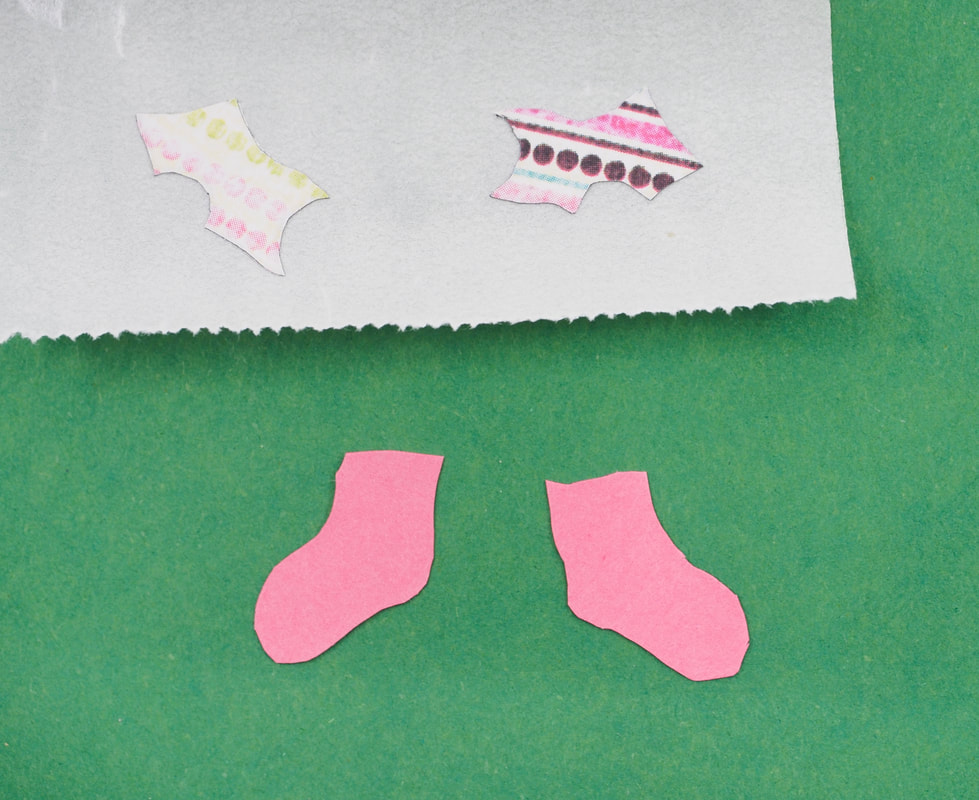
Front Side
|
Turn the top layer into stickers and position over the bottom layer
Stickered Pieces
|
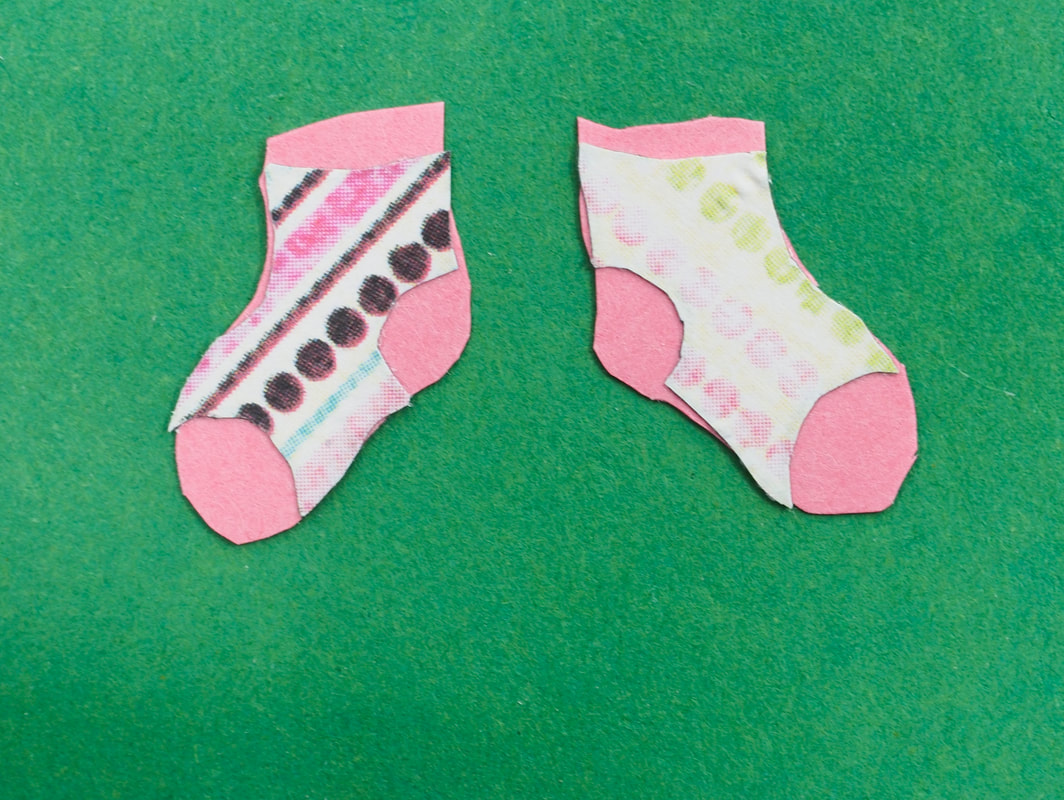
Assembled Socks
|
Bib
You will need to cut out:
- Bottom layer - The full bib
- Top layer - The star
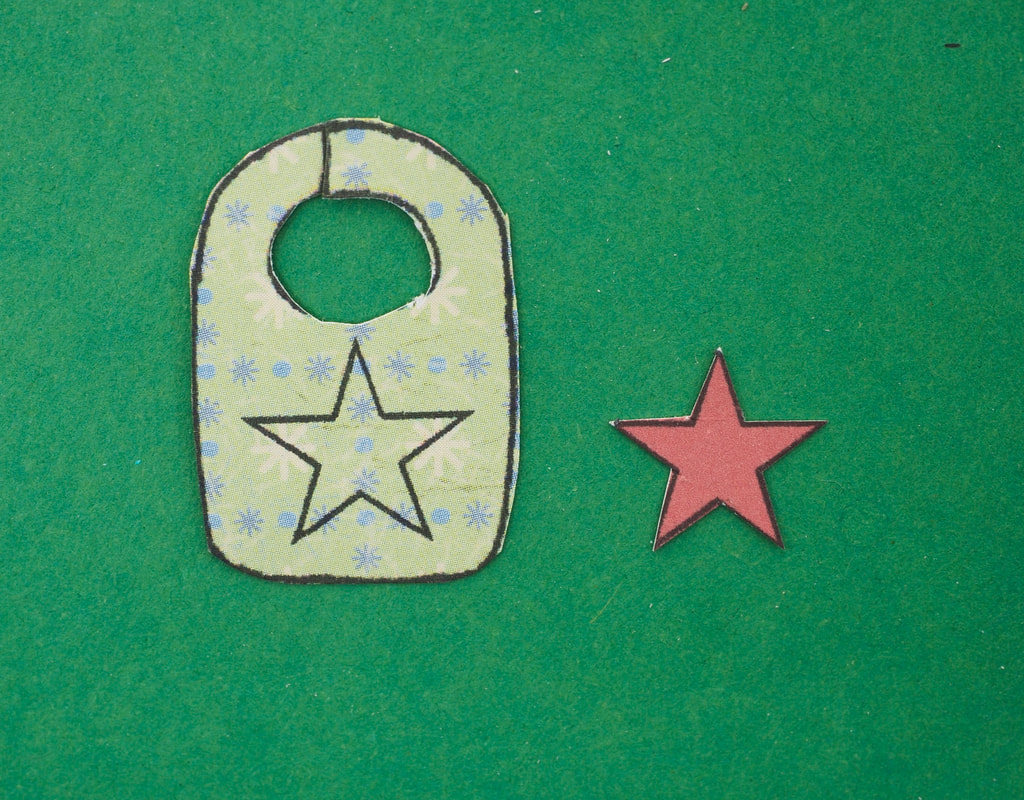
Reverse Side
|
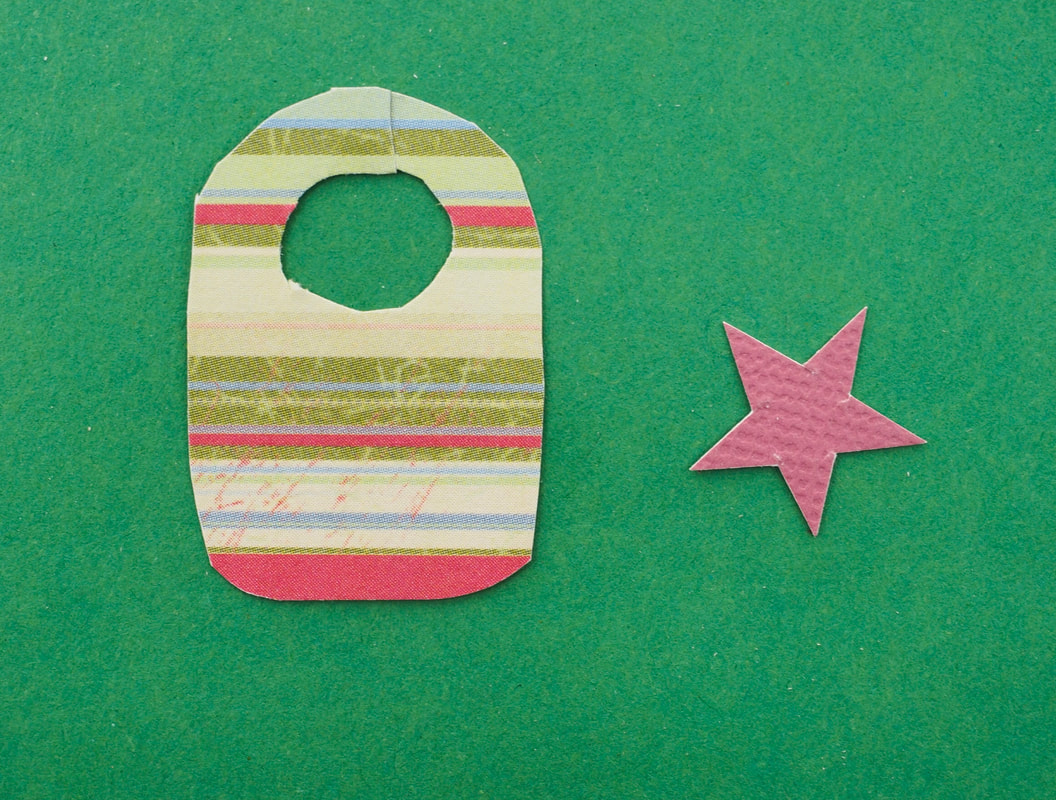
Front Side
|
Turn the top layer (star) into a sticker and position over the bottom layer
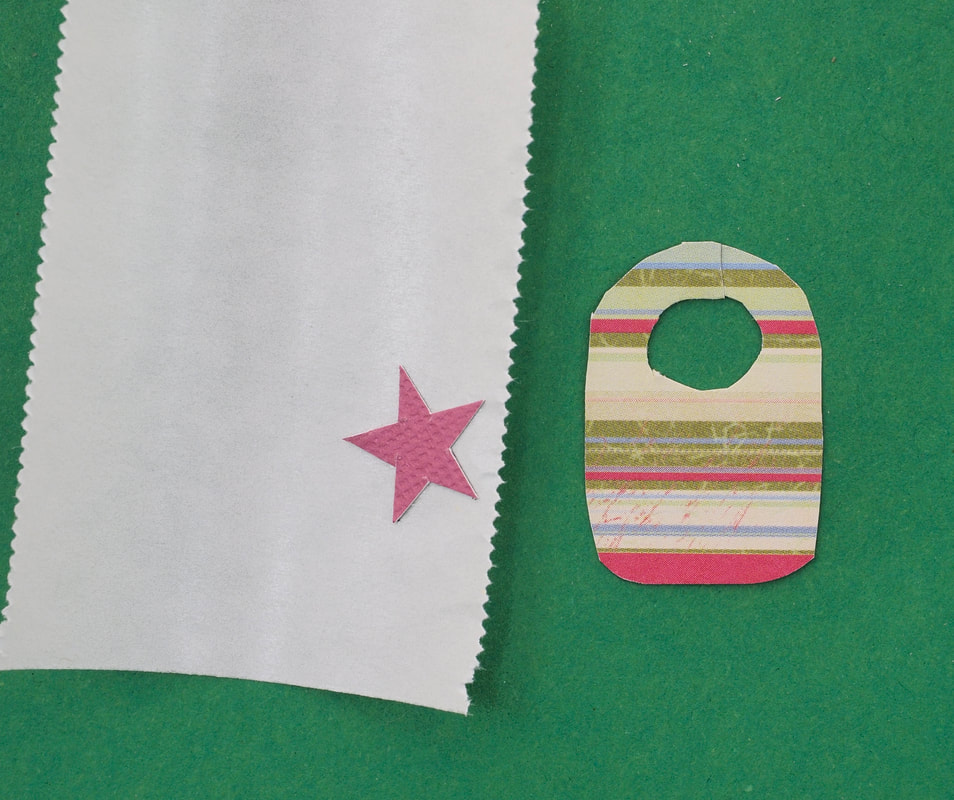
Stickered Star
|
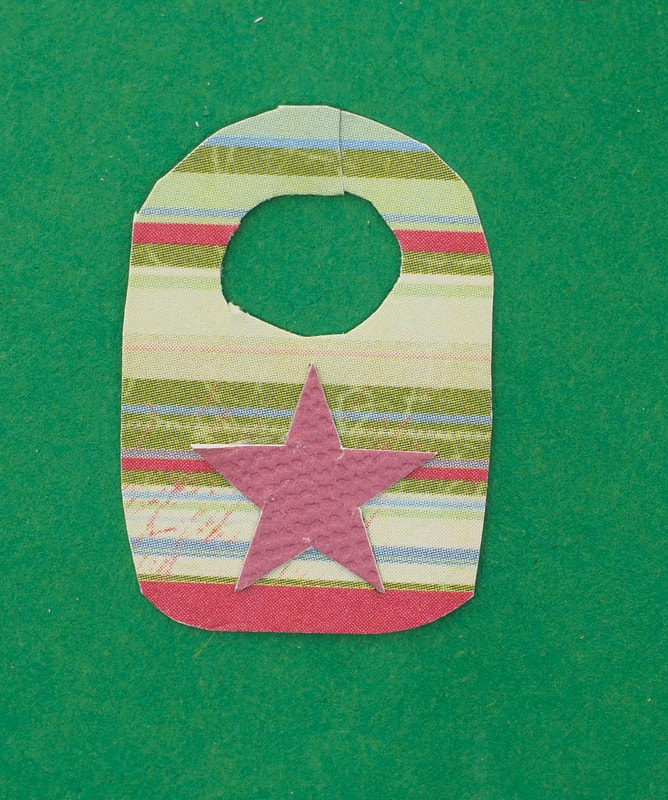
Assembled Bib
|
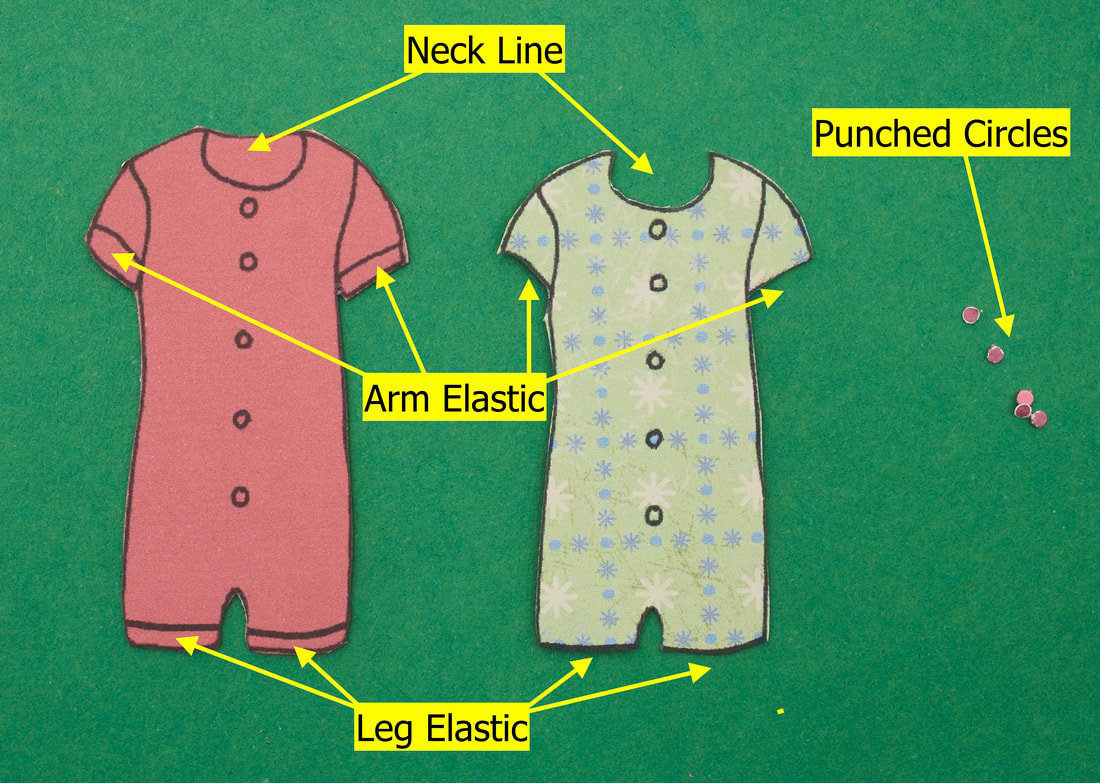
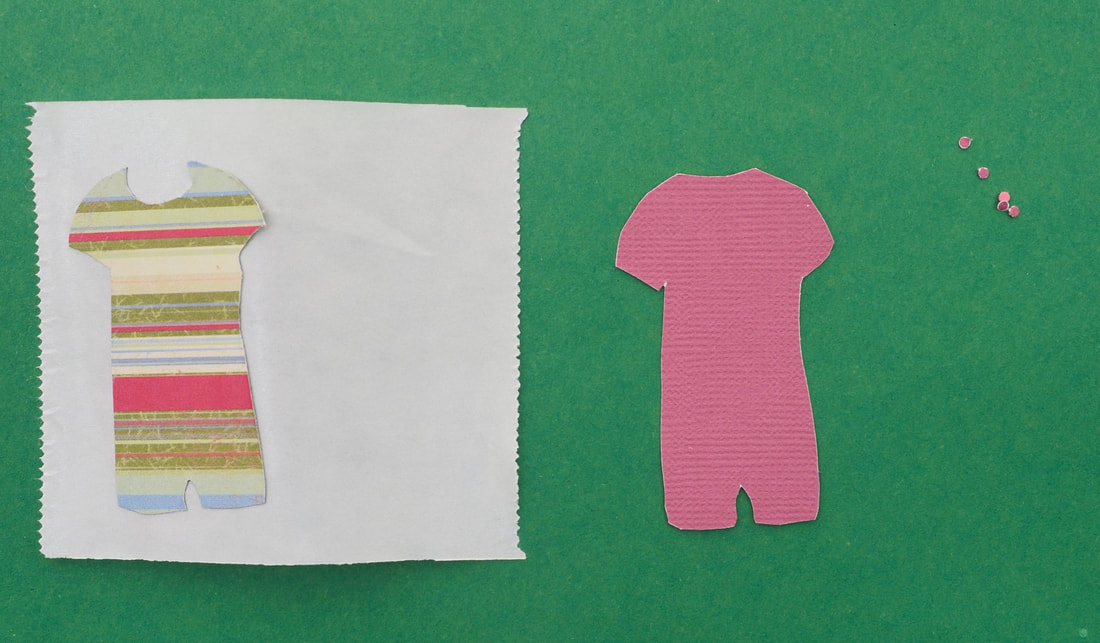
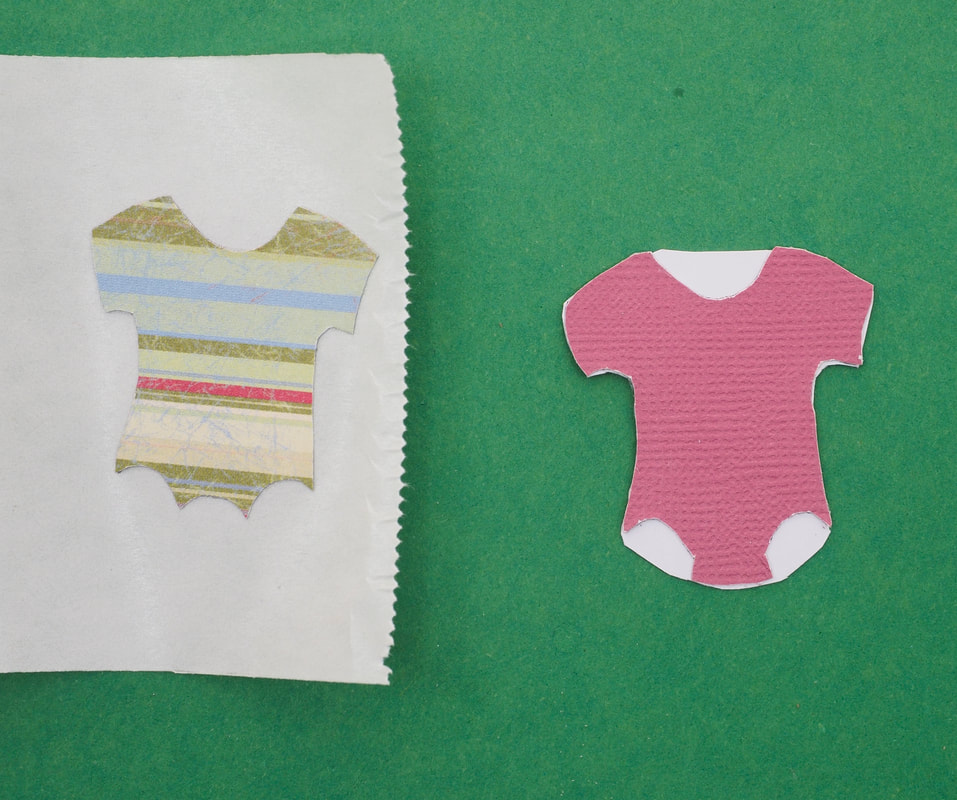
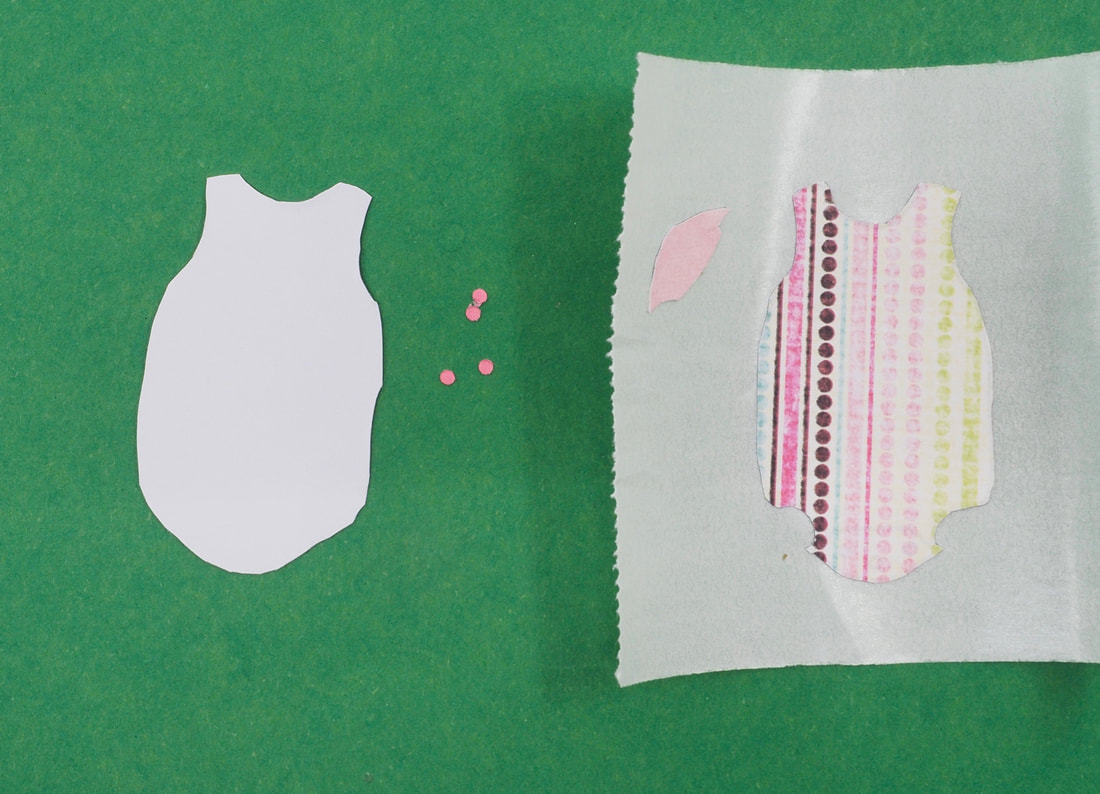
Romper
You will need to cut out:
- Bottom layer - The full romper
- Top layer - The romper minus neck line, arm elastic and leg elastic
Reverse Side
|

Front Side
|
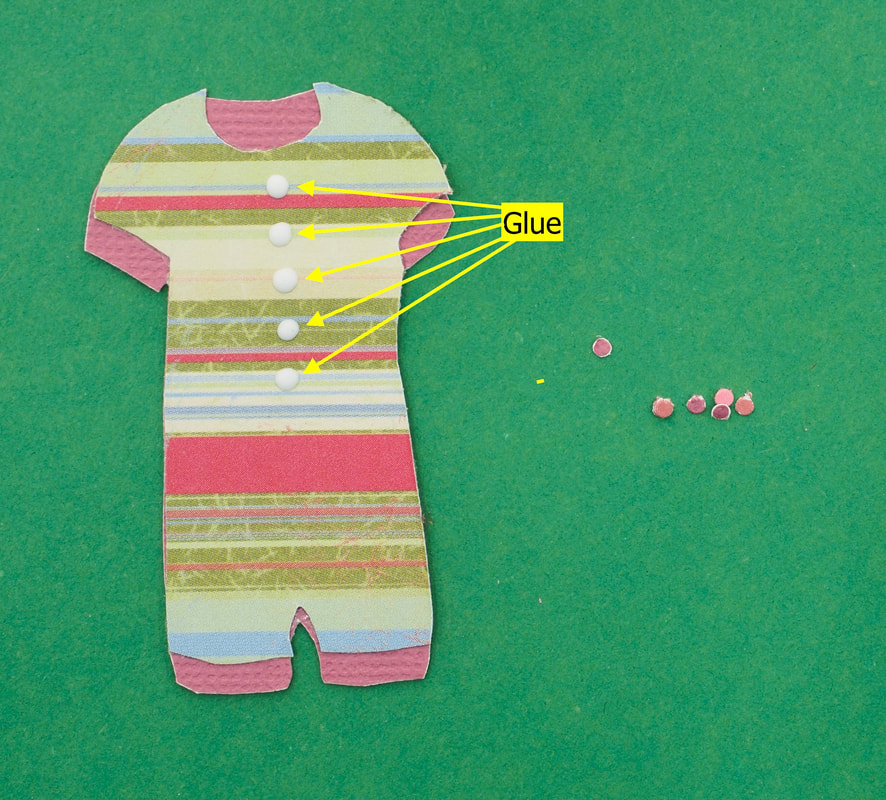
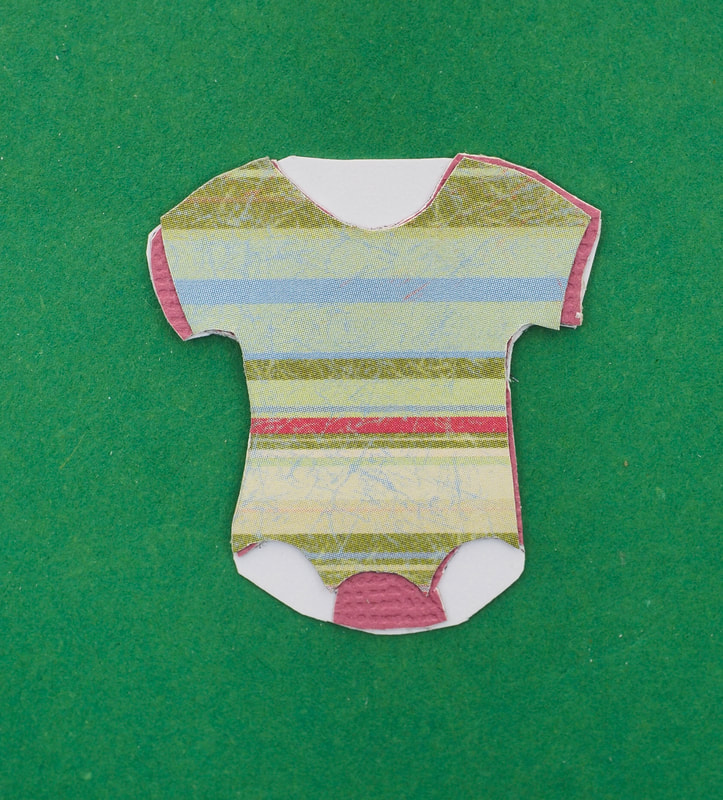
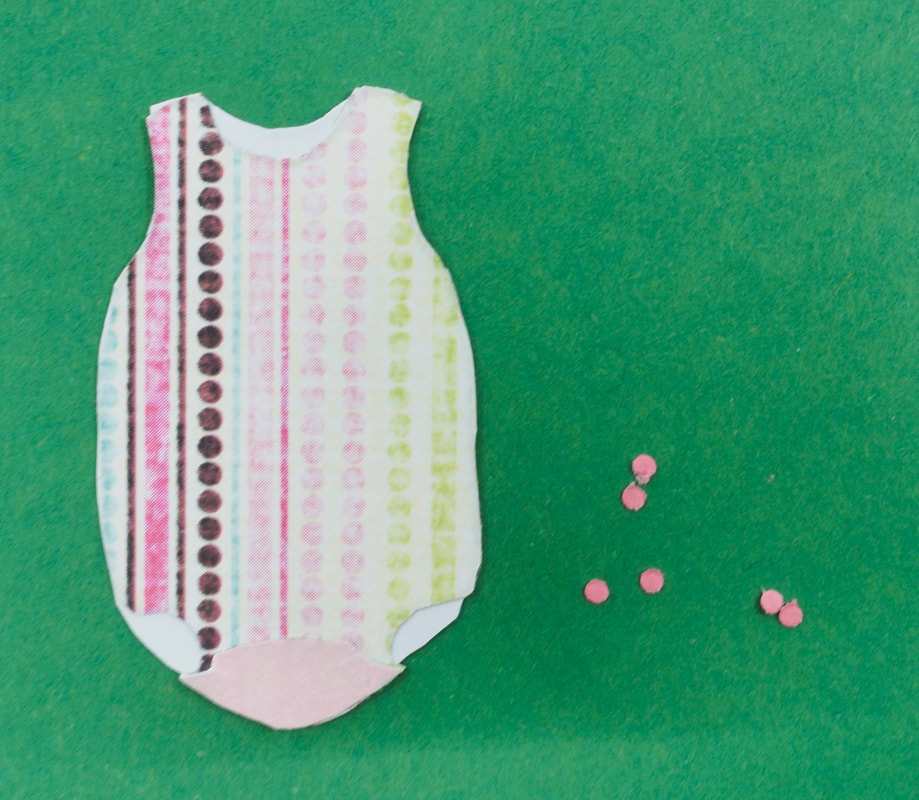
Turn the top layer (star) into a sticker and position over the bottom layer.
Put 5 small glue dots on the front of the romper
Put 5 small glue dots on the front of the romper
Stickered Layer
|
Assembled Romper with Glue Dots
|
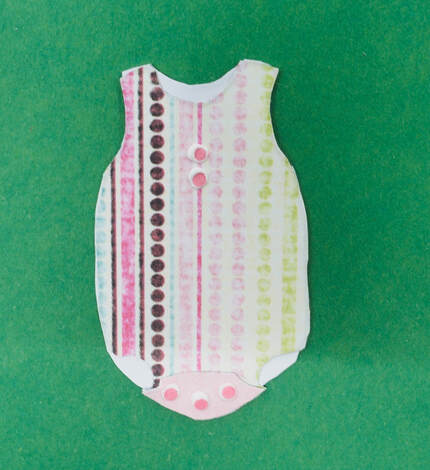
Adhere the 5 small punched circles to the glue dots

|
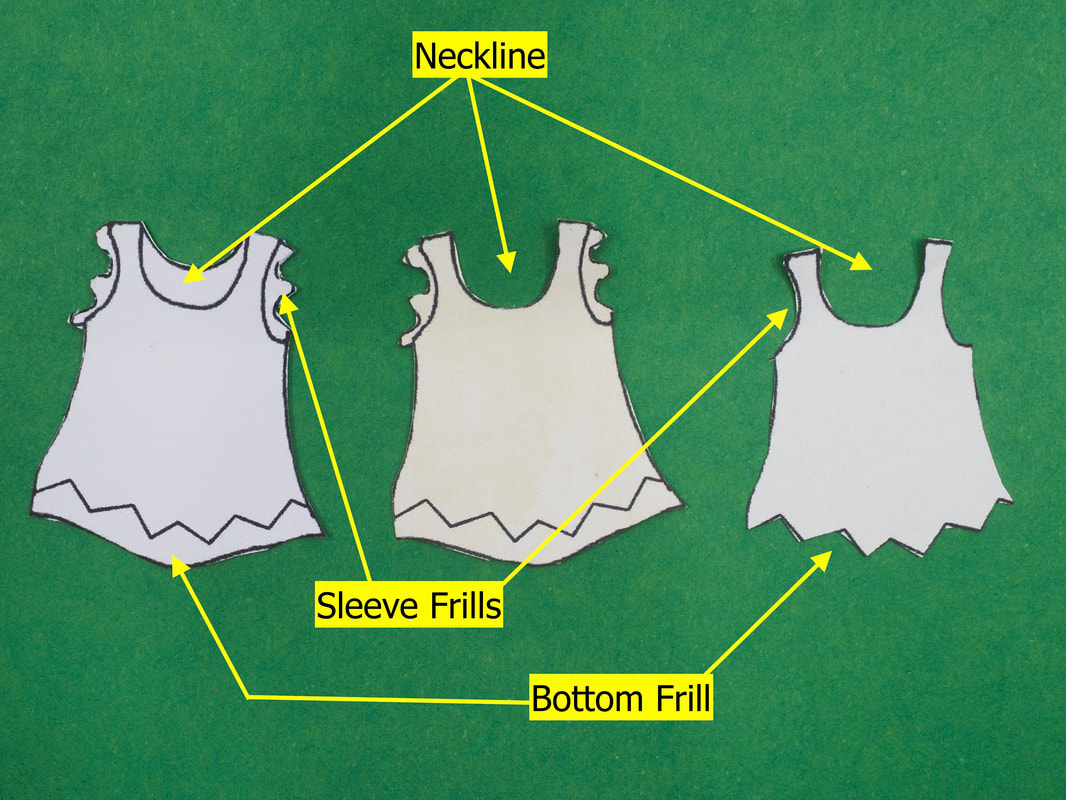
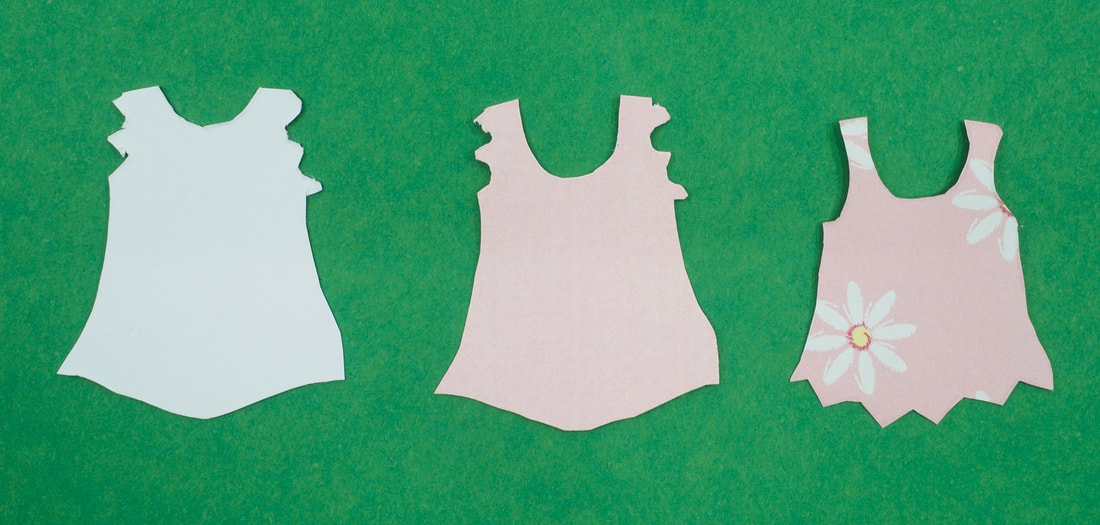
Dress
You will need to cut out:
You will also need:
- Bottom layer - The full dress
- Middle layer - The dress minus the neck line
- Top layer - The dress minus the neck line, sleeve frills & bottom frill
You will also need:
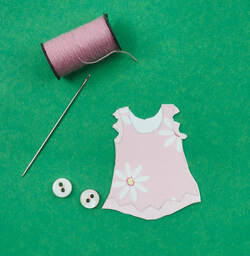
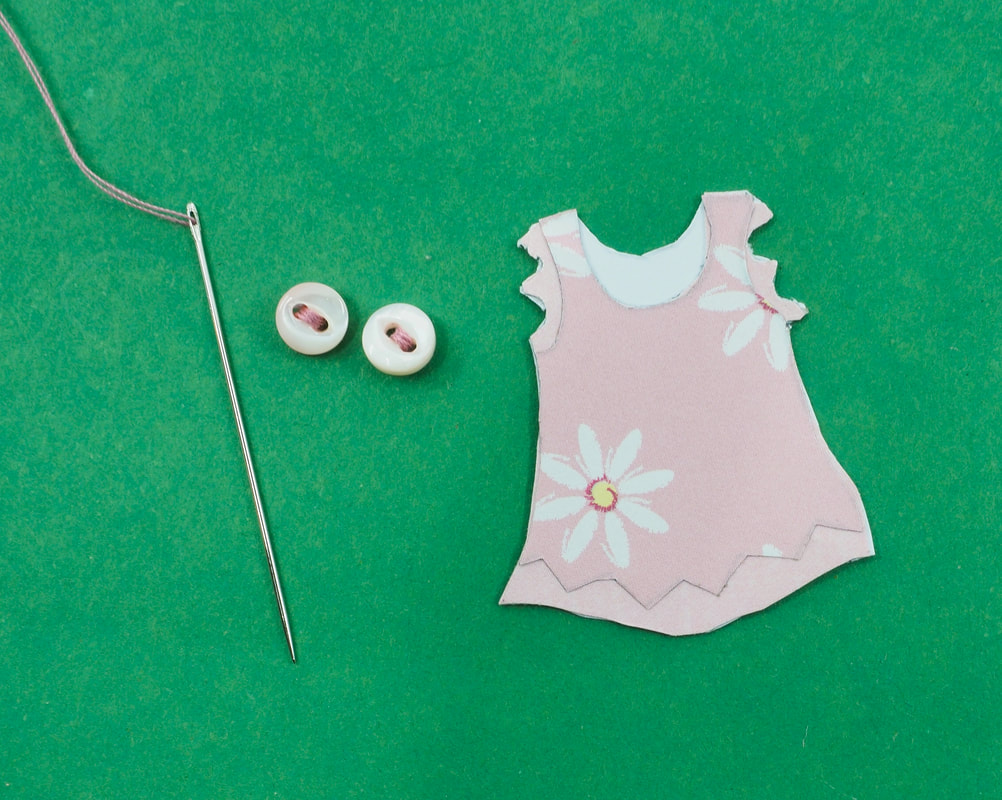
- Two small buttons
- Needle and threaed
Reverse Side
Front Side
Turn the top layer & middle layers into stickers
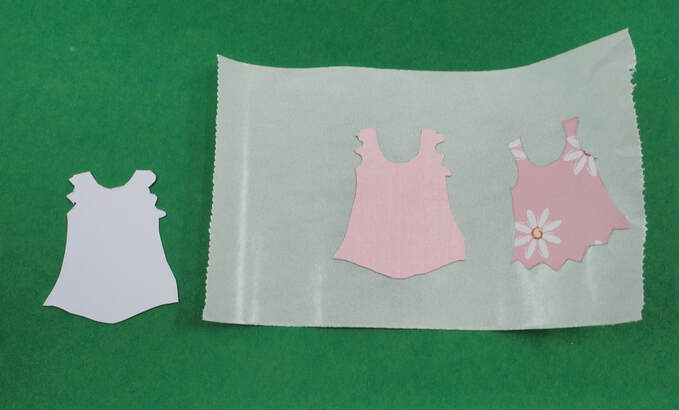
Position the middle layer on top of the bottom layer, then add the top layer onto that
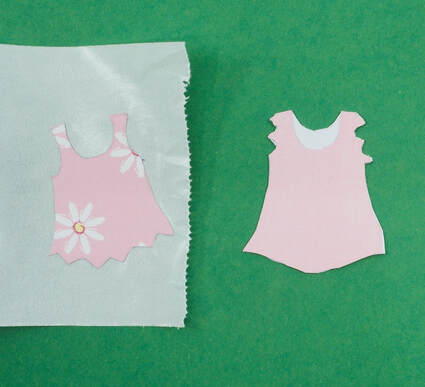
Middle layer applied
|
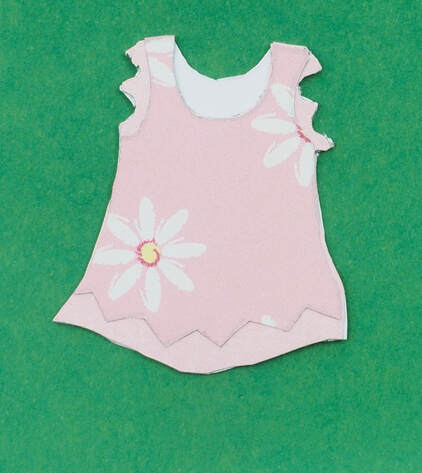
Top layer applied
|
Sew cotton into the small buttons
|
|
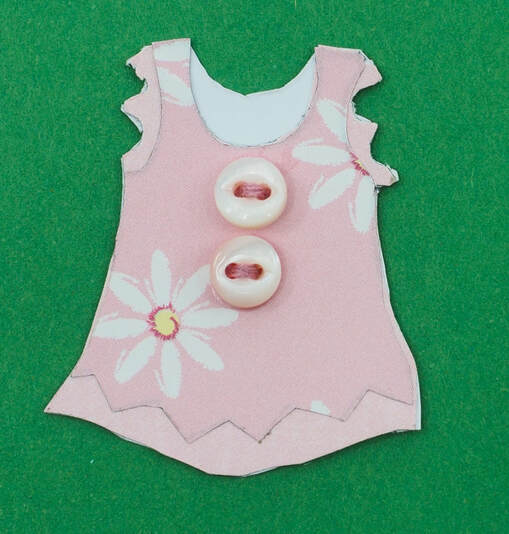
Glue the buttons onto the dress
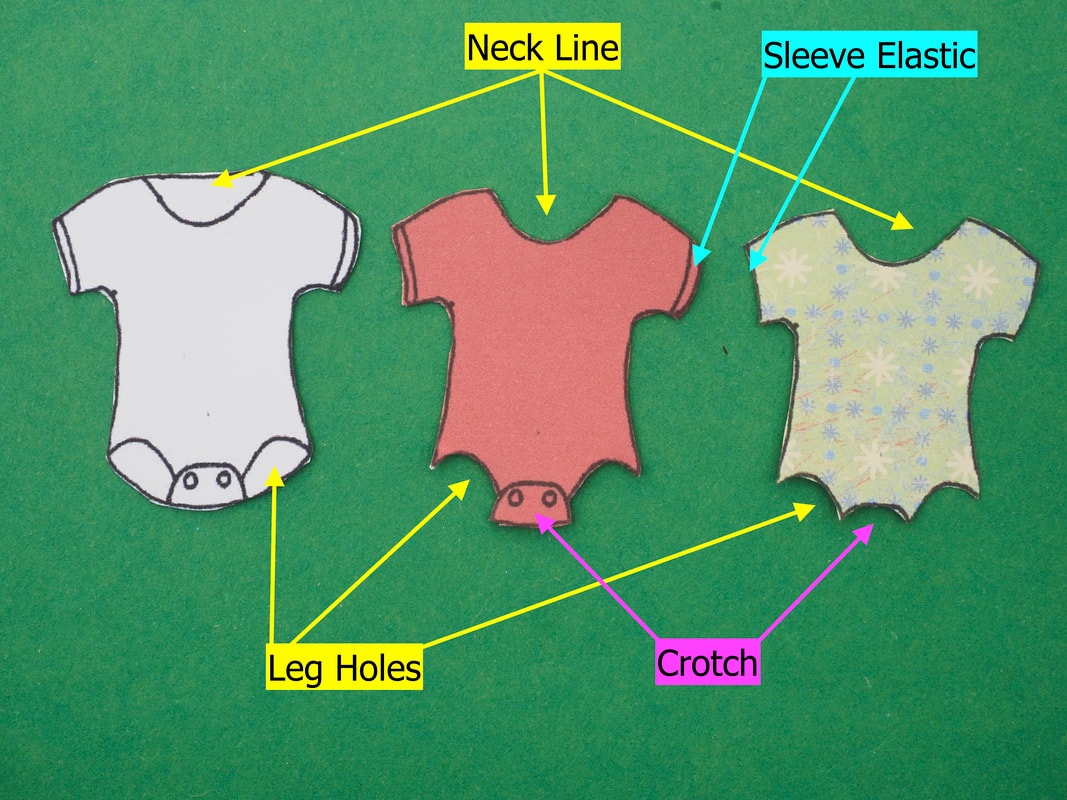
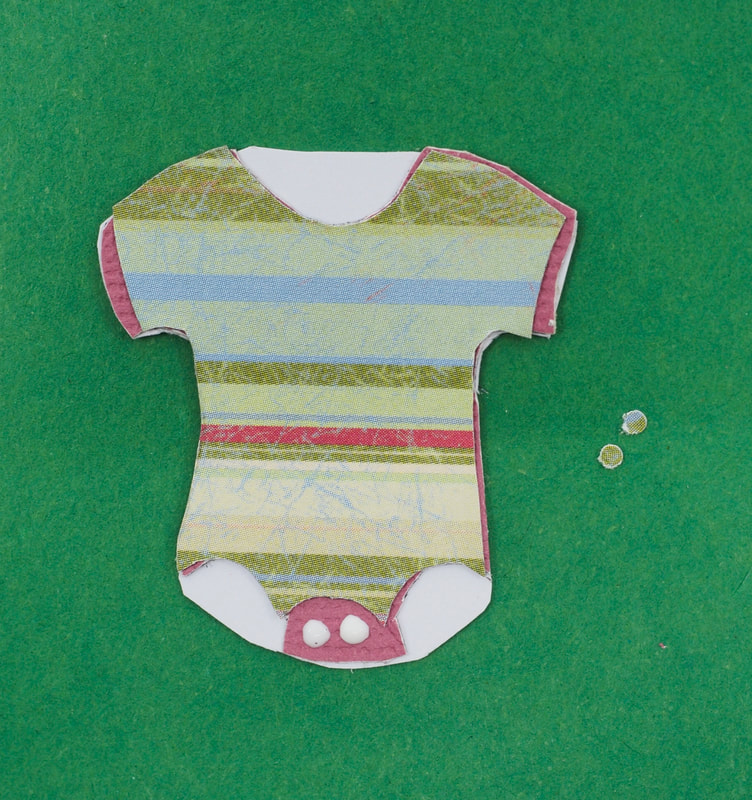
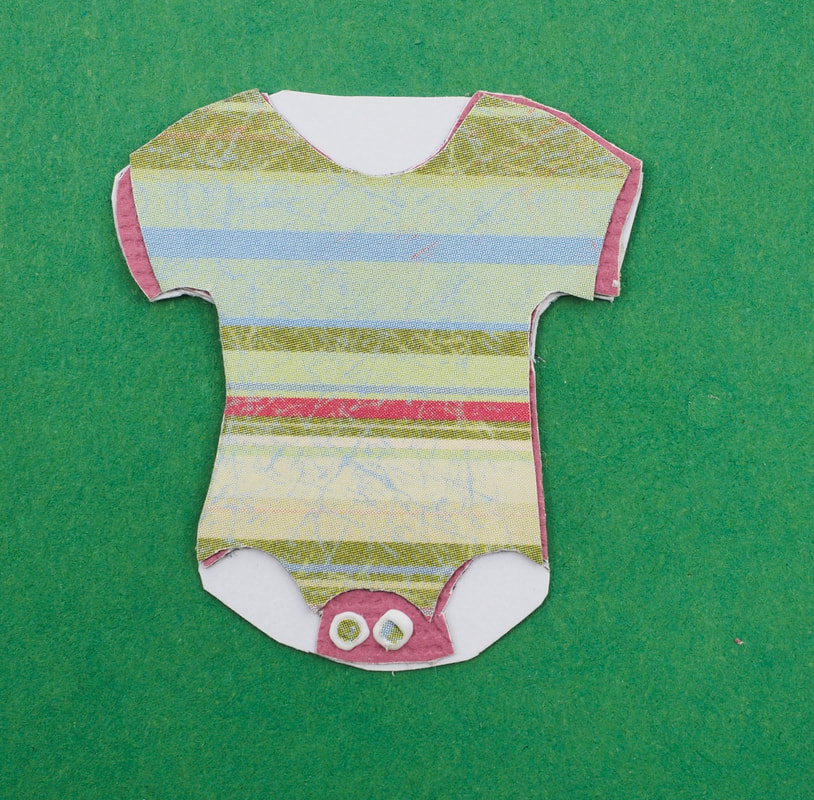
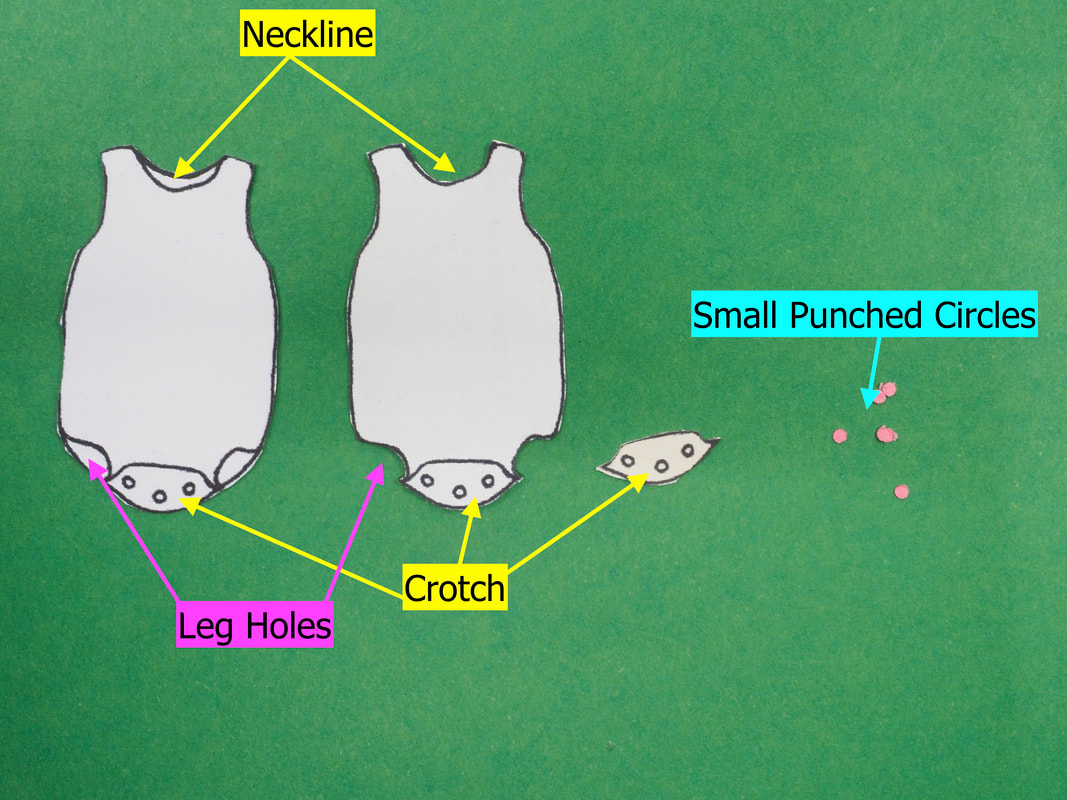
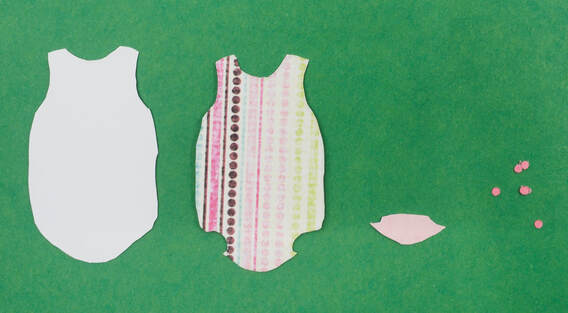
BodySuit with sleeves
You will need to cut out:
You will also need 2 small punched circles
- Bottom layer - The full bodysuit
- Middle layer - The bodysuit minus the neck line & leg holes
- Top layer - The bodysuit minus the neck line, leg holes, crotch & sleeve elastic
You will also need 2 small punched circles
Reverse Side
Front Side
Turn the top layer & middle layers into stickers
Position the middle layer on top of the bottom layer, then add the top layer onto that
|
|
Put two dots of glue on the crotch, then adhere the small punched circles
|
|
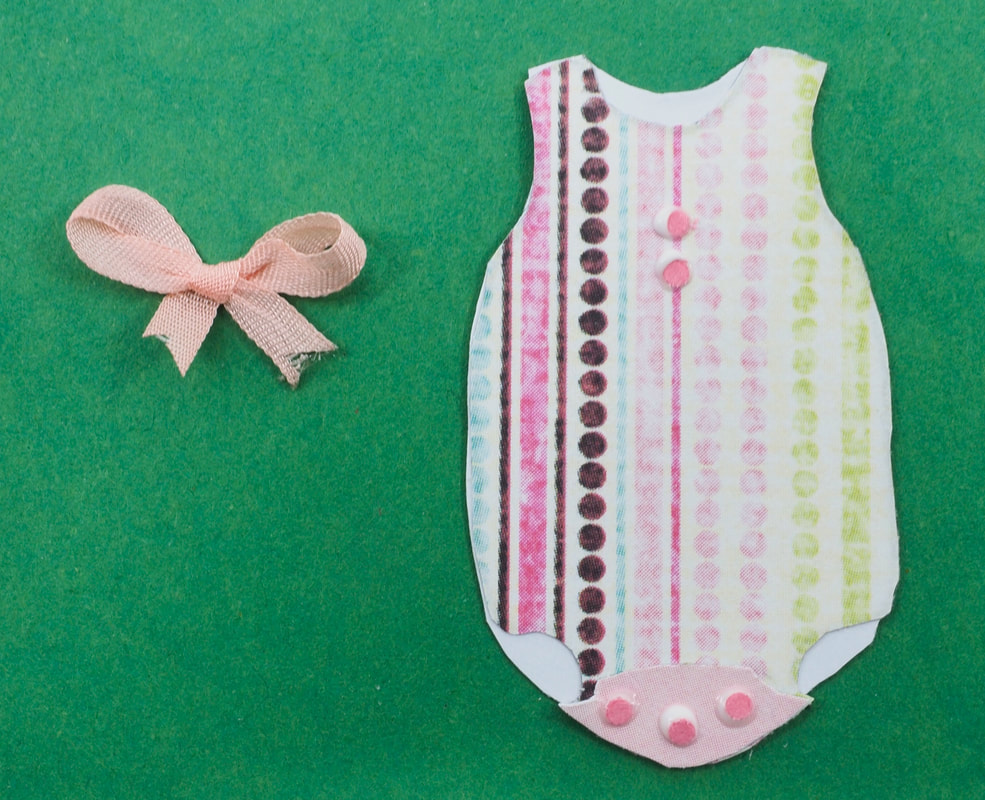
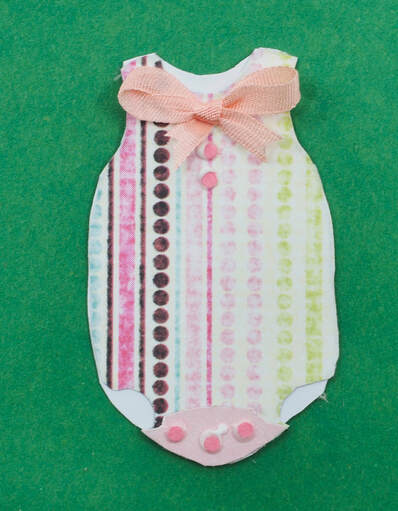
Bodysuit without sleeves
You will need to cut out:
You will also need:
- Bottom layer - The full bodysuit
- Middle layer - The bodysuit minus the neck line & leg holes
- Top layer - the crotch piece
You will also need:
- 5 small punched circles
- A piece of this ribbon
Reverse Side
Front Side
Turn the top layer & middle layers into stickers
Position the middle layer on top of the bottom layer, then add the top layer onto that

|
|
Add small dots of glue to the top and crotch, then adhere the small punched circles
Tie a bow with the thin ribbon and glue it onto the bodysuit
|
|
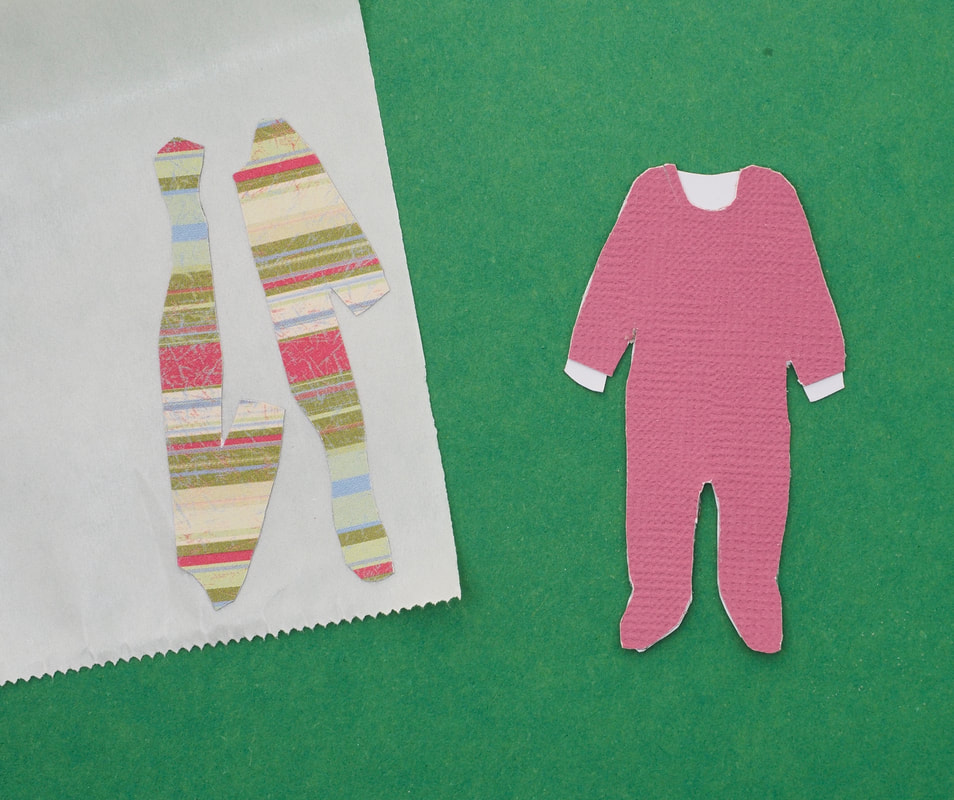
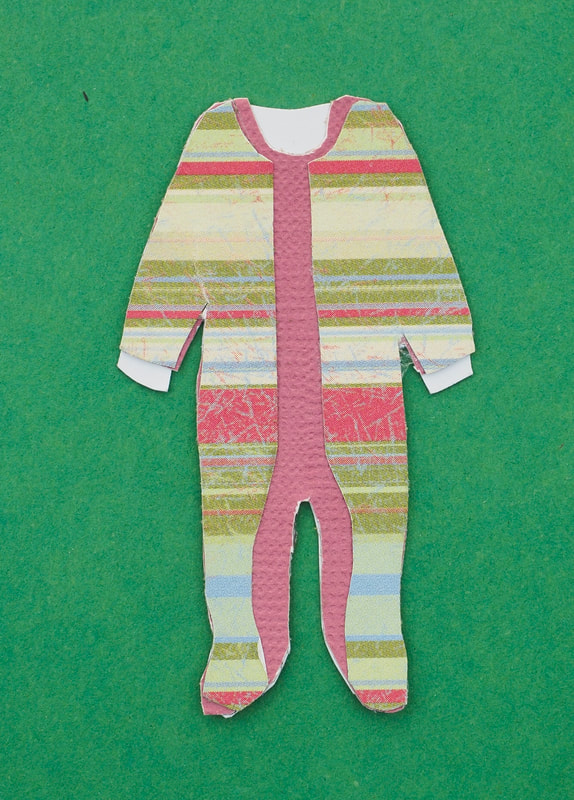
Jumpsuit
You will need to cut out:
- Bottom layer - The full jumpsuit
- Middle layer - The jumpsuit minus the neckline & arm elastic
- Top layer - The jumpsuit minus the neckline, arm elastic, neck elastic and centre panel

Reverse Side
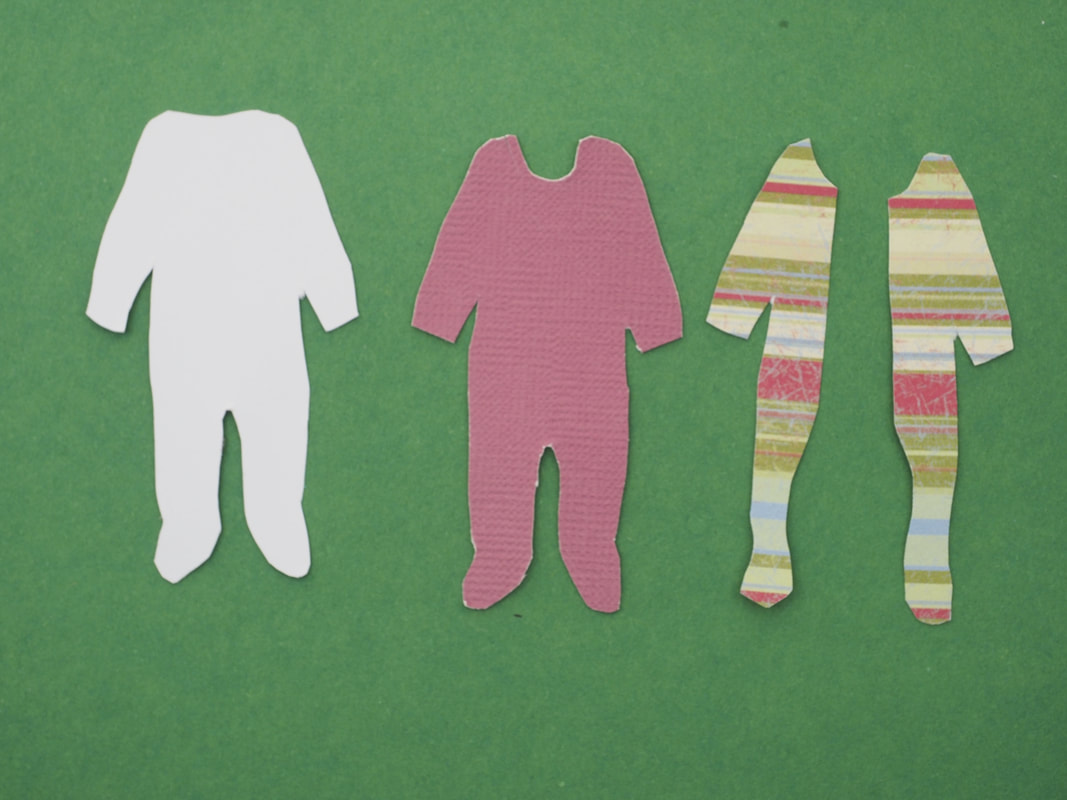
Front Side
Turn the top layer & middle layers into stickers
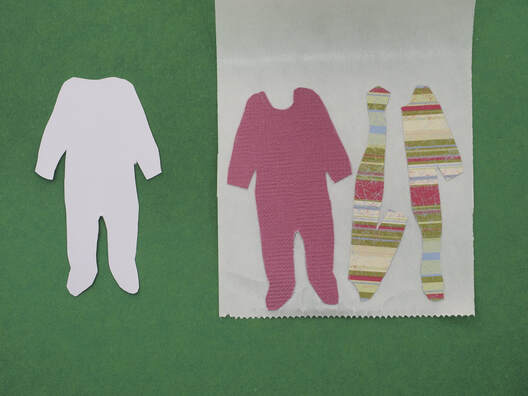
Position the middle layer on top of the bottom layer, then add the top layer (consisting of 2 pieces)
|
|
3. Assemble the Card
Create a Card Base
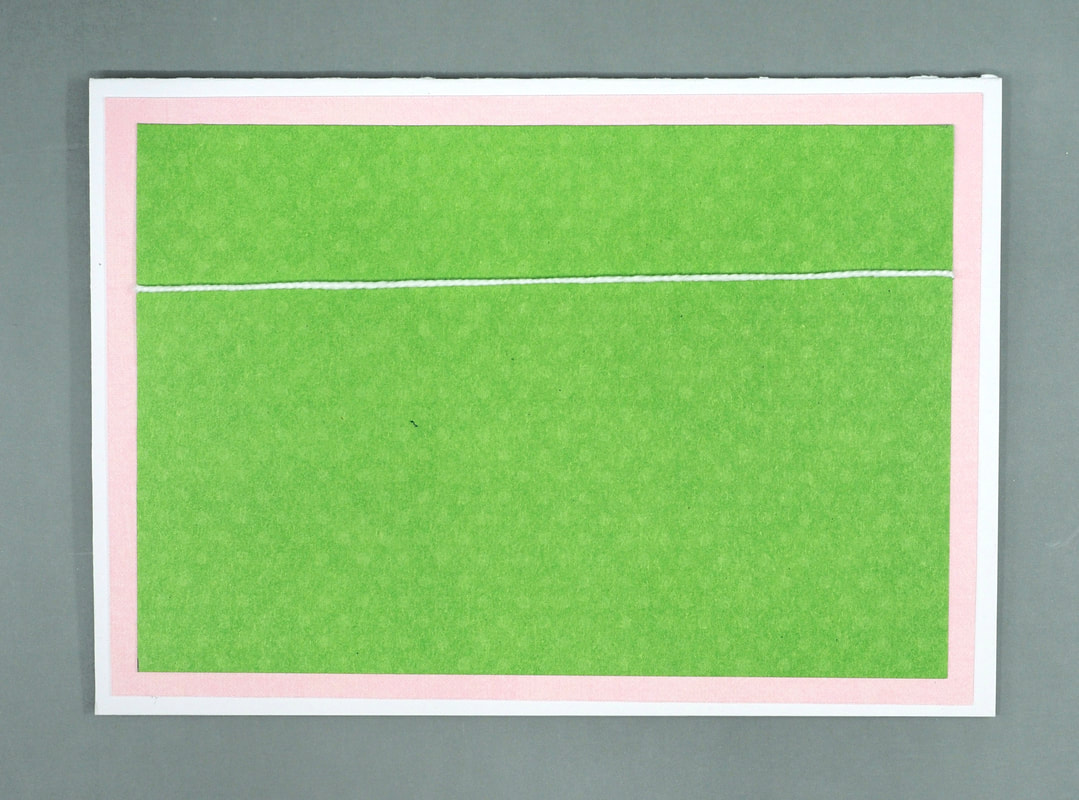
Cut a piece of card 21cm x 14.8cm (ie A5)
Score and fold in half to create a card base
Tutorial on scoring and folding card
Score and fold in half to create a card base
Tutorial on scoring and folding card

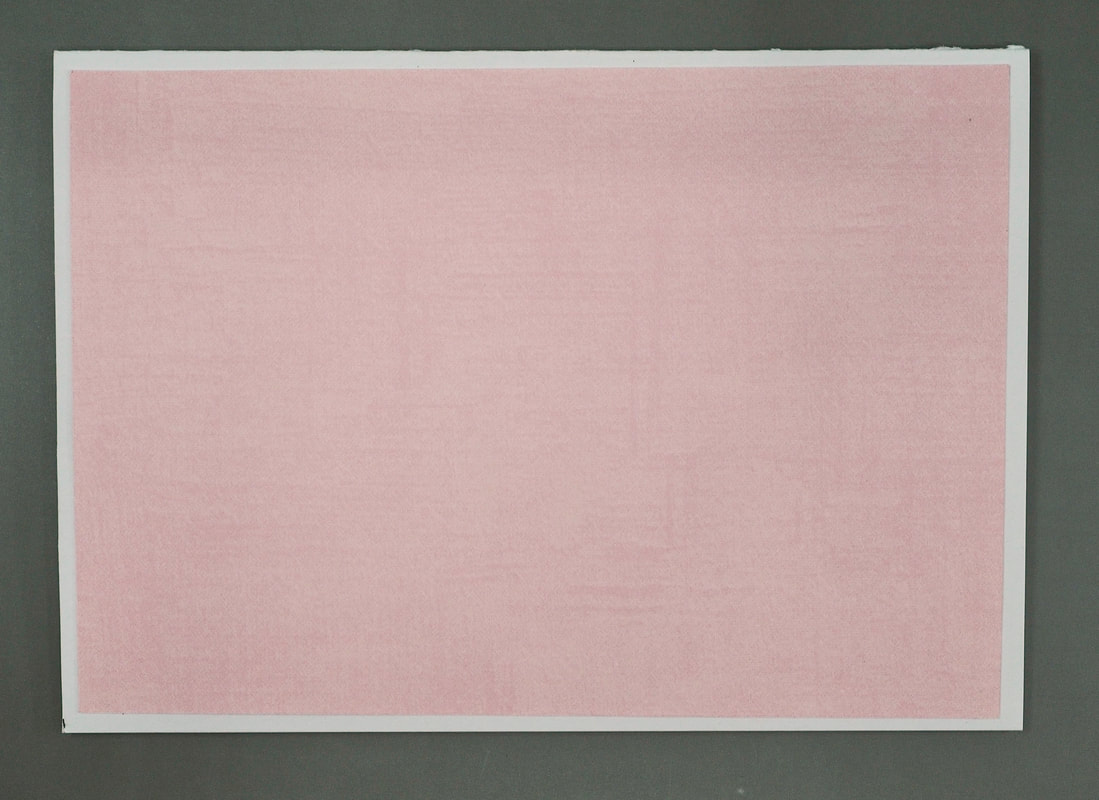
Layer THe Backing Papers
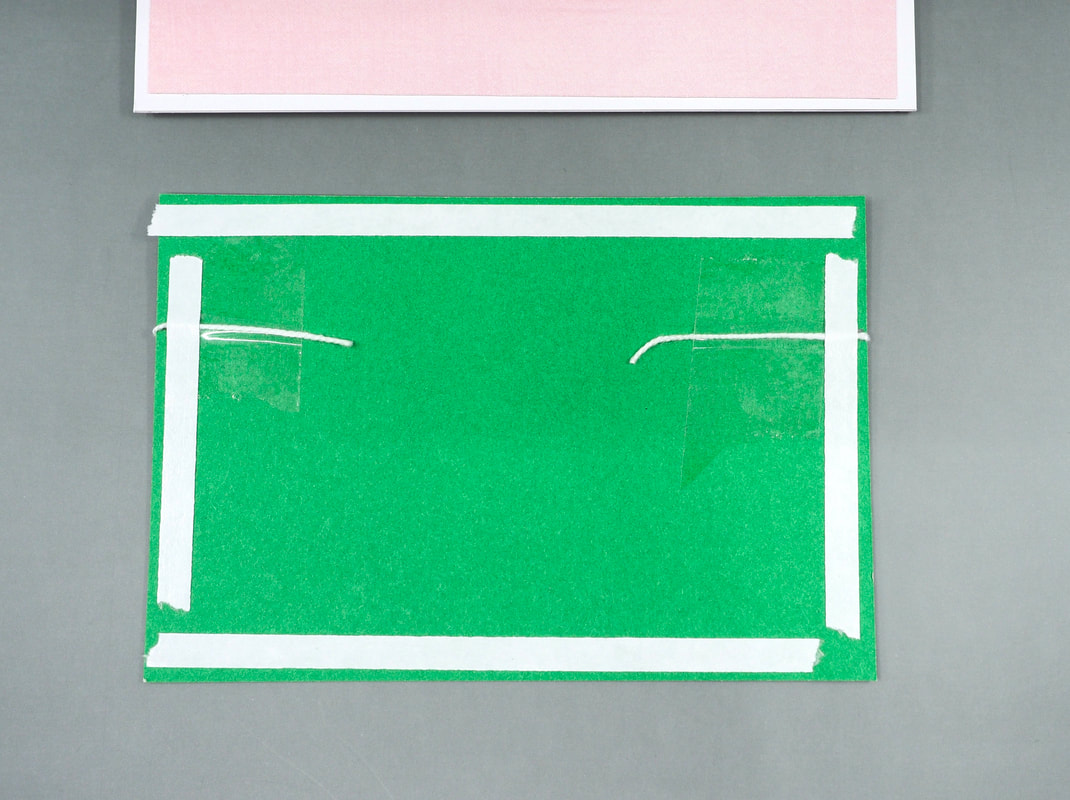
Cut a piece of paper 10.0cm x 14.3cm and adhere it to the front of the card base using double sided sticky tape.

|
|
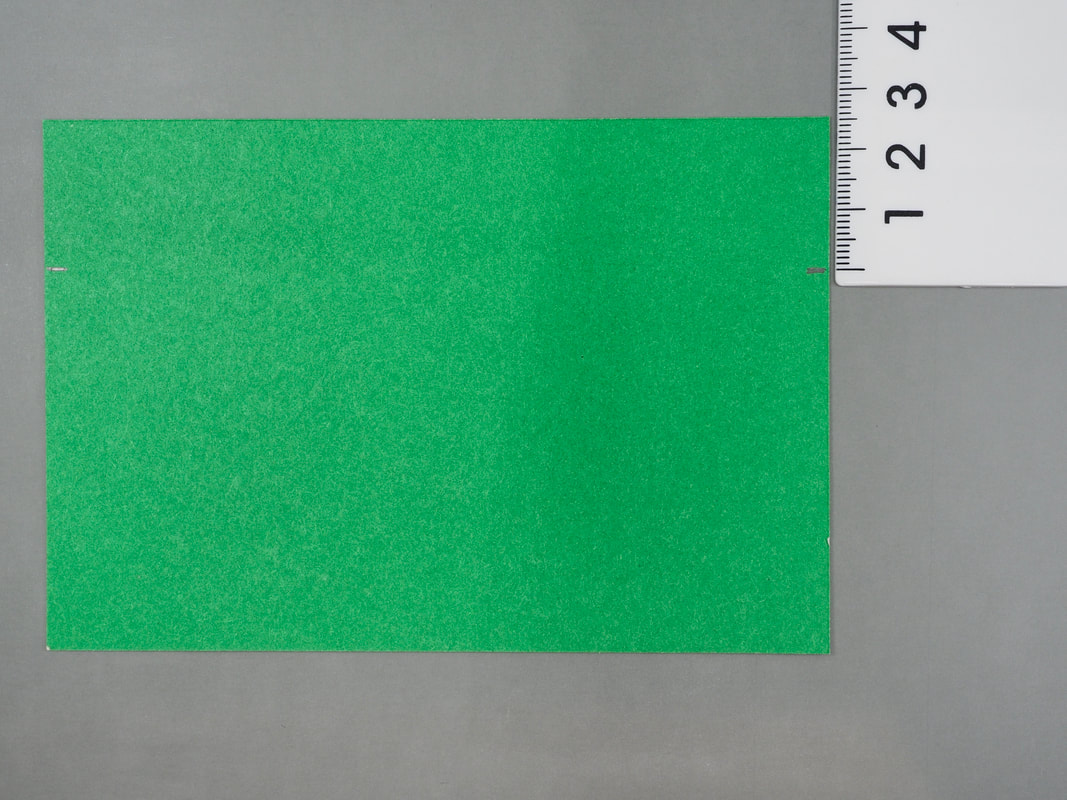
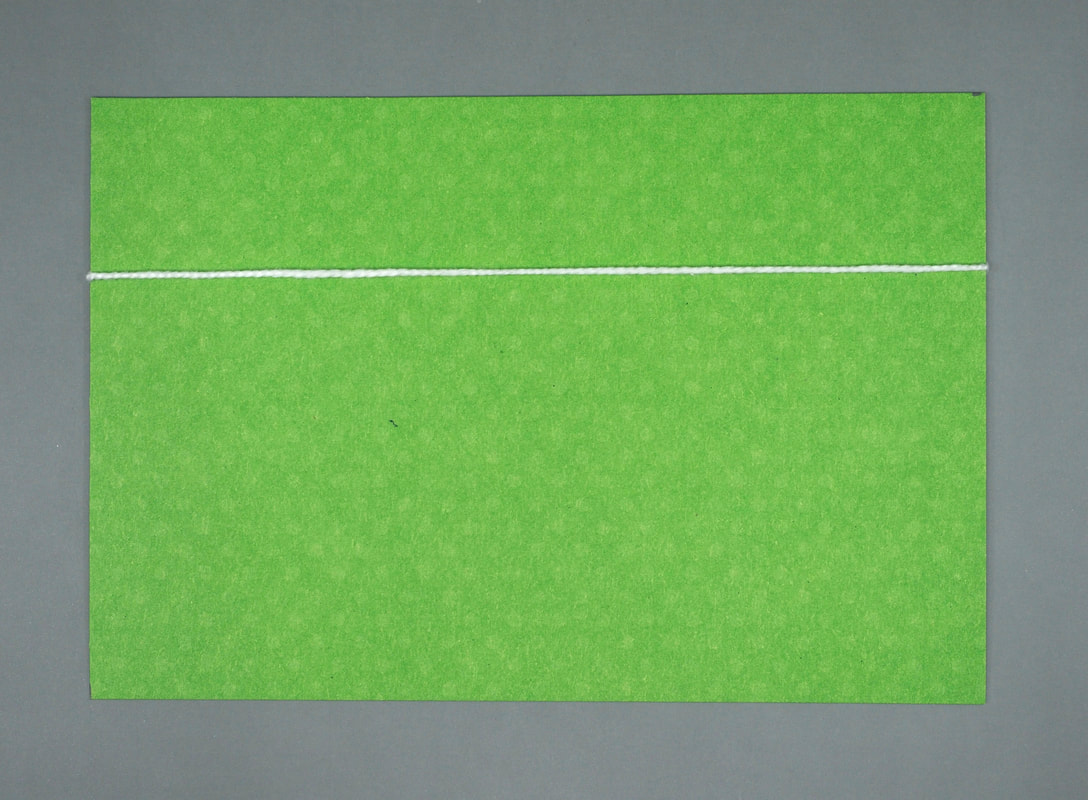
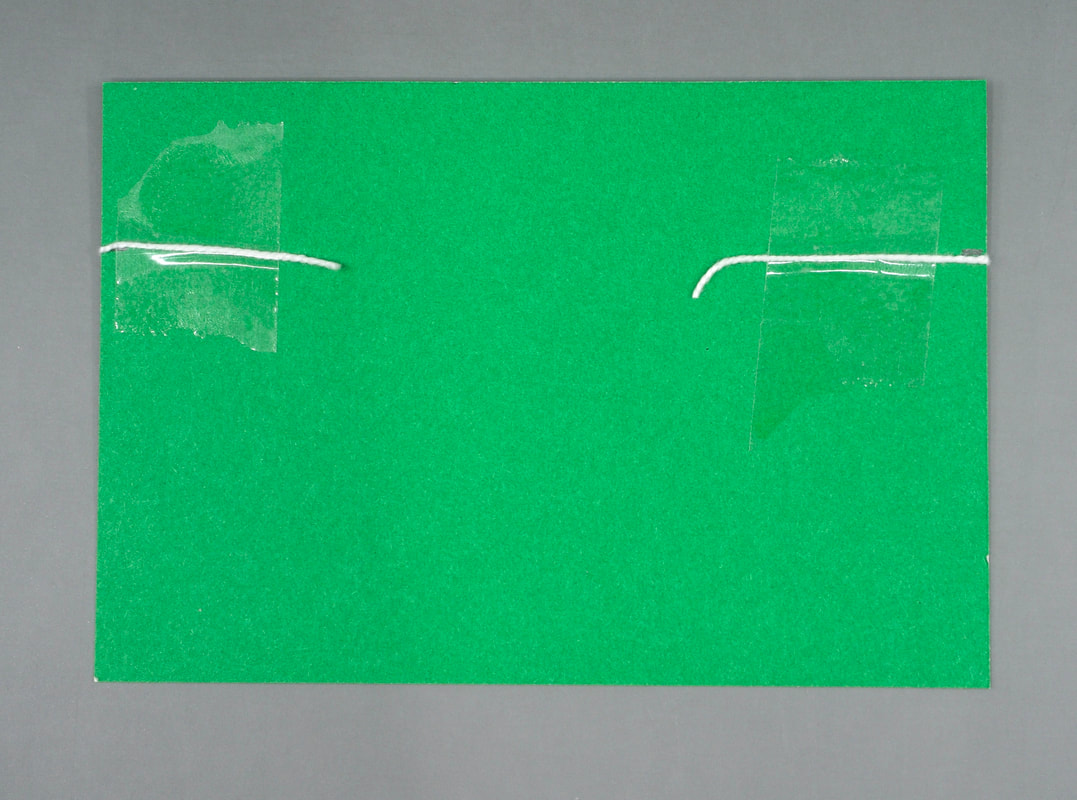
Cut a contrasting piece of paper 9.0cm x 13.3cm.
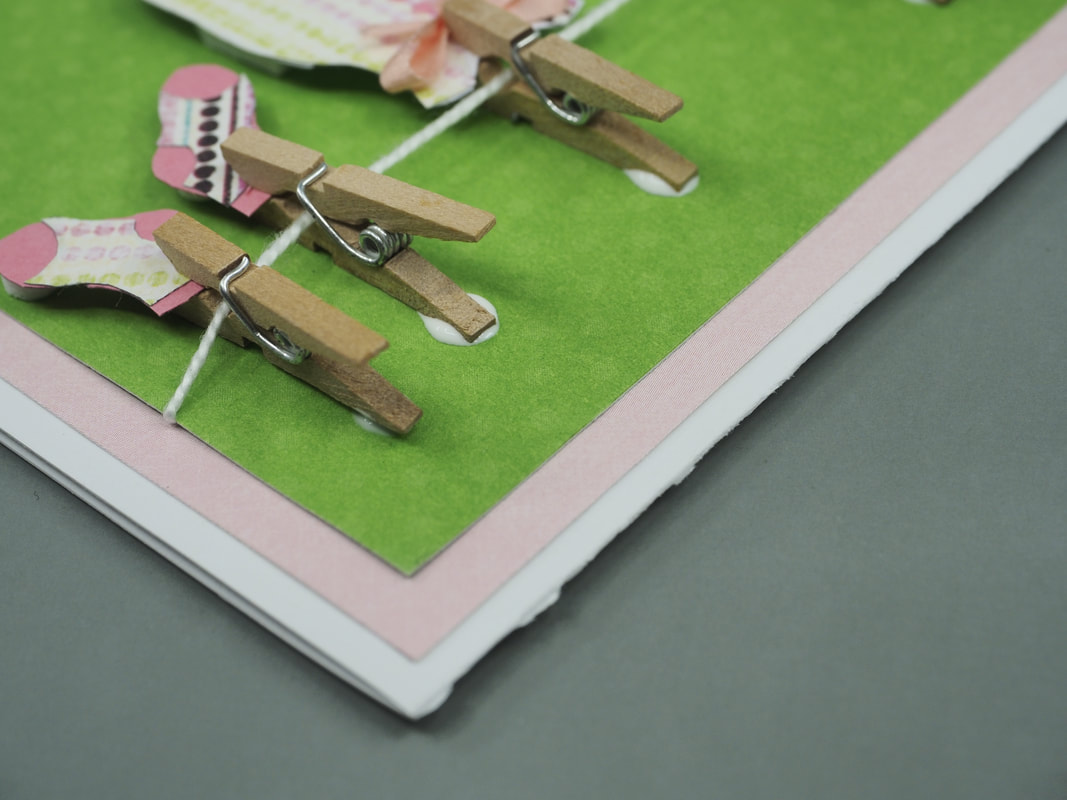
Use sticky tape to attach a piece of string to the back of this piece of paper, 2.5cm from the top. Wrap it around the card and attach it on the other side.
Use sticky tape to attach a piece of string to the back of this piece of paper, 2.5cm from the top. Wrap it around the card and attach it on the other side.
|
|
|
Attach this piece to the front of your card using double sided sticky tape
|
|
Arrange the positioning of the pegs and clothes on the card, then use foam dots / squares to adhere the clothes to the card
|
|
Glue down the pegs, then allow to dry