Fairy Doors
Thanks for your support!
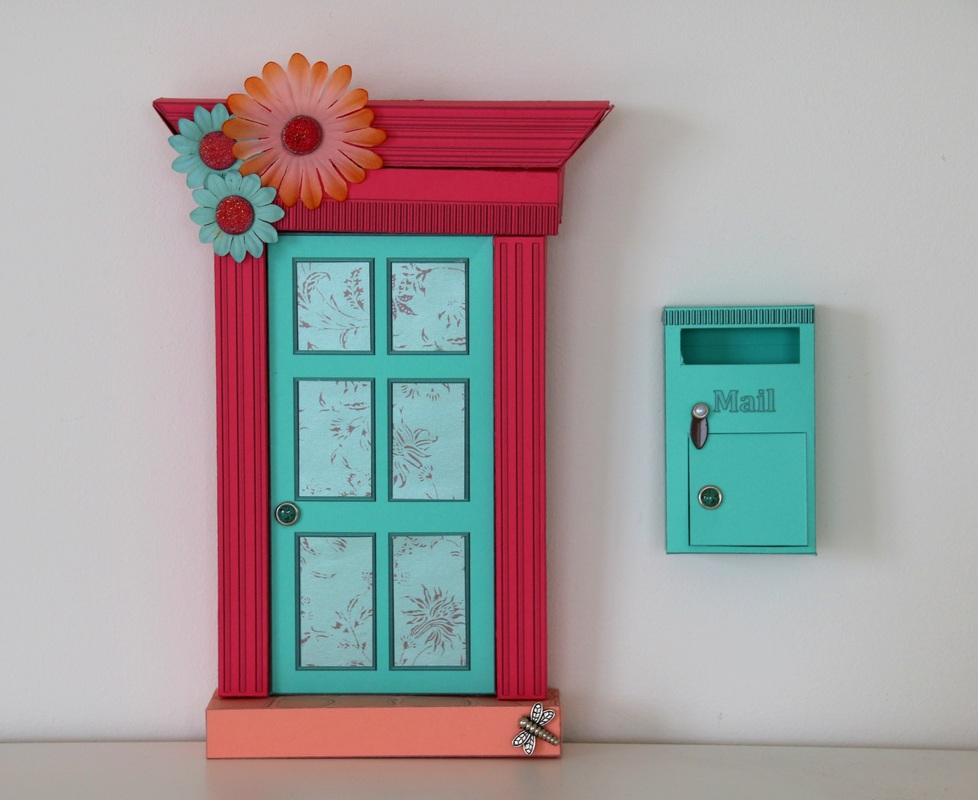
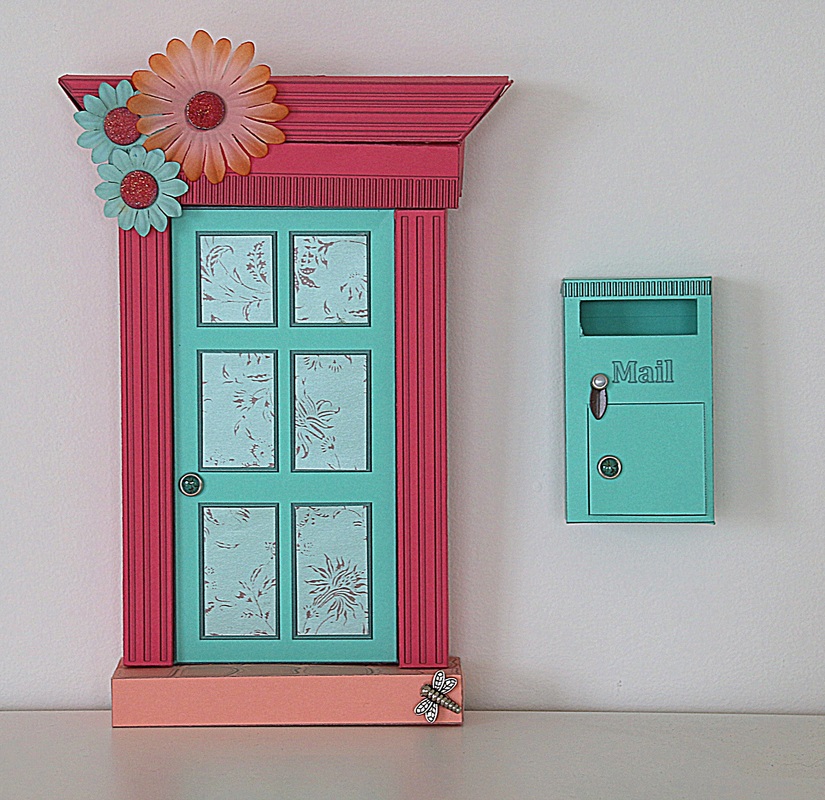
Create a fairy door...
Only fairies can use the door (it doesn't open for people) . The Fairies only come out when no-one is awake.
The Fairy Mailbox Page can be found here.
Only fairies can use the door (it doesn't open for people) . The Fairies only come out when no-one is awake.
The Fairy Mailbox Page can be found here.
Materials
1. A4 Card x 5-6 pieces
2. Printer
3. Scissors, craft knife, paper trimmer
4. Double-sided sticky tape, glue, or glue gun
5. Ruler
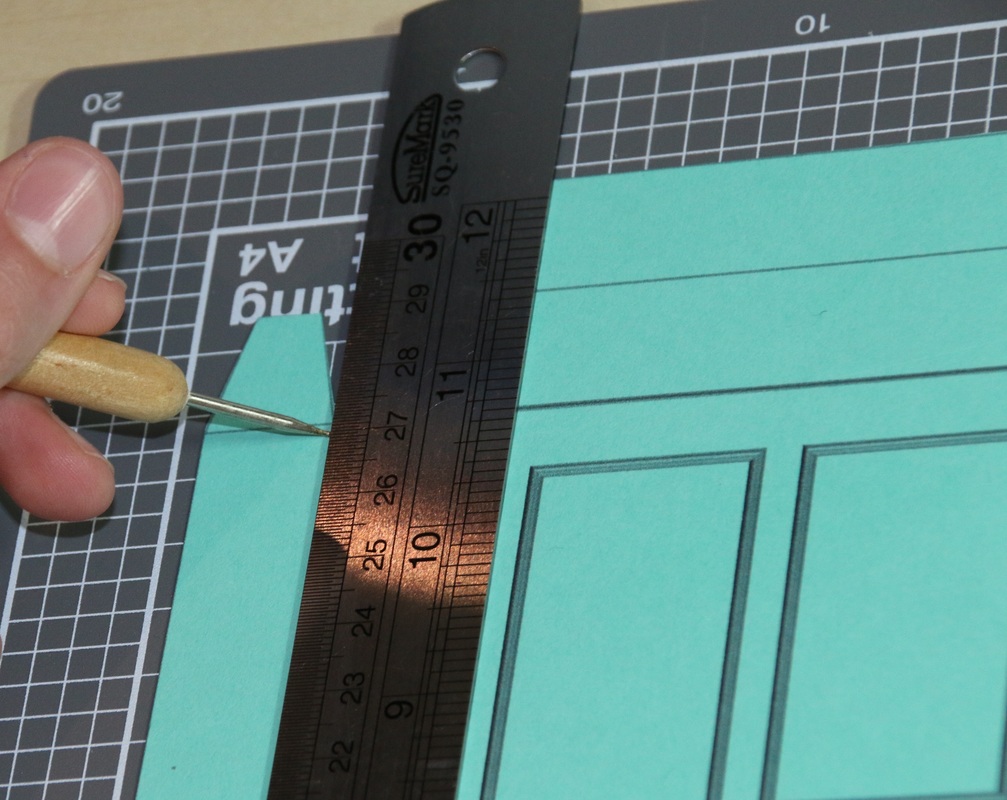
6. Scoring tool. If you don't have one of these, you can also use a ball point pen that has run out of ink as a scoring tool.
7. Decorations and embellishments
1. A4 Card x 5-6 pieces
2. Printer
3. Scissors, craft knife, paper trimmer
4. Double-sided sticky tape, glue, or glue gun
5. Ruler
6. Scoring tool. If you don't have one of these, you can also use a ball point pen that has run out of ink as a scoring tool.
7. Decorations and embellishments
|
Instructions
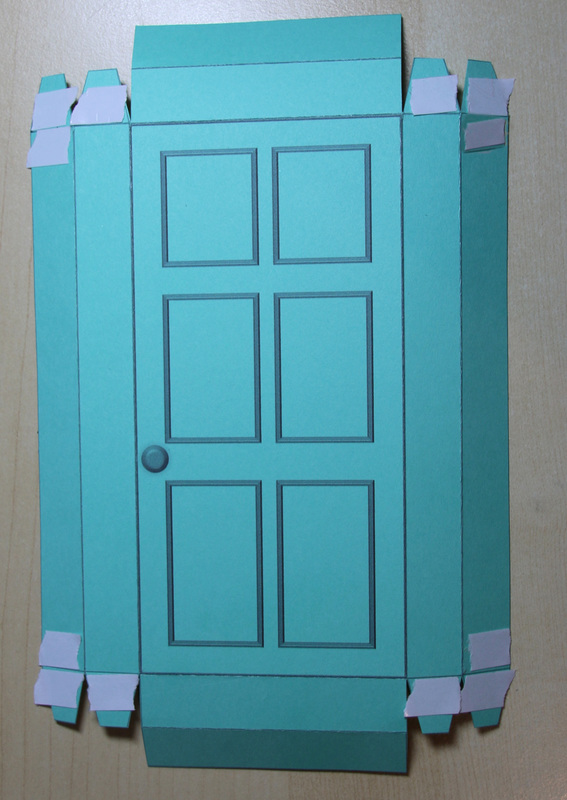
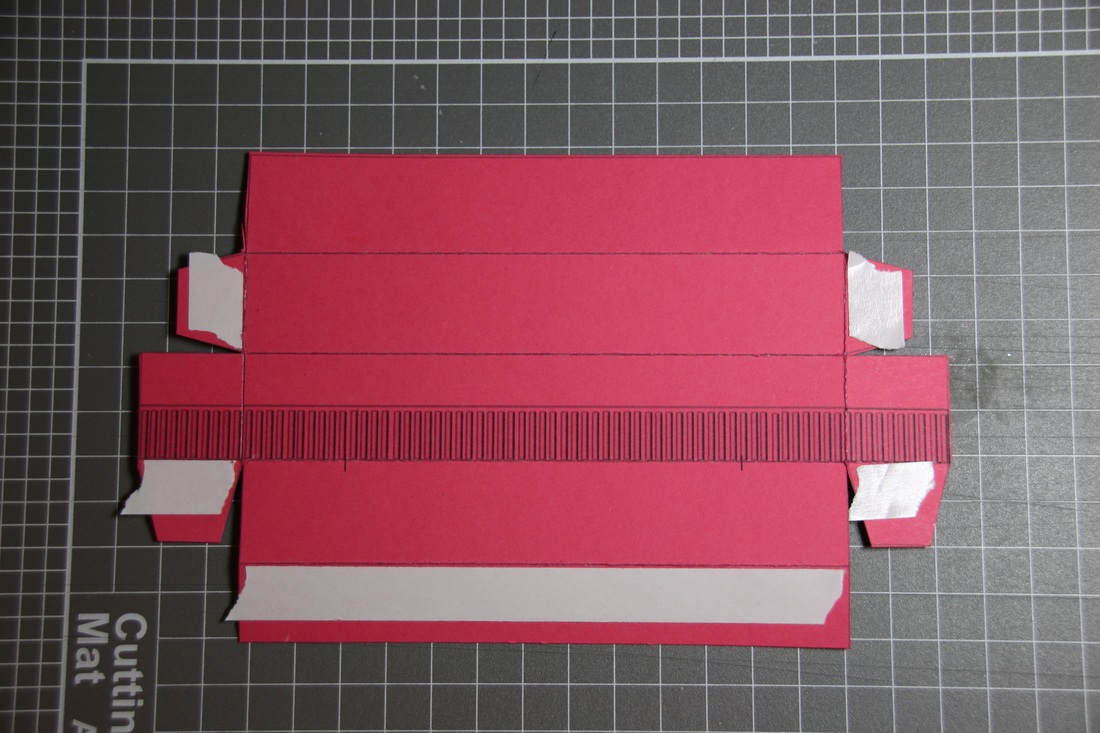
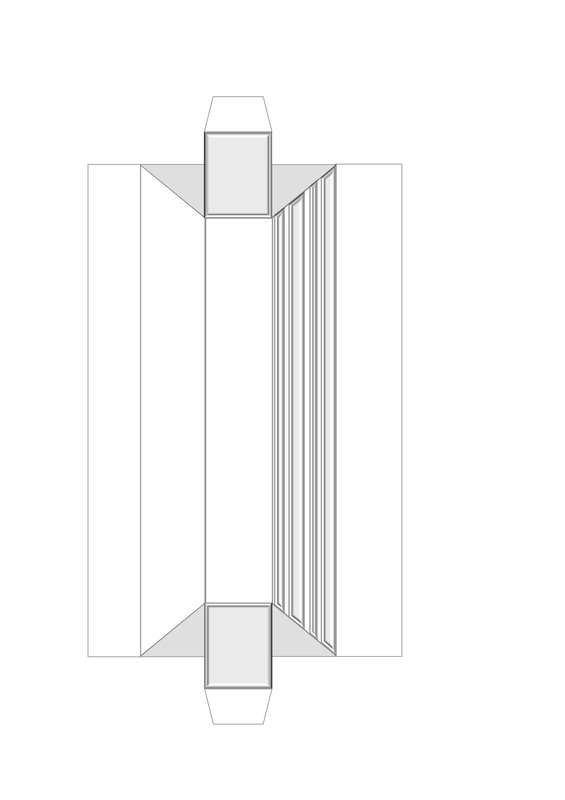
1. Print the "Base with door" template (pdf doc below) onto A4 Card.
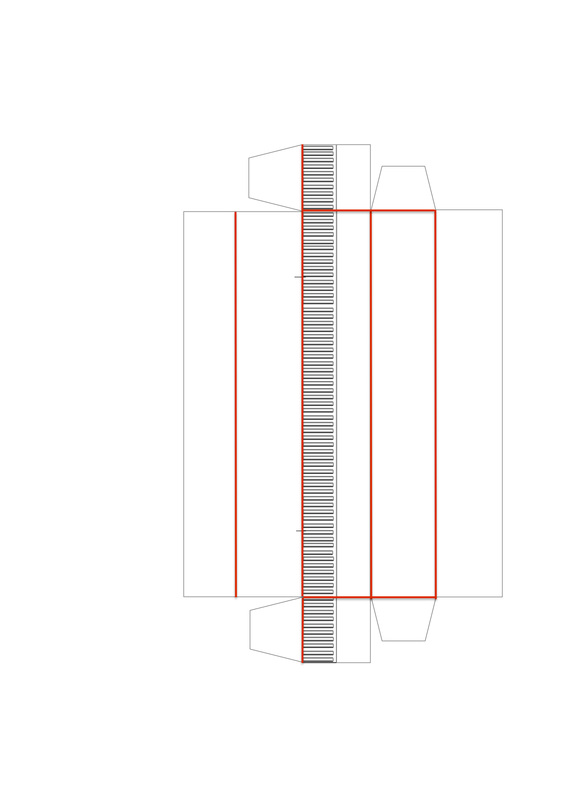
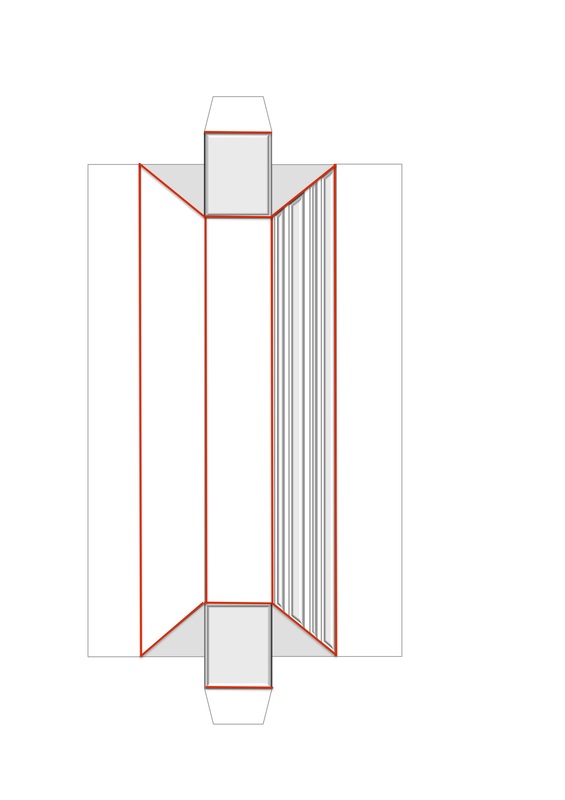
2. Cut out the door, and score the lines, as shown below in red. Scoring leaves a dent in the card, making it easier to fold straight lines.
Tutorial on Scoring 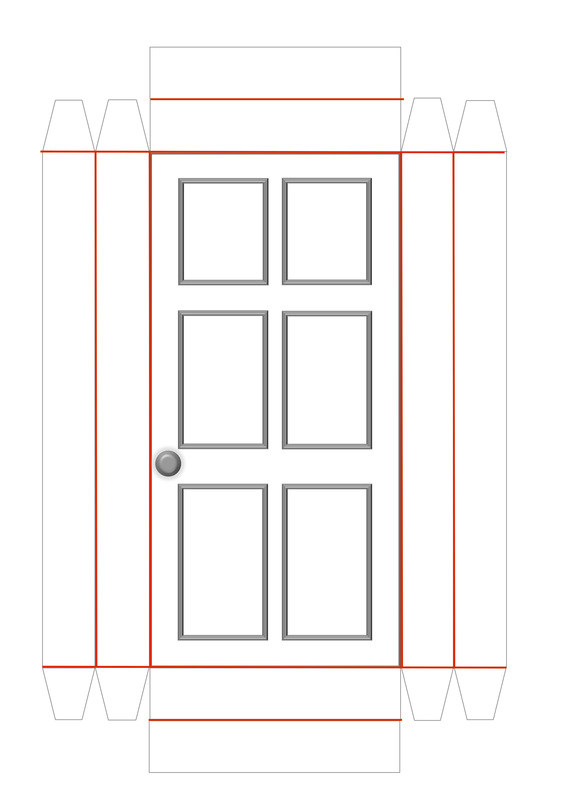
Score the lines marked in red.
|
Scoring Lines
| ||
|
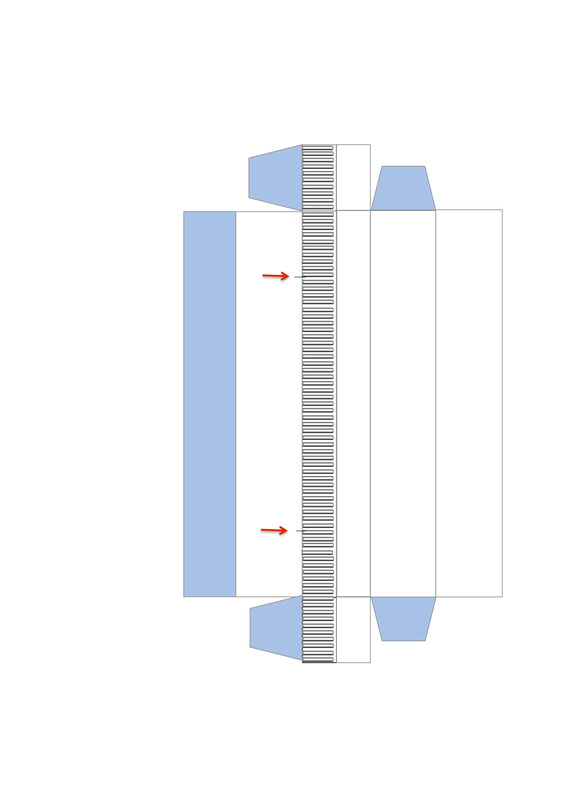
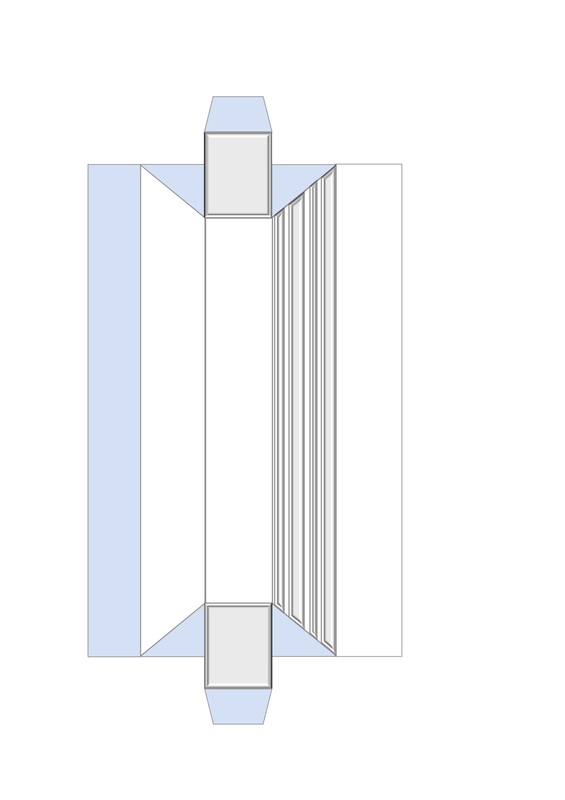
3. Fold the template along the scored lines and place double-sided sticky tape in the areas indicated (shown blue in the picture to the right)
Tape (or glue) the areas indicated
|
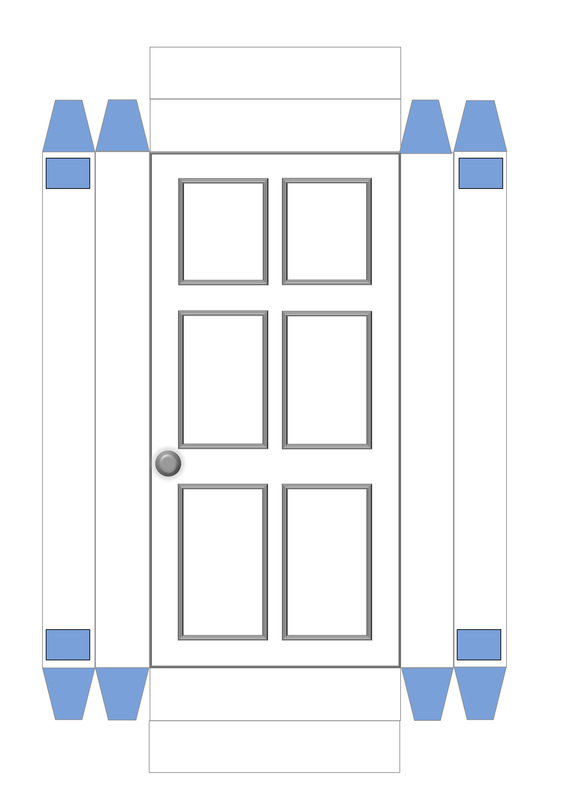
Door Template - Where to place tape or glue
|
|
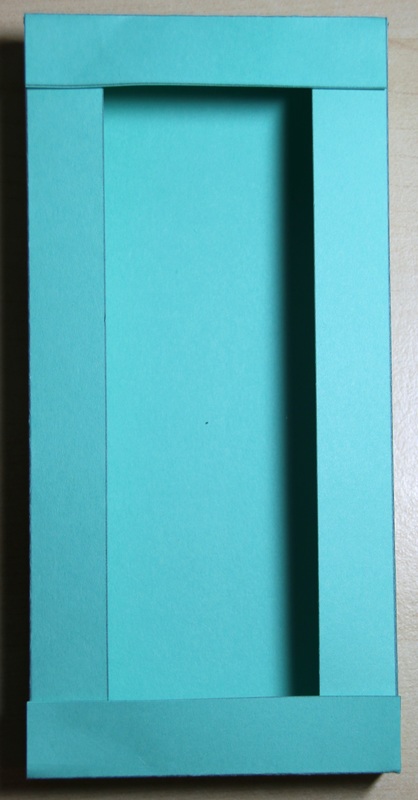
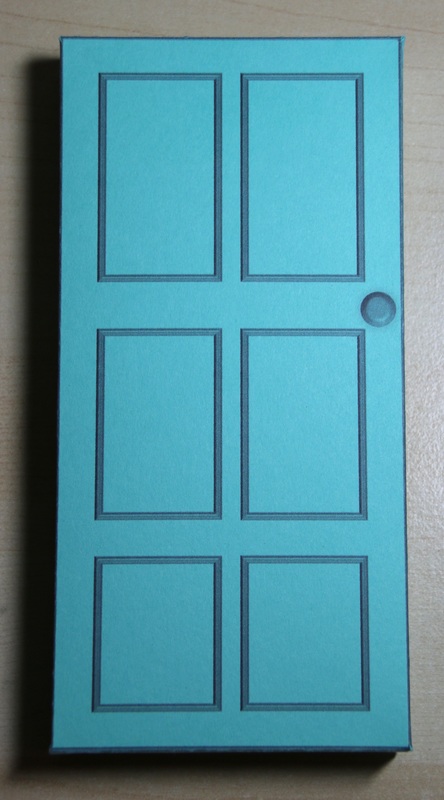
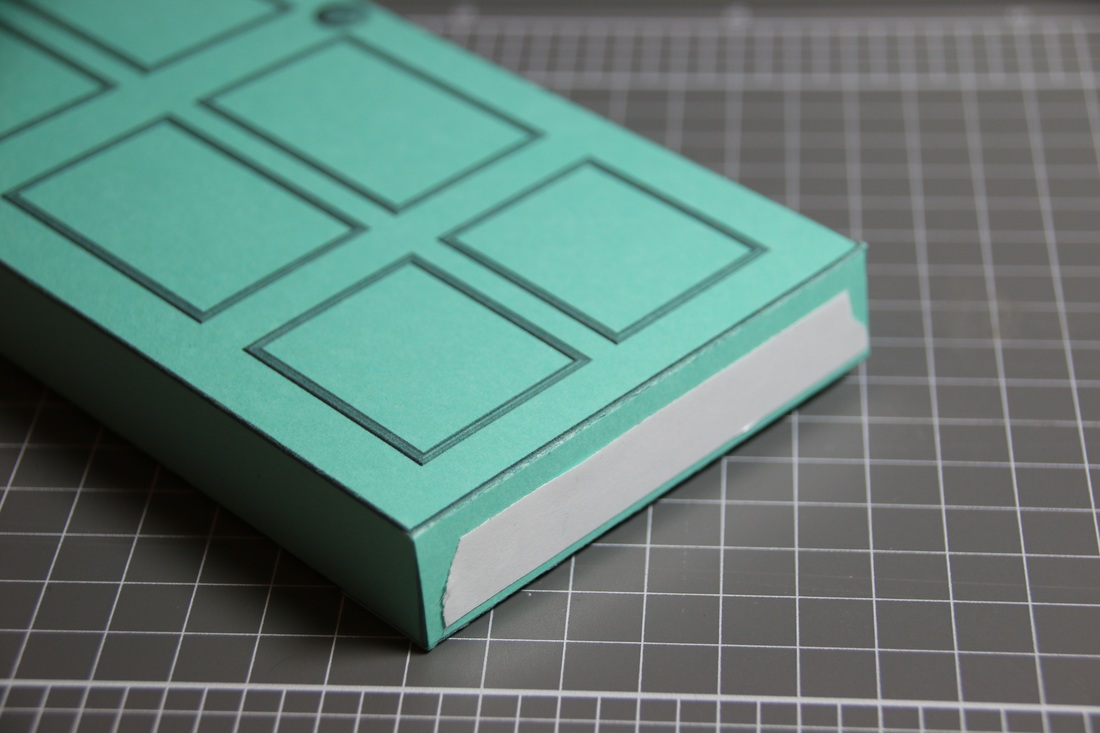
4. Fold the template into a rectangular prism and secure the tape.
|
|
|
5. Print the "Door topper" template (pdf doc below) onto A4 Card.
|

"Door Topper" template
| ||
|
5. Cut out the "Door Topper", and score the lines, as shown in red.
|
"Door Topper" Template - Score lines marked red
|
|
6. Fold the template along the scored lines and place double-sided sticky tape in the areas indicated (shown blue in the picture to the right)
|
"Door Topper" template - Area to tape marked blue and red arrows pointing to the positioning markers.
|
|
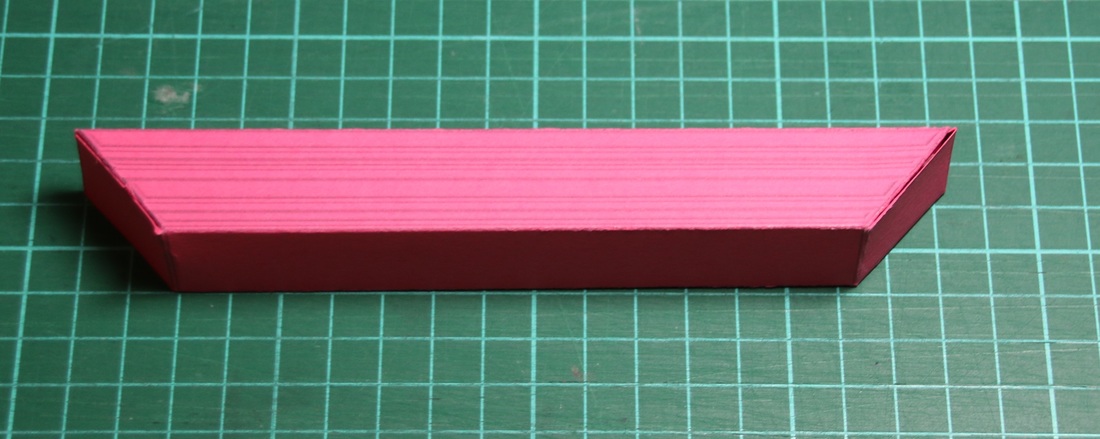
7. Fold the template into a rectangular prism and secure with the tape.
|

|
|
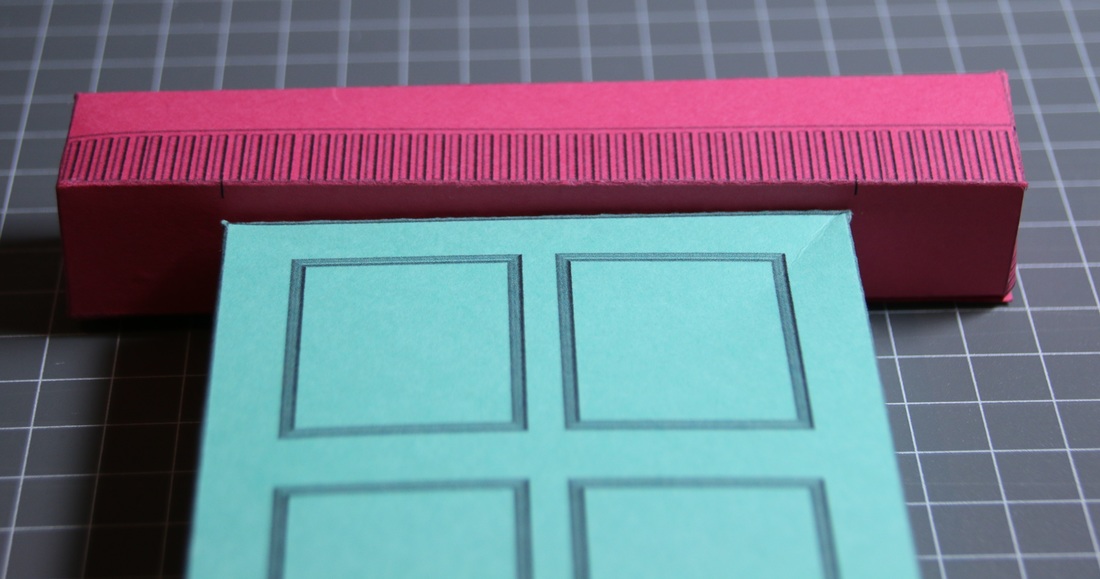
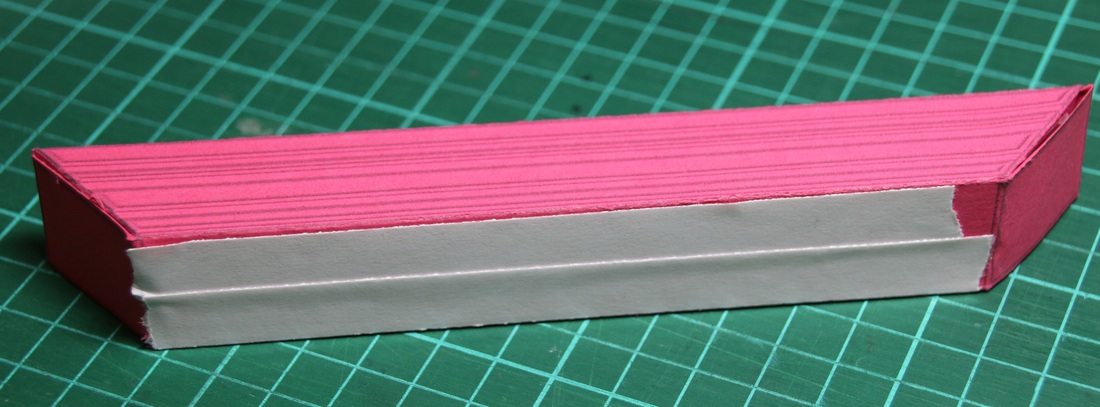
8. Using Double-sided tape, adhere the "Door Topper" onto the door, as shown. Use the positioning markers to centre the door.
The Door will be sunken, compared to the Door Topper at the front, but they will be level at the back. |
|
|
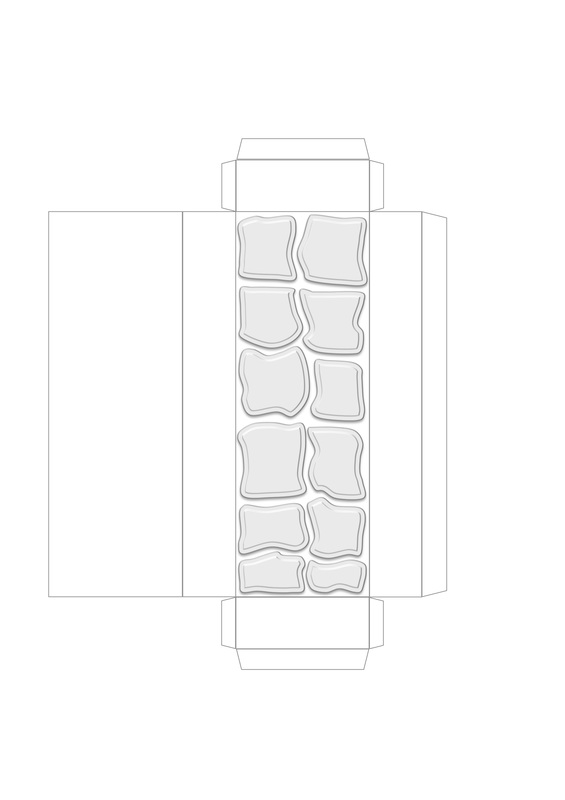
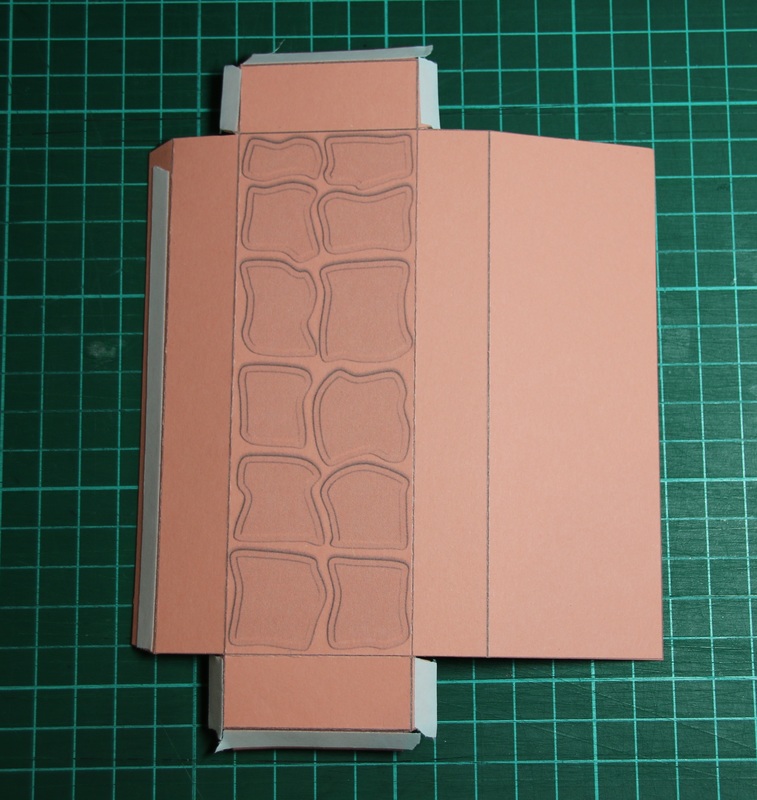
9. Print the "Side Column" template (pdf doc below) onto A4 Card, twice (x2).
|
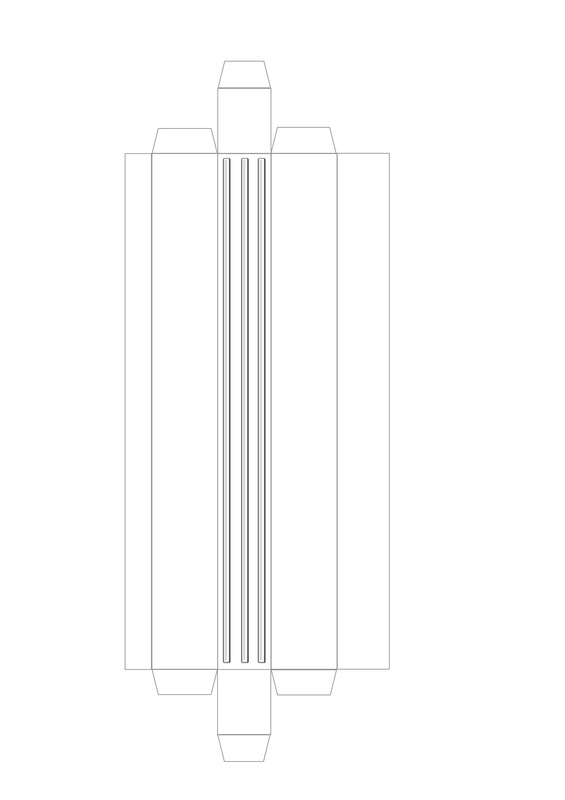
"Side Column" Template
| ||
|
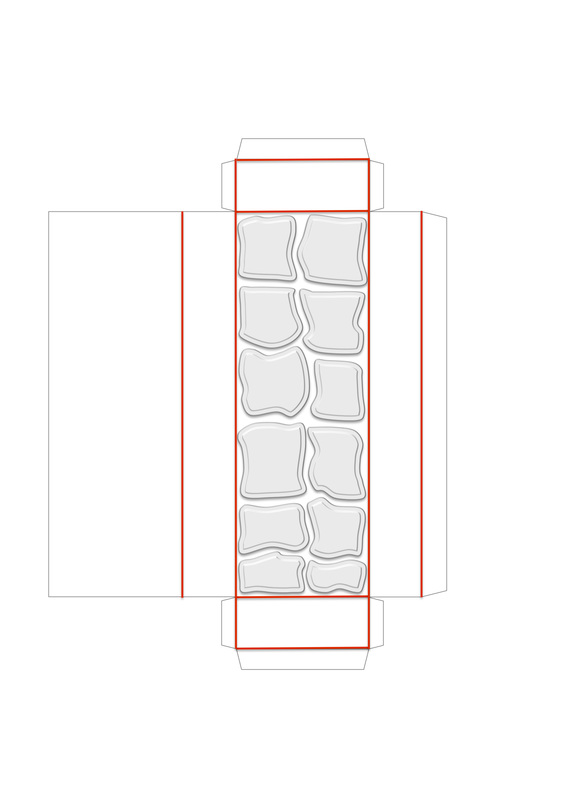
10. Cut out both the "Side Column" Templates, and score the lines, as shown in red.
|
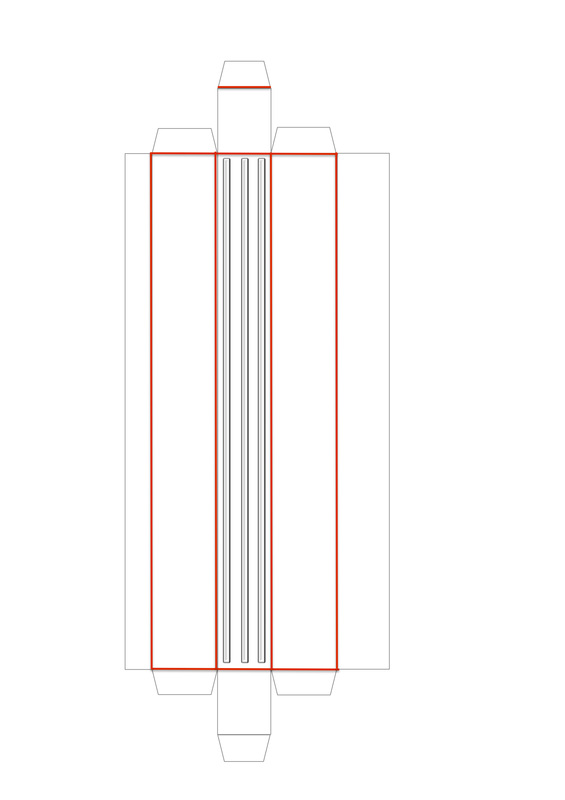
"Side Column" Template. Score Lines Marked.
|
|
11. Fold the templates along the scored lines and place double-sided sticky tape in the areas indicated (shown blue in the picture to the right)
|

"Side Column" Template - Where to place tape or glue
|
|
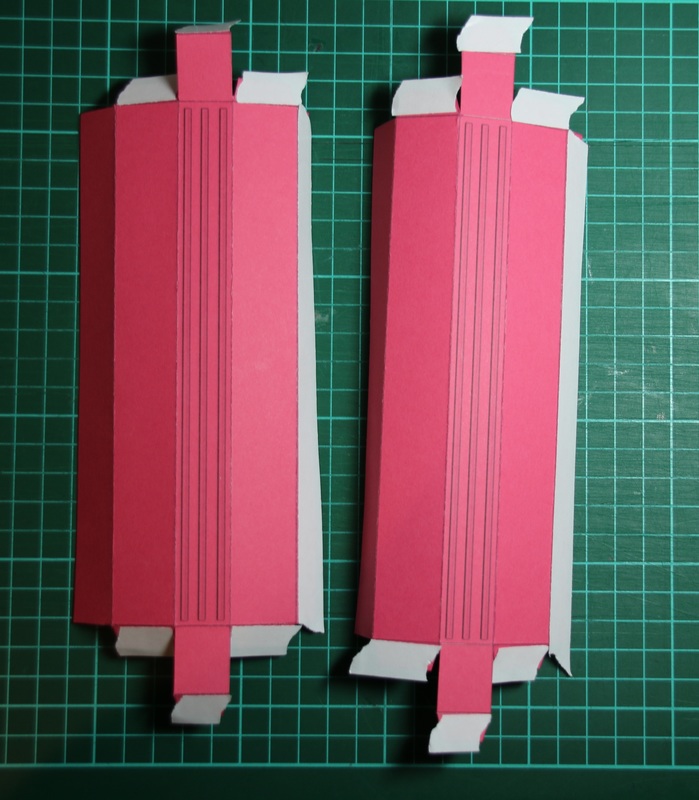
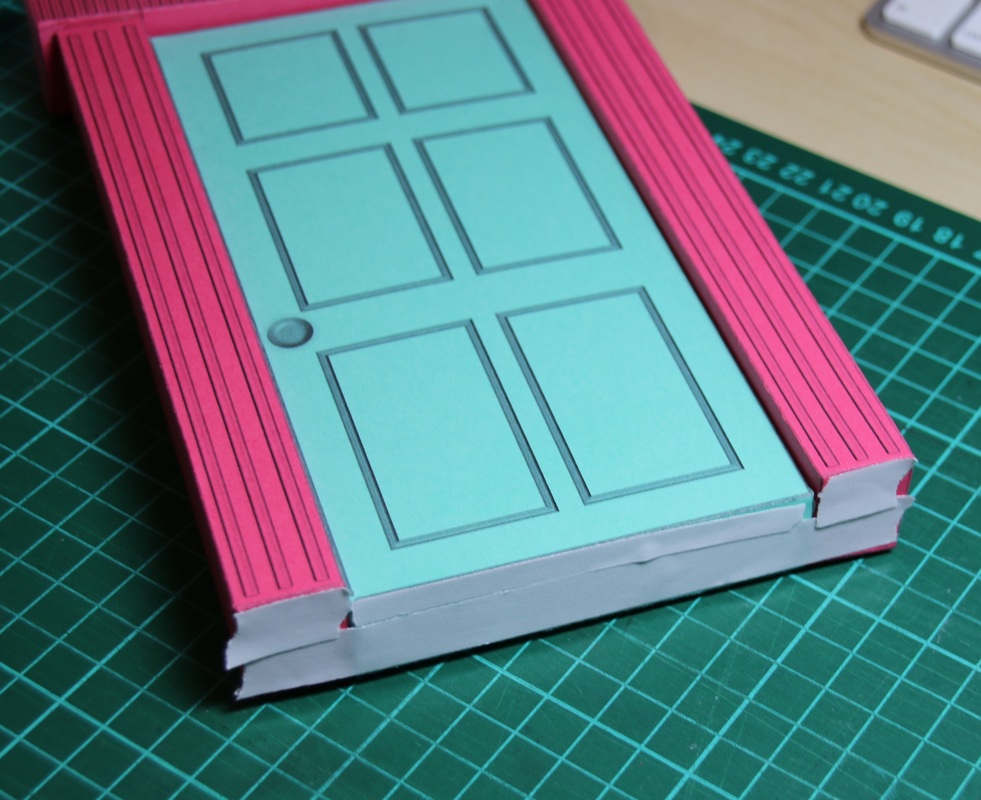
12. Fold the templates into a rectangular prisms and secure with the tape.
|

|
|
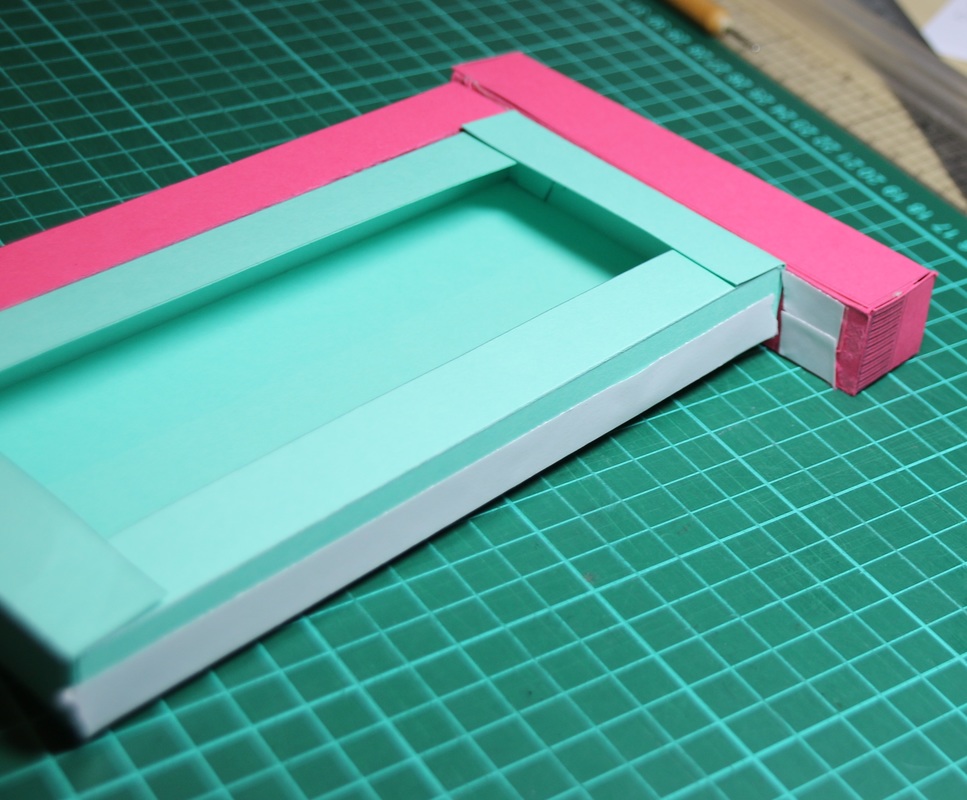
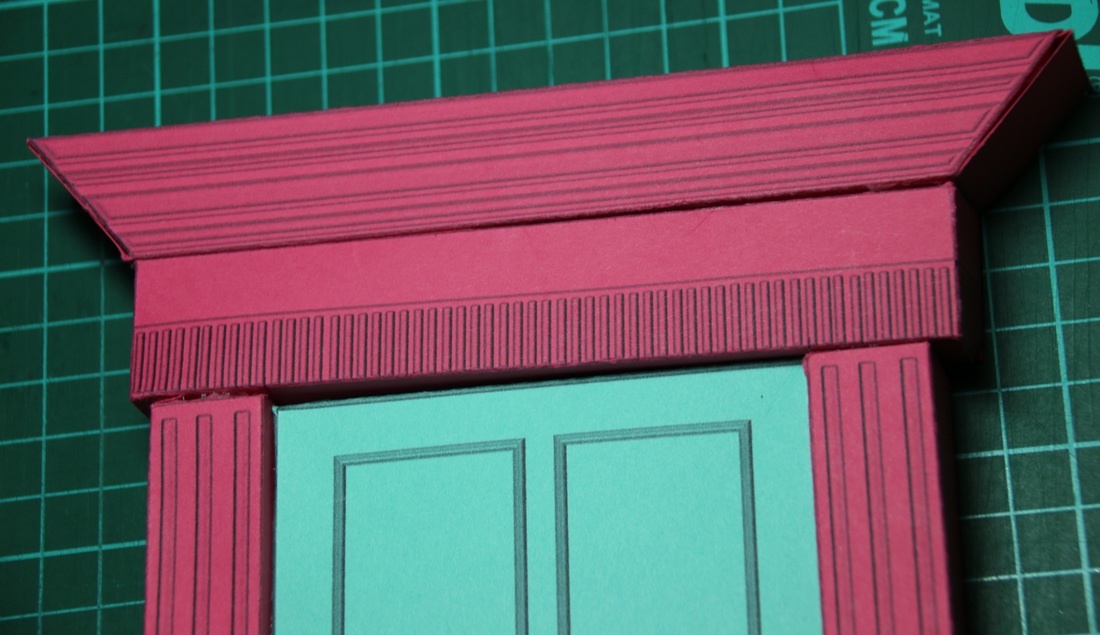
13. Attach the columns to the sides of the door using the Double-sided sticky tape.

|
|
|
14. Print the "Step" template (pdf doc below) onto A4 Card.
|
"Step" Template
| ||
|
15. Cut out the "Step" Template, and score the lines, as shown in red.
|
"Step" Template. Score Lines Marked.
|
|
16. Fold the templates along the scored lines and place double-sided sticky tape in the areas indicated (shown blue in the picture to the right)
|
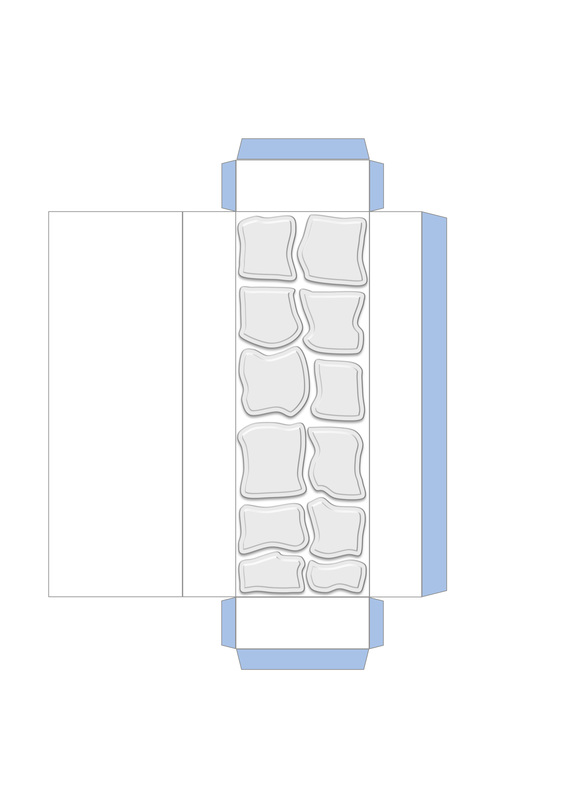
"Step" Template. Areas to glue marked.
|
|
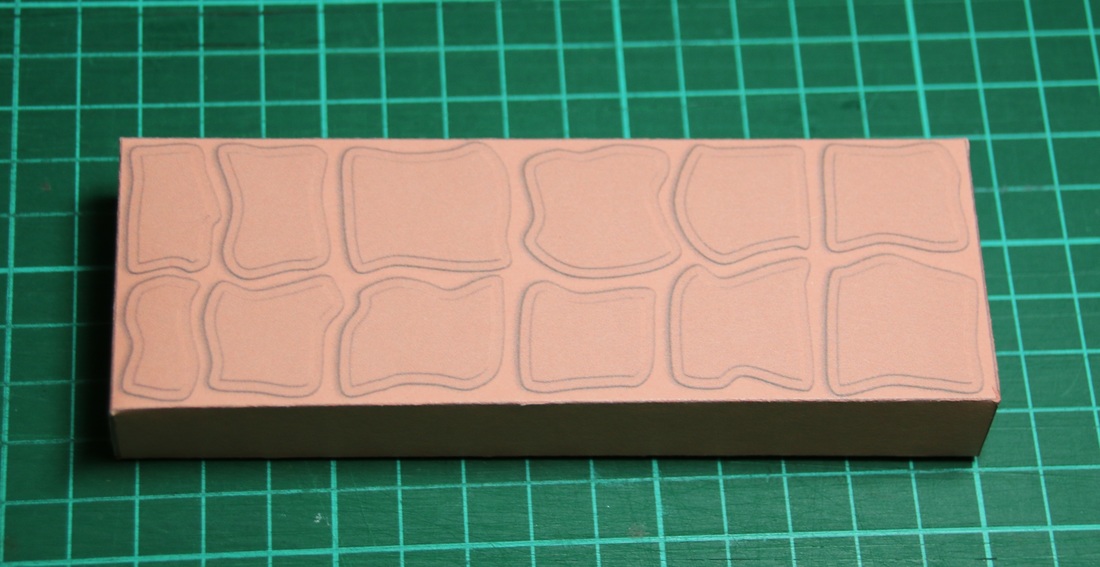
17. Fold the template into a rectangular prism and secure with the tape.
|
|
|
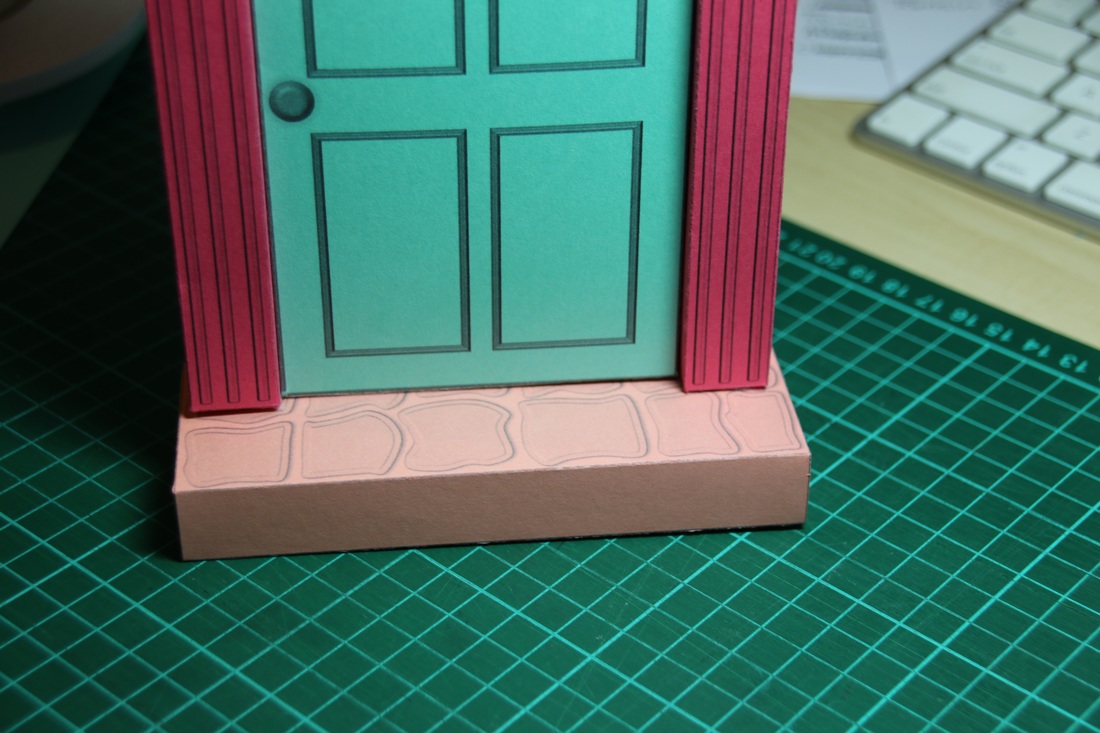
18. Attach the step to the bottom door using the Double-sided sticky tape.
|
|
|
19. Print the "Top Door Decoration" template (pdf doc below) onto A4 Card.
|
"Top Door Decoration" Template
| ||
|
20. Cut out the "Top Door Decoration" Template, and score the lines, as shown in red.
|
"Top Door Decoration" Template. Score Lines Marked.
|
|
21. Fold the templates along the scored lines and place double-sided sticky tape in the areas indicated (shown blue in the picture to the right)
|
"Top Door Decoration" Template. Areas to be taped are marked.
|
|
22. Fold the template , as shown in the picture, and secure with the tape.
|
|
|
23. Attach the "Top Door Decoration" to the top of the door using Double-sided Sticky Tape.
|
|
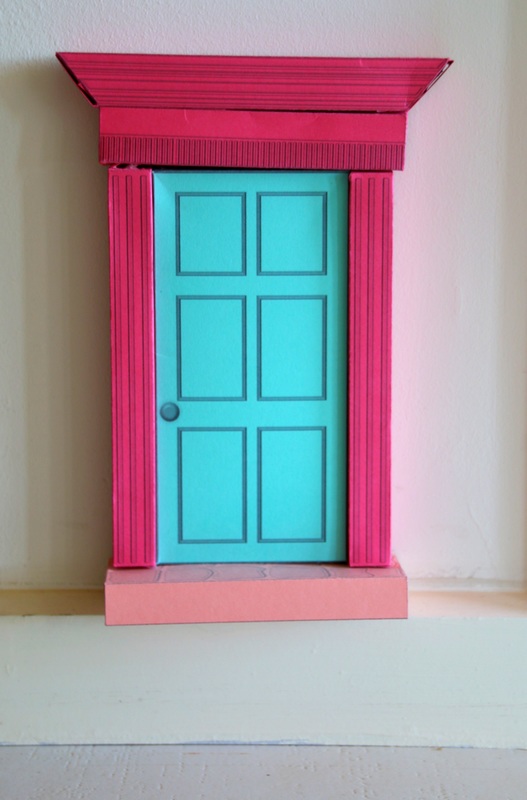
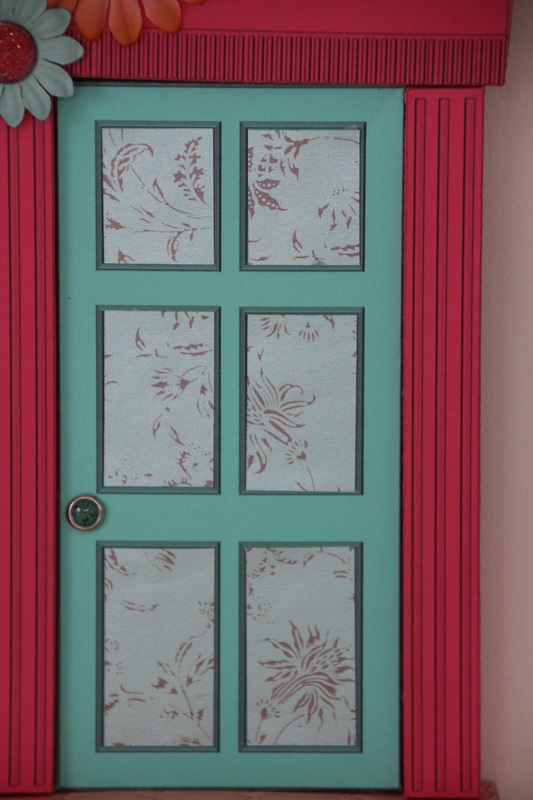
24. Decorate your Fairy Door
|
DECORATION IDEAS:
1. Create Decorative Squares for the door: Print the "Door Squares for decoration" template (pdf doc below) onto THE BACK of decorative A4 paper.
Cut out the squares and tape or glue them onto the door.
|
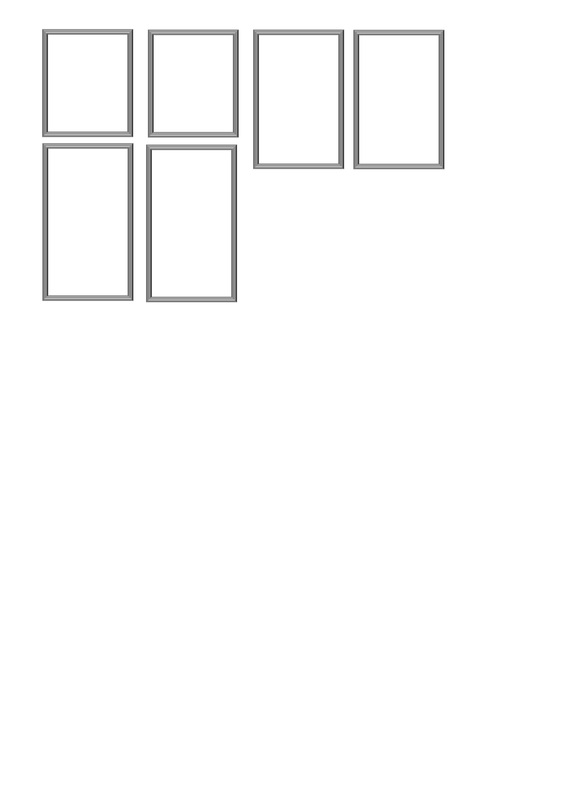
"Door Squares for Decoration: Template
| ||
2. Attach a handle: Use a decorative split pin (Brad) or button.
3. Flowers, beads, rhinestones...