Stained Glass Window
Please consider supporting me :)
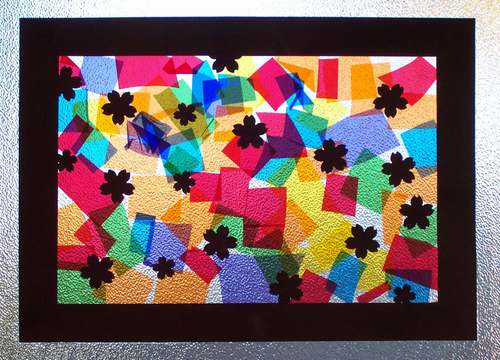
These look so colourful on the window, especially one where the sun shines through, or where it is sunny outside.
Materials
1. Contact
2. Cellophane in different colours
3. Piece of Black A4 paper or light card
4. Scissors or craft knife
5. Paper punches in different shapes (optional)
6. Ruler
7. Lead pencil
Materials
1. Contact
2. Cellophane in different colours
3. Piece of Black A4 paper or light card
4. Scissors or craft knife
5. Paper punches in different shapes (optional)
6. Ruler
7. Lead pencil
|
Instructions
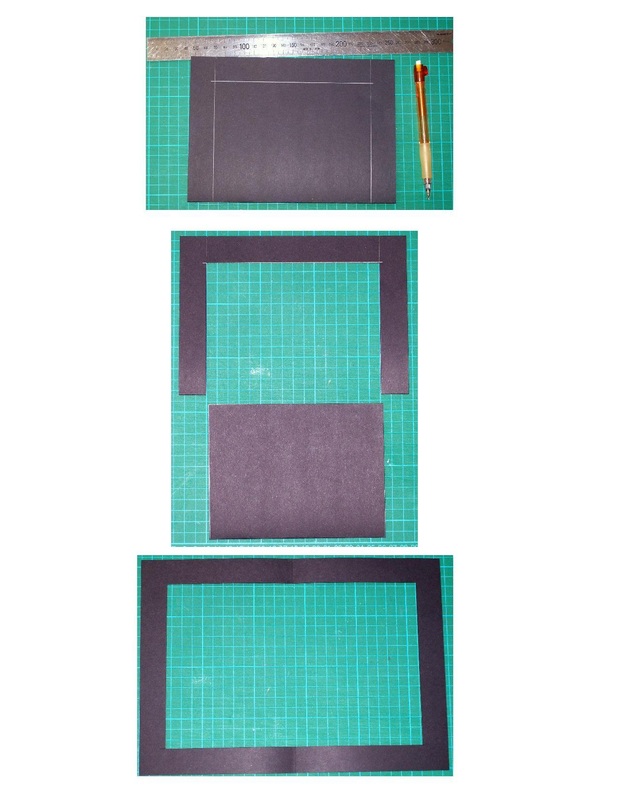
1. Fold the piece of A4 paper in half, and using a ruler, mark a border around the edges (apart from the fold) as shown. Cut out and remove the centre portion of the paper using a craft knife or scissors. Open out the outer piece of paper to form a frame. |
|
|
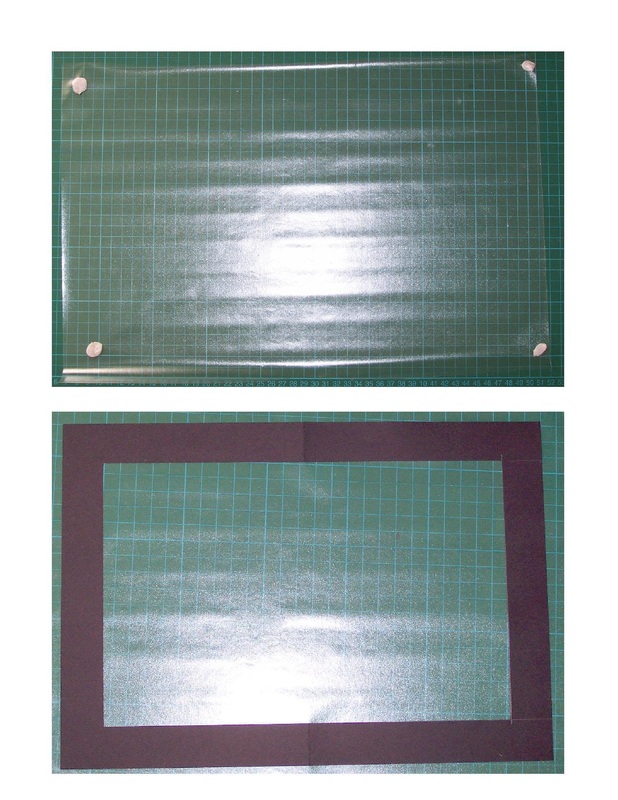
2. Cut a piece of contact that is larger than your frame. Use blu-tack to attach it to the table, contact (non-sticky) side down, and then remove the covering paper (the sticky should face up). The blu-tack holds it in place and stops it from curling up. Attach your frame to the contact, as shown, making sure that there is a border of contact around the outside of the frame.
|
|
|
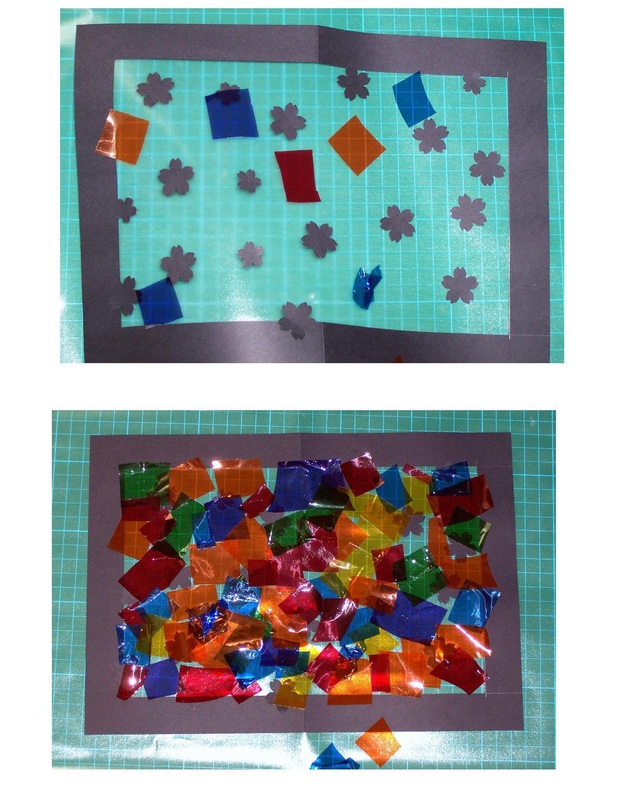
3. Punch out shapes from black paper (if desired). Arrange the punched out shapes onto the contact in side the frame first. Then cut up your different colours of cellophane inso small pieces, aproximately 1.5 - 2.0 cm square is about the right size. Arrange the coloured pieces of cellophane over the contact inside the frame. It is fine if it overlaps and doesn't matter if not all of every piece is stuck down.
|
|
|
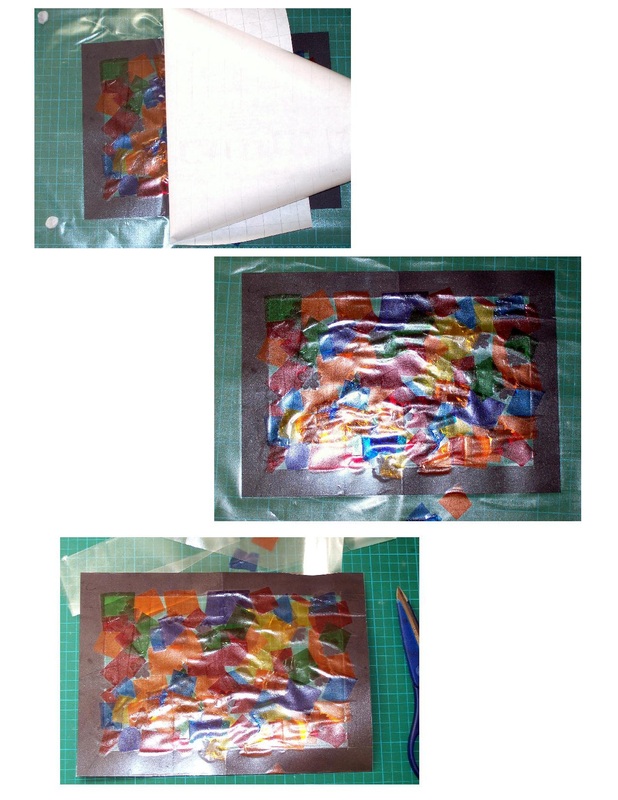
4. Cut another piece of contact larger than the frame, and apply it carefully over the arranged cellophane, as shown.
I prefer to leave the backing on the contact and remove it slowly as I work my way across the artwork, carefully applying it to avoid bubbles and crumples. You can use a ruler to help you smooth the contact on. Trim the excess contact from around the frame using scissors or craft knife. Rub the contact firmly with your hands to adhere it down and remove any bubbles. |
|
|
5. Use blu-tack to attach your stained glass to a window.
|

|