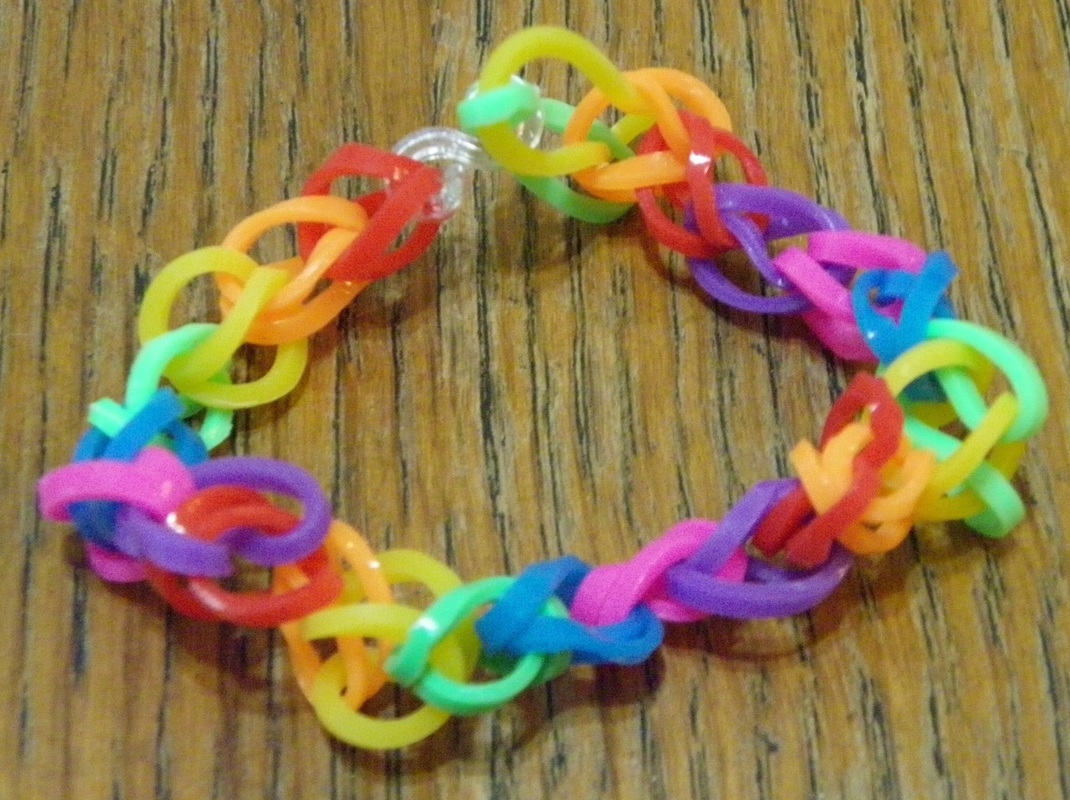
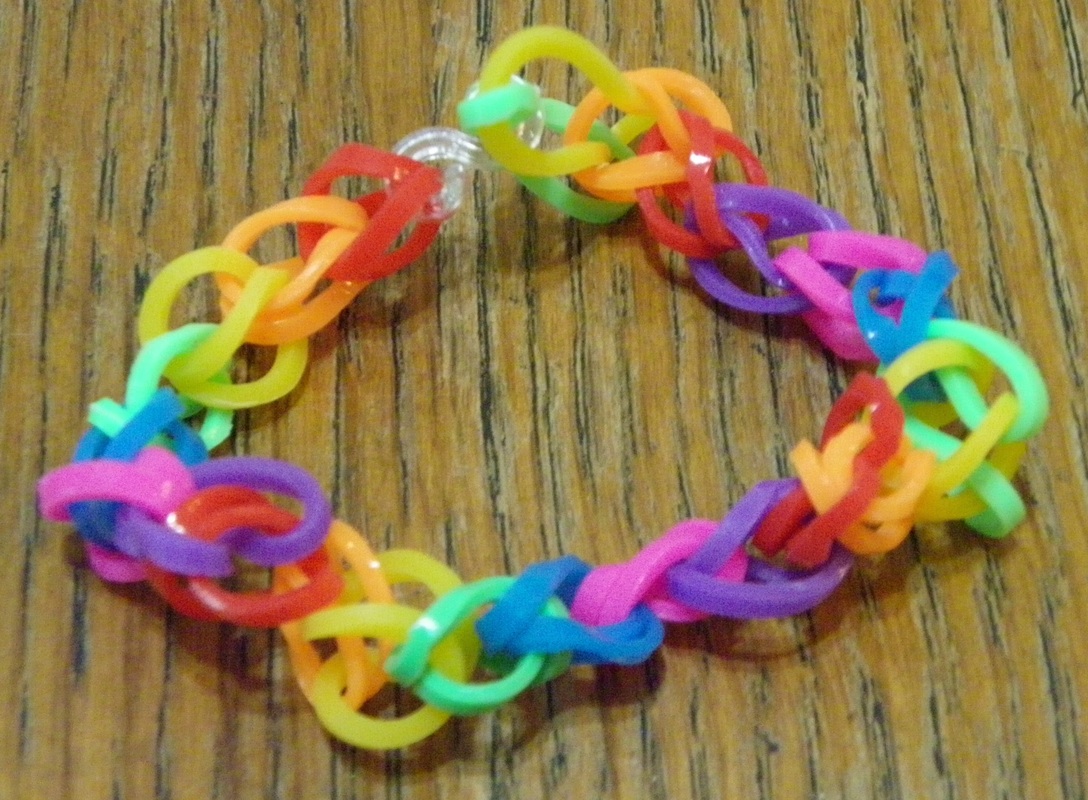
Single Chain Bracelet
Please consider supporting me :)

|
|
Instructions
Step 1
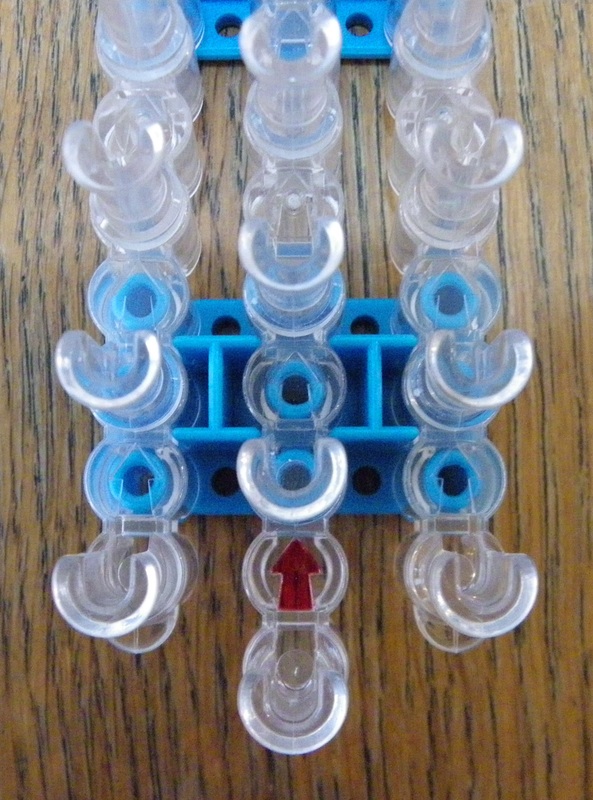
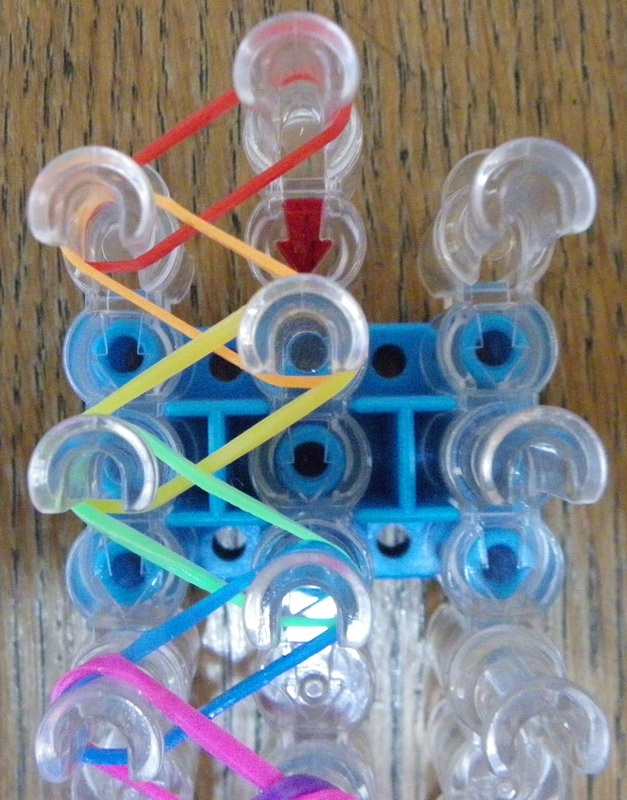
Place the loom in a staggered configuration, with the red arrow pointing away from you.
Place the loom in a staggered configuration, with the red arrow pointing away from you.
Step 2
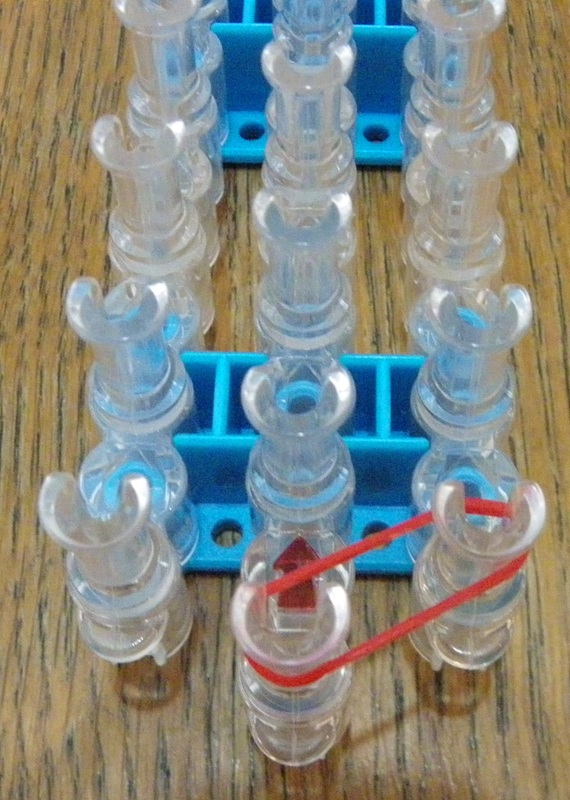
Place your first band from the centre peg to the right peg.
Place your first band from the centre peg to the right peg.
Step 3
|
|
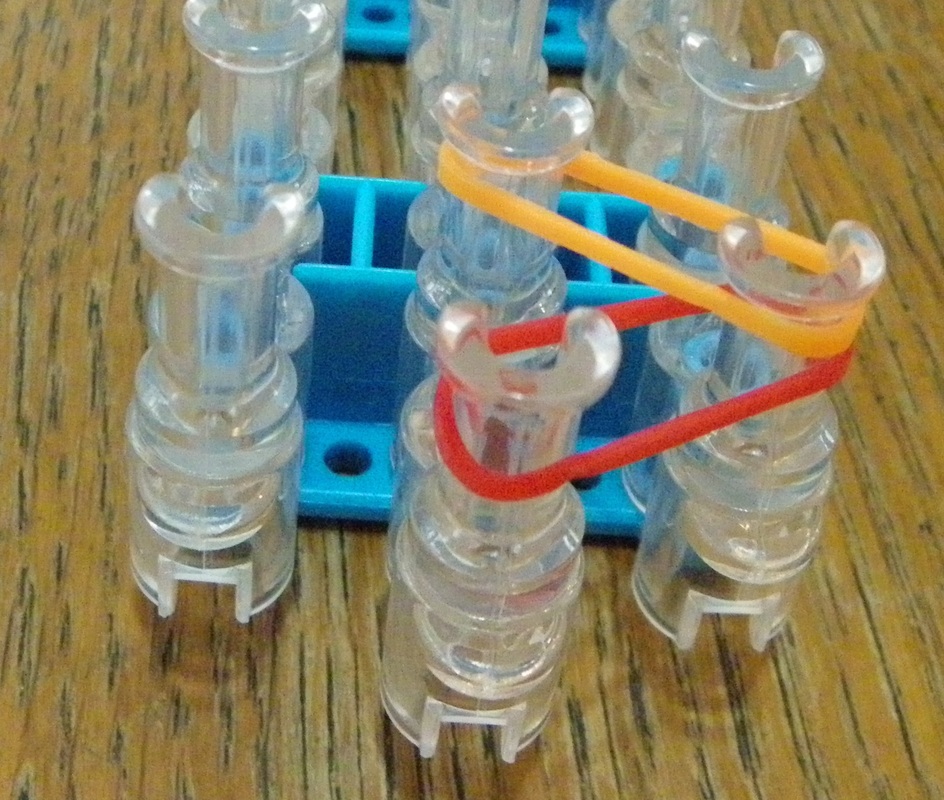
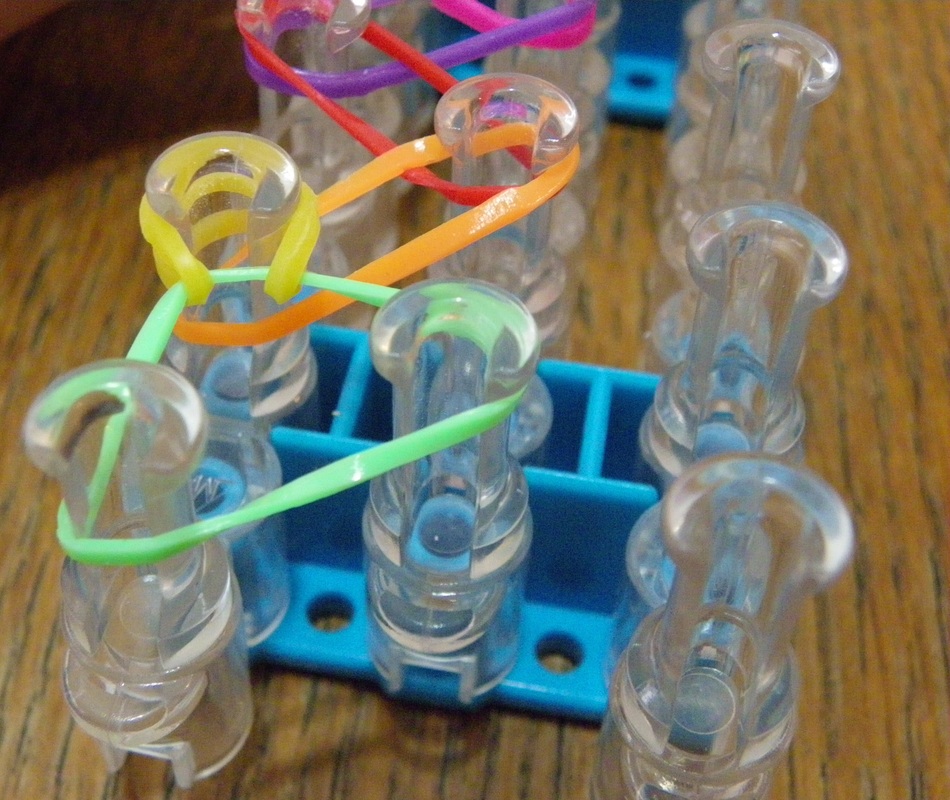
Place your second band on the loom from the left peg to the centre peg, in a zig-zag pattern.
Remember to push down the bands as you go.
Remember to push down the bands as you go.
Step 4
|
|
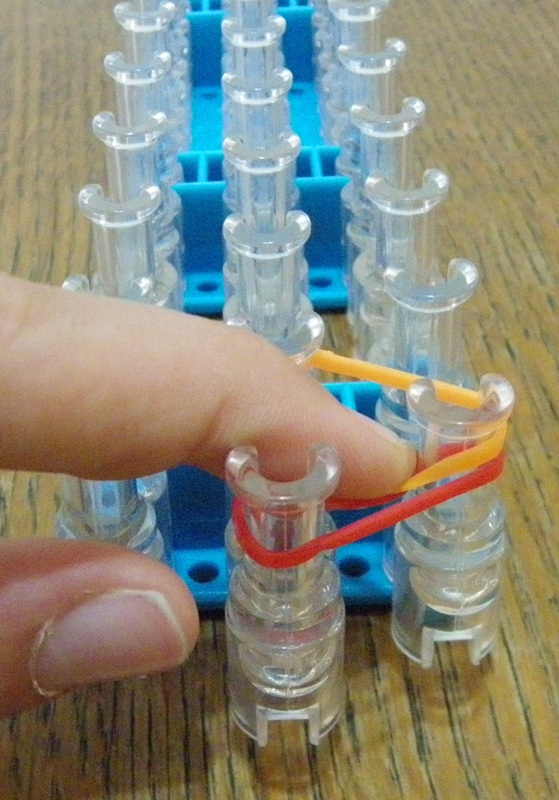
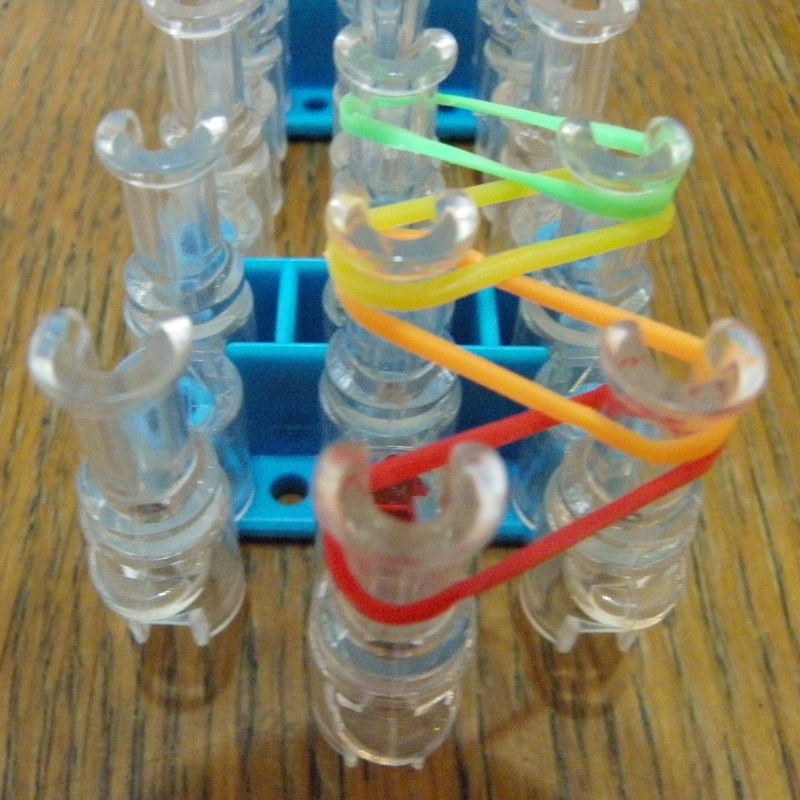
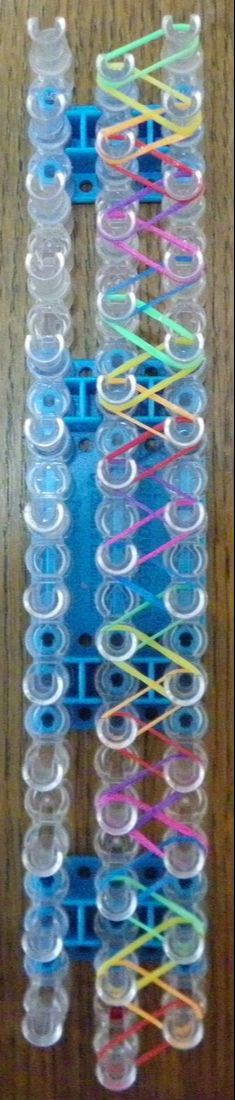
Continue placing bands in a zig-zag pattern along the loom, until you reach the end of the loom.
Step 5
Turn your loom around so that the red arrow is at the far end away from you, but the arrow is pointing towards you.
Step 6
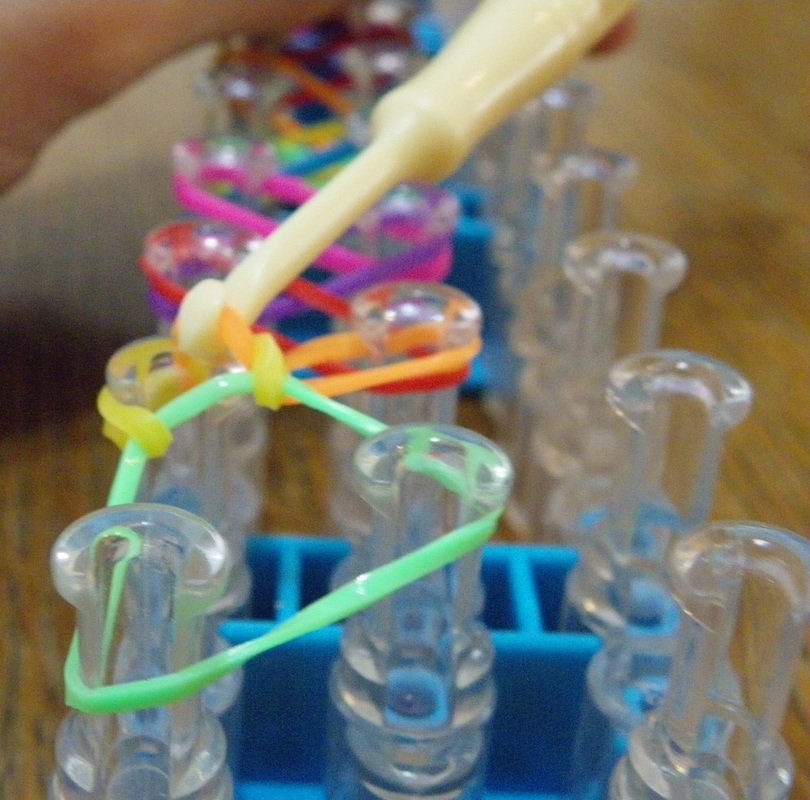
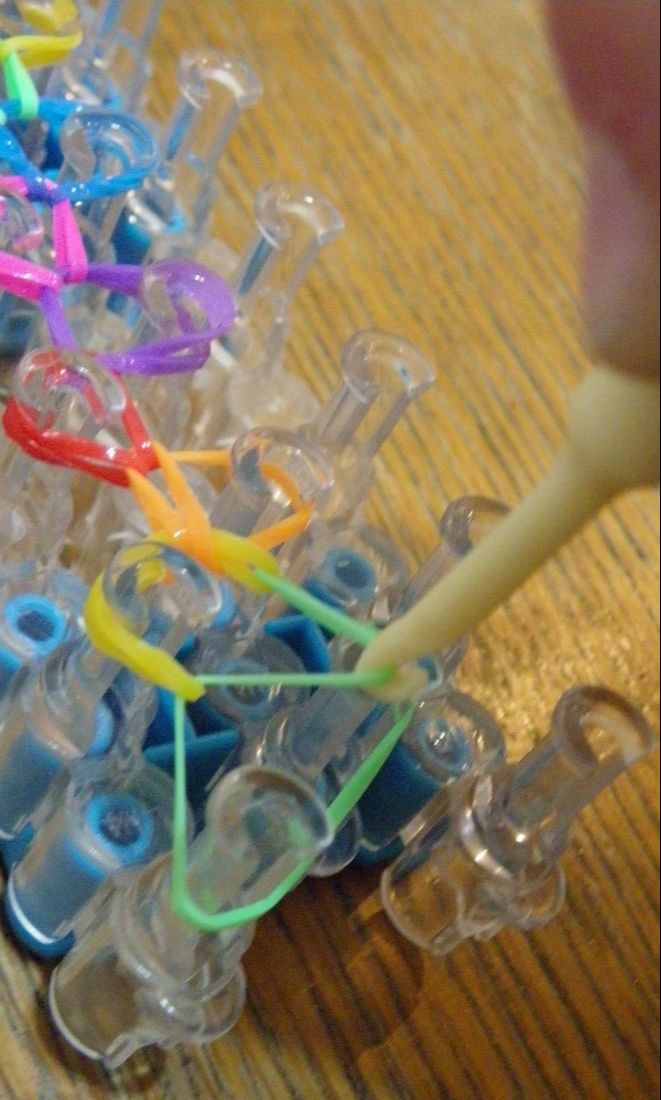
|
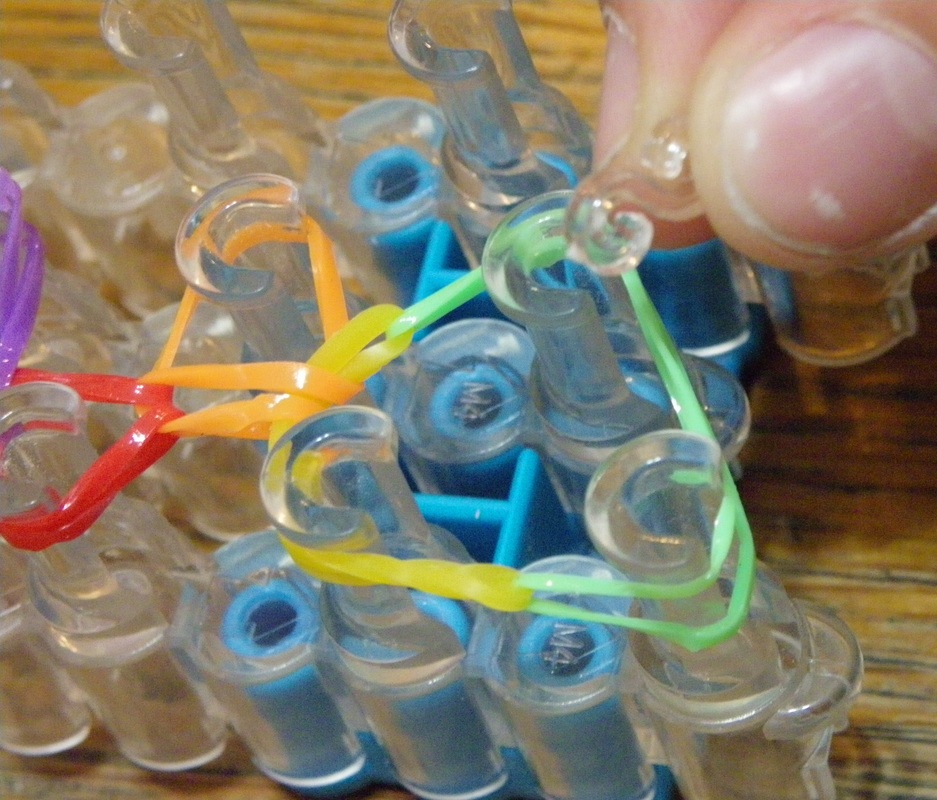
We are now working at the end of the loom without the red arrow.
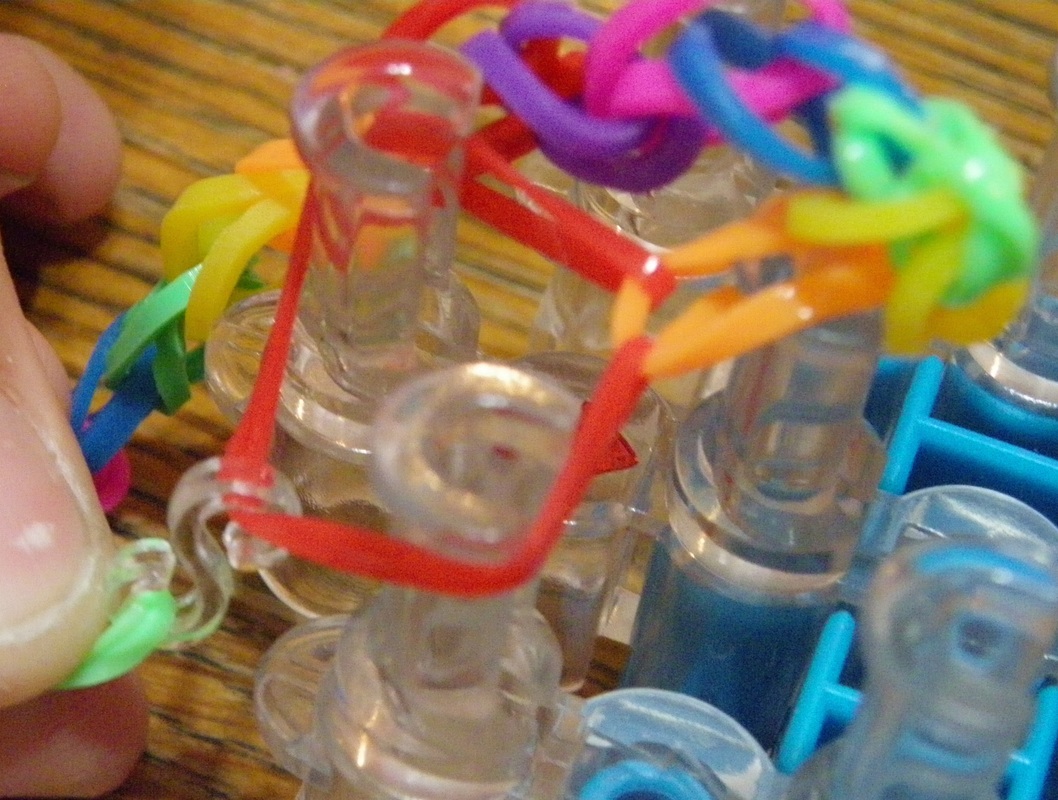
Place your hook within the hollow of peg 2 ( the first (green) and second (yellow) bands both wrap around peg 2) . Grab hold of the second (yellow) band with the hook. Lift the yellow band off peg 2, gently removing it from underneath the green band (the green band is caught in the yellow band but stays on peg 2) Loop the second (yellow) band over onto peg 3. The first (green) band is caught in the second (yellow) band and is pulled to make a triangle shape. 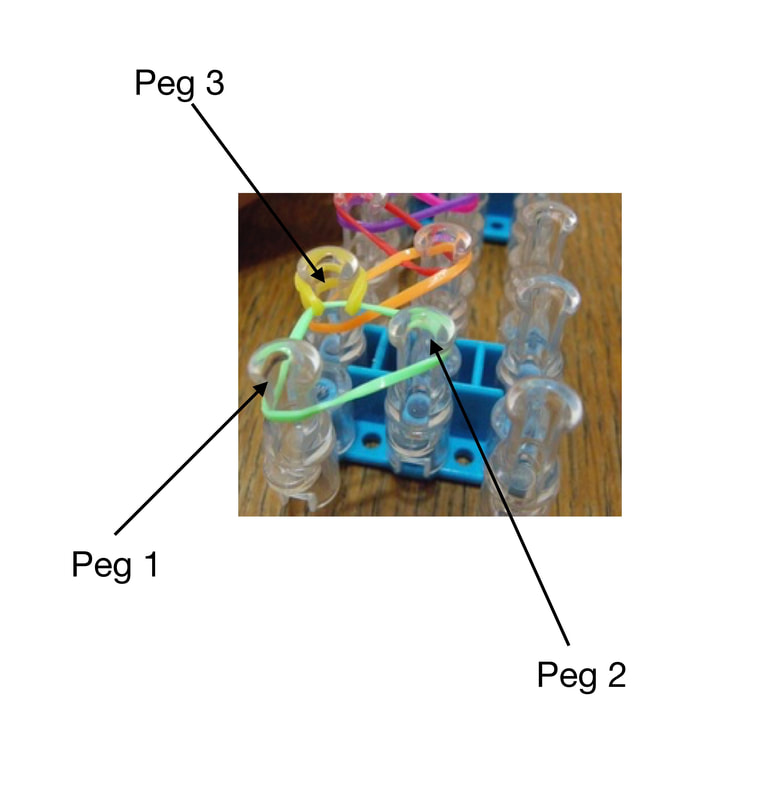
|

Place the hook in the hollow of peg 2

Gently lift off the second (yellow) band, leaving the first (green) band in place.
The green band is caught up in the yellow band
The yellow band looks around the green band onto peg 3
|
|
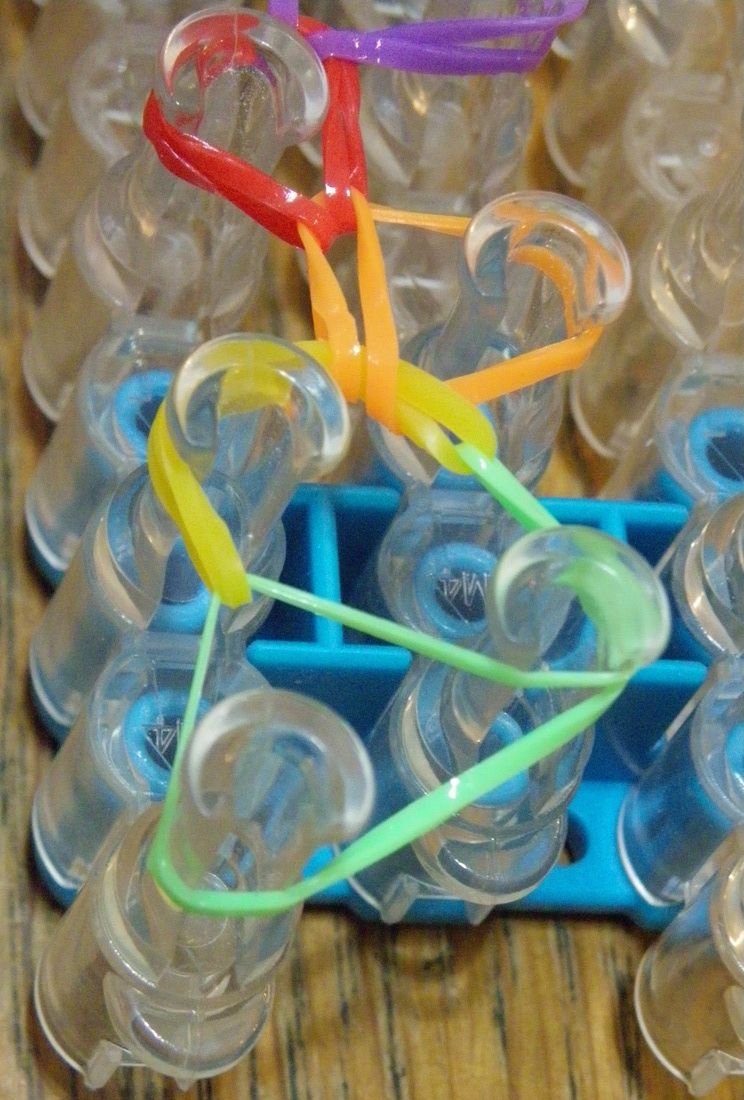
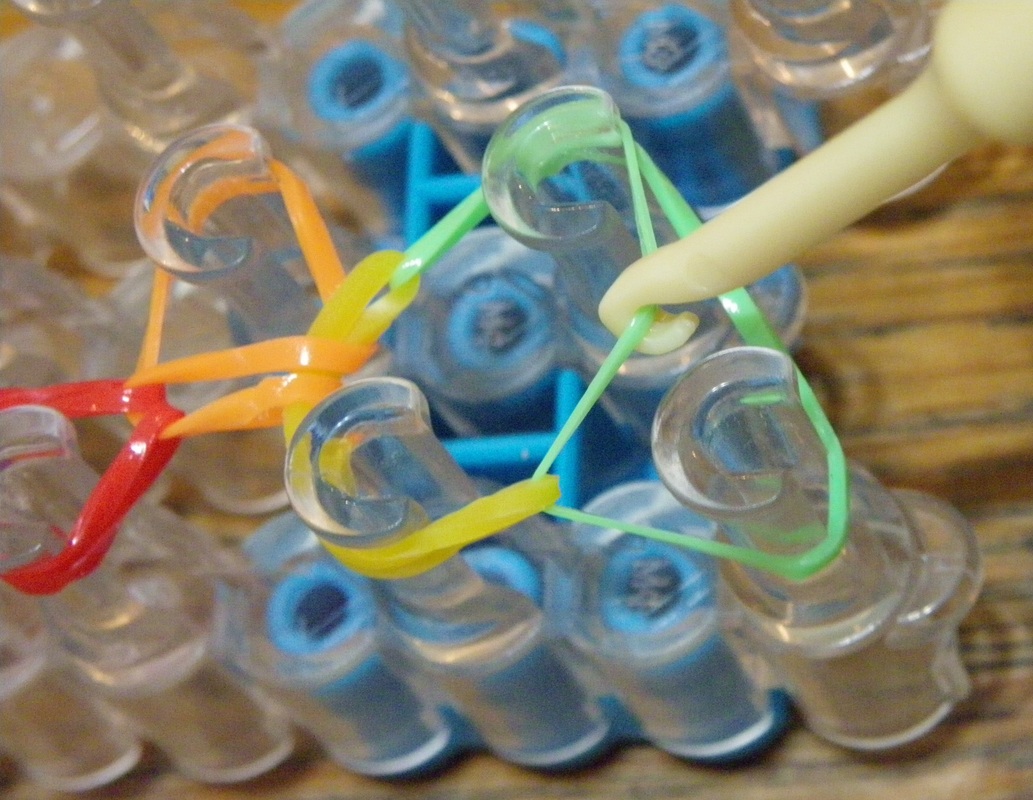
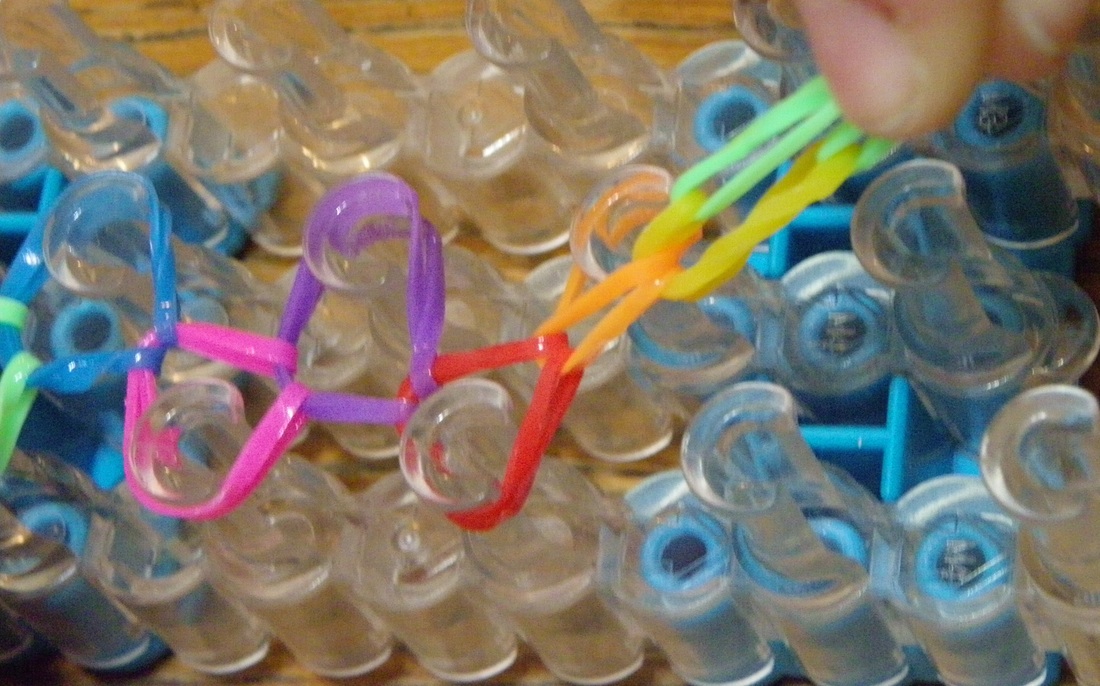
Step 7
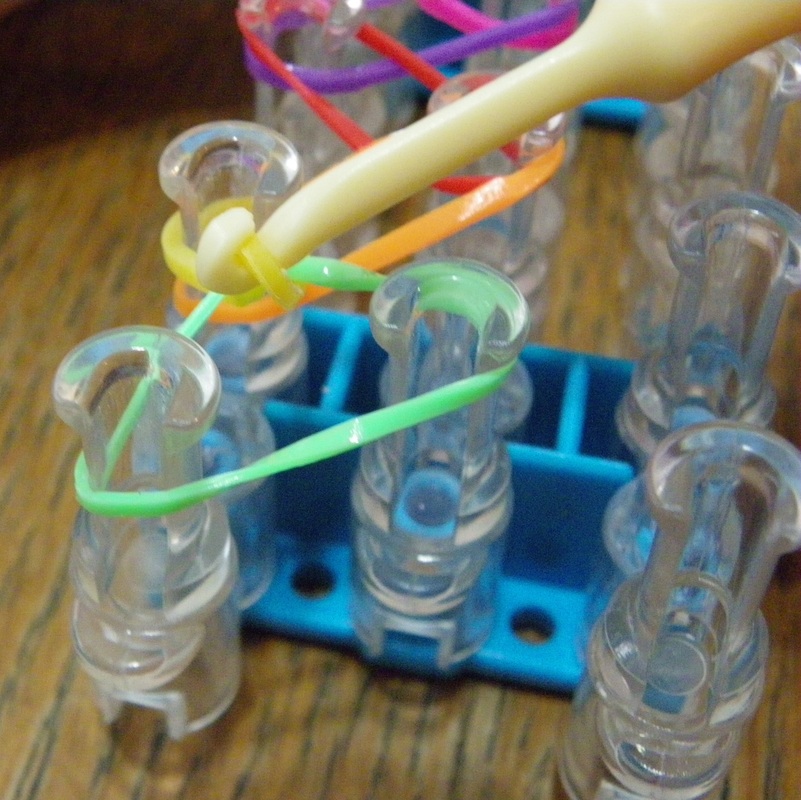
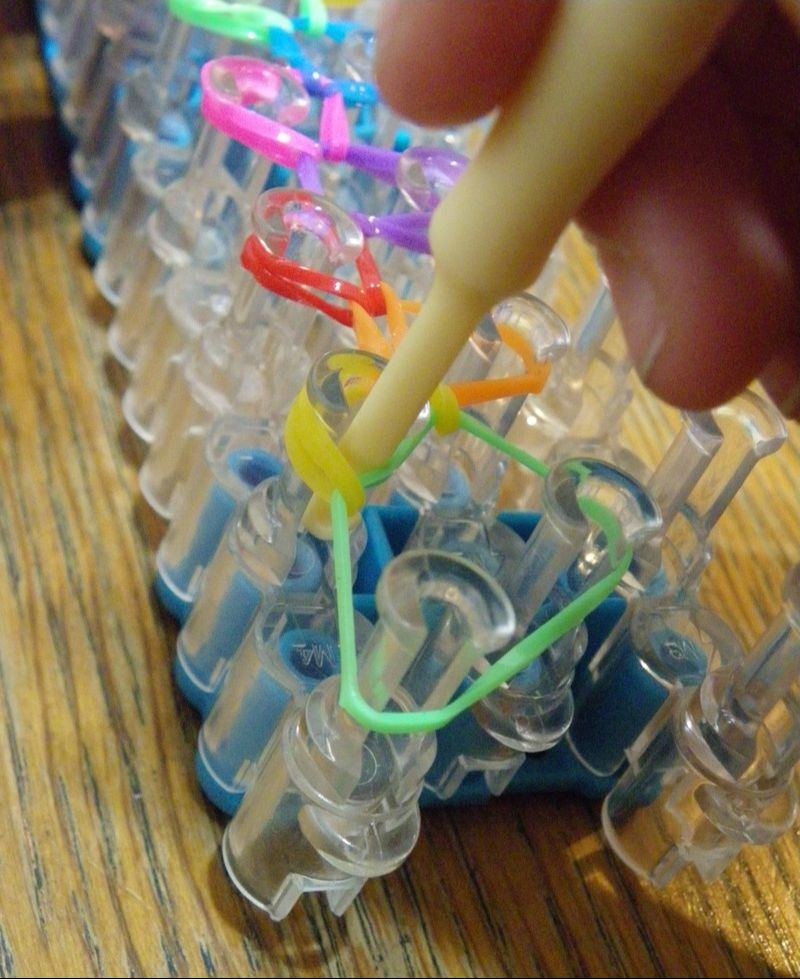
Repeat step 6 on every subsequent band until you reach the end of the loom, looping each band back over to itself catching the previous band in its loop. |
The orange band is being looped back to itself, catching the yellow band.
|
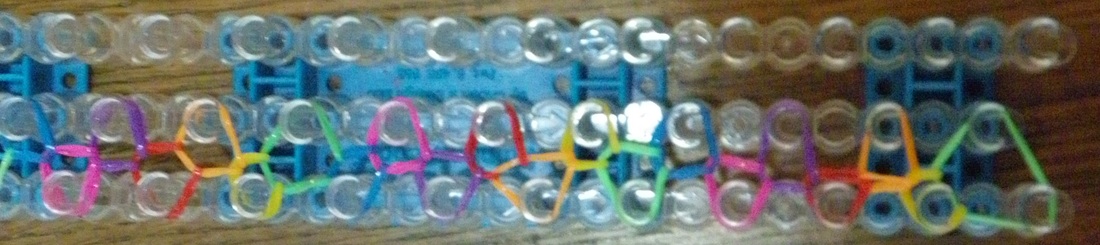
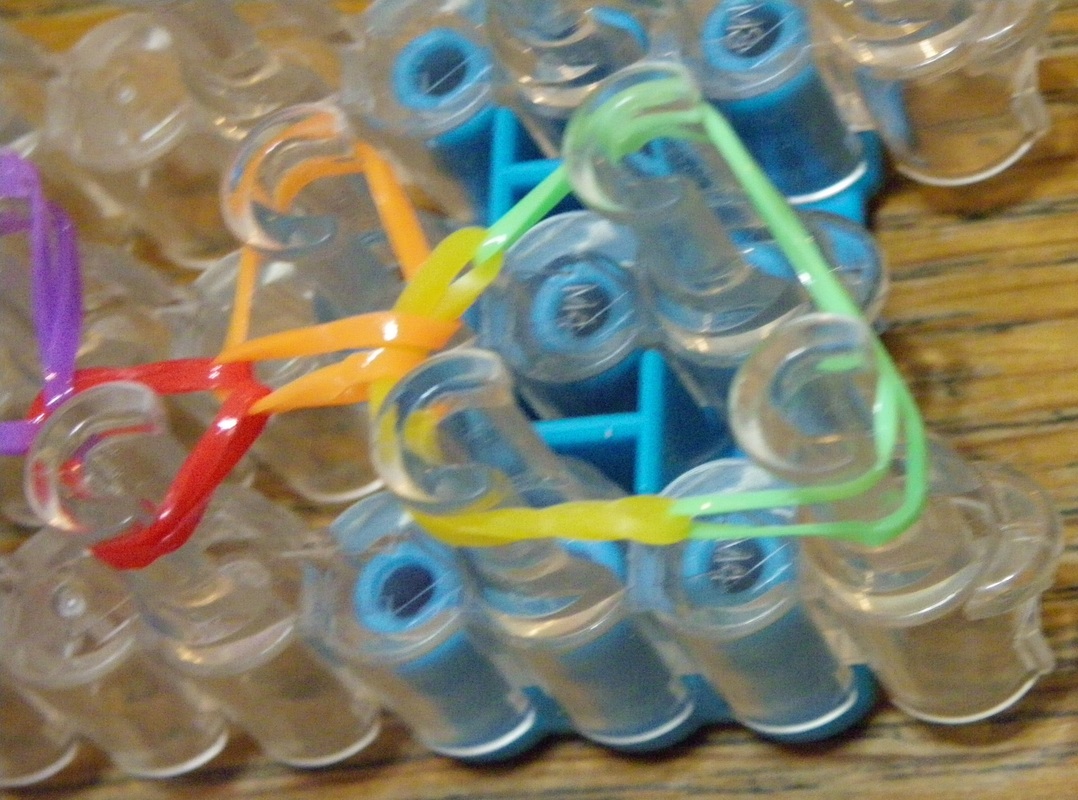
Once you have looped the last band your loom should look like this.
|
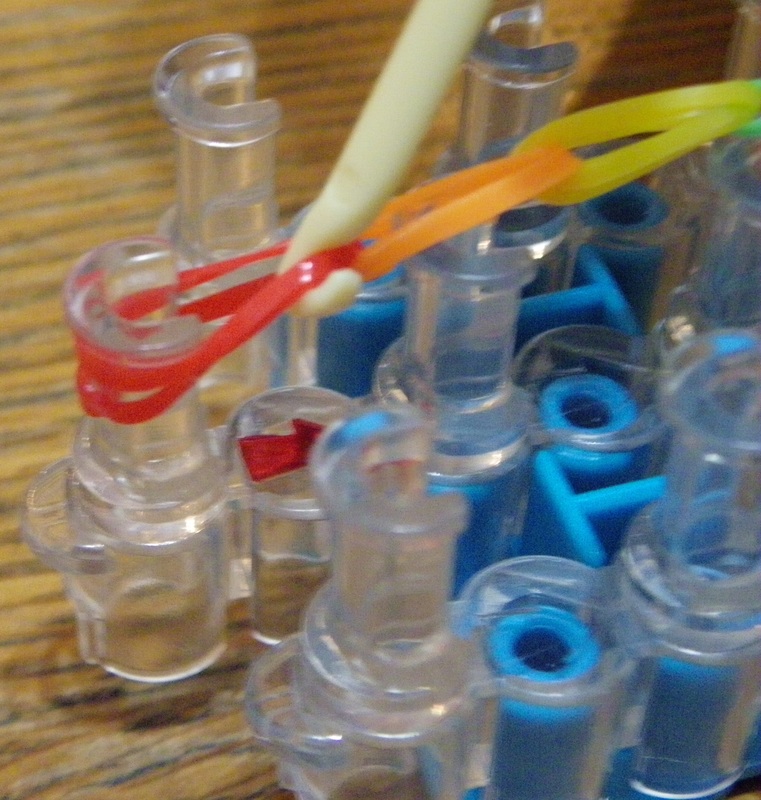
Step 8
Put your hook in the hollow of peg 3. With your hook pull the first (green) band over towards peg 2. Place the band over peg 2. |
|
|
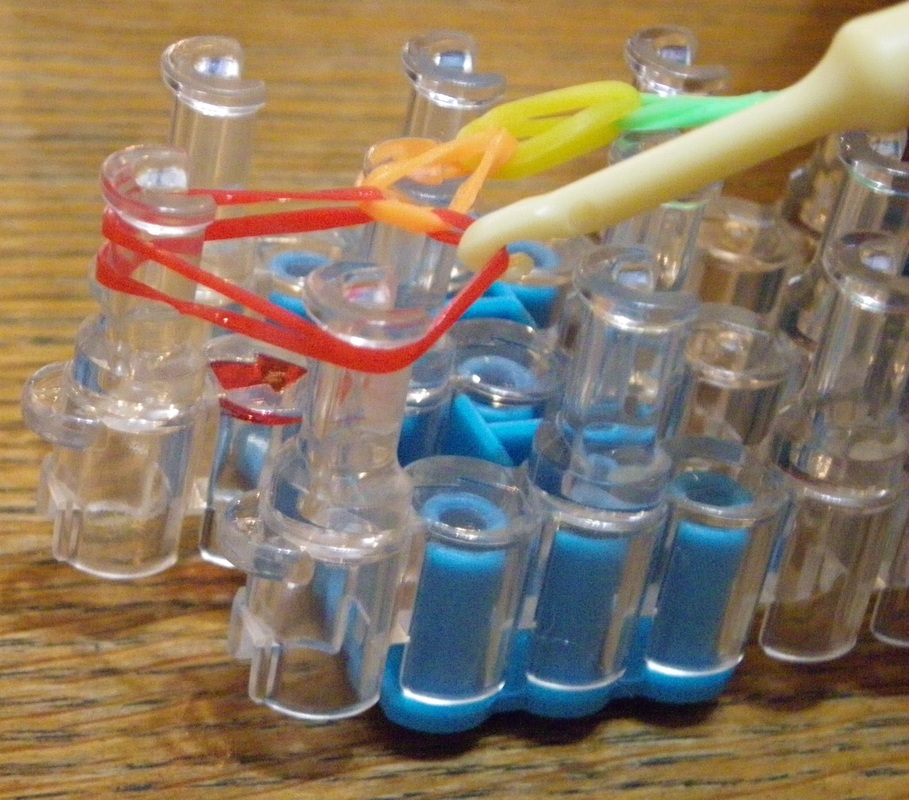
Step 9
Take the first (green) band with your hook and loop it around the first peg. |
|
|
Step 10
Take an S-clip or C-clip and place it down over the first (green) band. |
|
|
Step 11
Holding the S-clip or C-clip , gently pull all the bands off the loom, except for the last band. |
|
Step 12
Turn the loom around so that the red arrow end is closest to you.
Using your hook, grab the last band, pull it over and place it over the right peg.
Turn the loom around so that the red arrow end is closest to you.
Using your hook, grab the last band, pull it over and place it over the right peg.
Place the band on the right peg.
Step 13
Loop the S-clip or C-clip onto the last band and remove the bracelet off the loom.
Loop the S-clip or C-clip onto the last band and remove the bracelet off the loom.