Numbered Birthday Card
Thanks for your support!

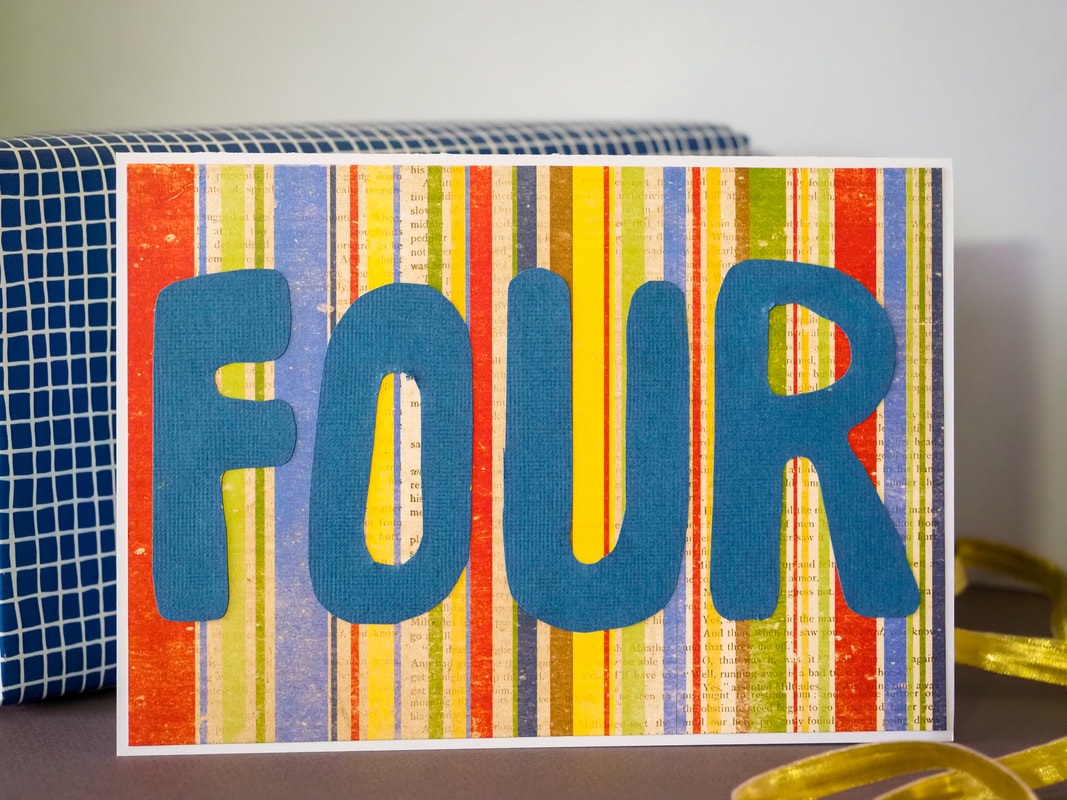
Need to make a quick birthday card and you're are short on time or inspiration? An easy an effective card can be made with hand-cut letters and an interesting background.
Materials Required:
1. Light card or paper from which to cut out the letters. Dark, solid colours work well for the letters.
2. A piece of patterned backing paper, which should match the colour of the card used for the letters
3. Pen or pencil
4. Scissors or a craft knife
5. Craft glue or double sided sticky tape
6. Base card stock, from which to make the card
Instructions:
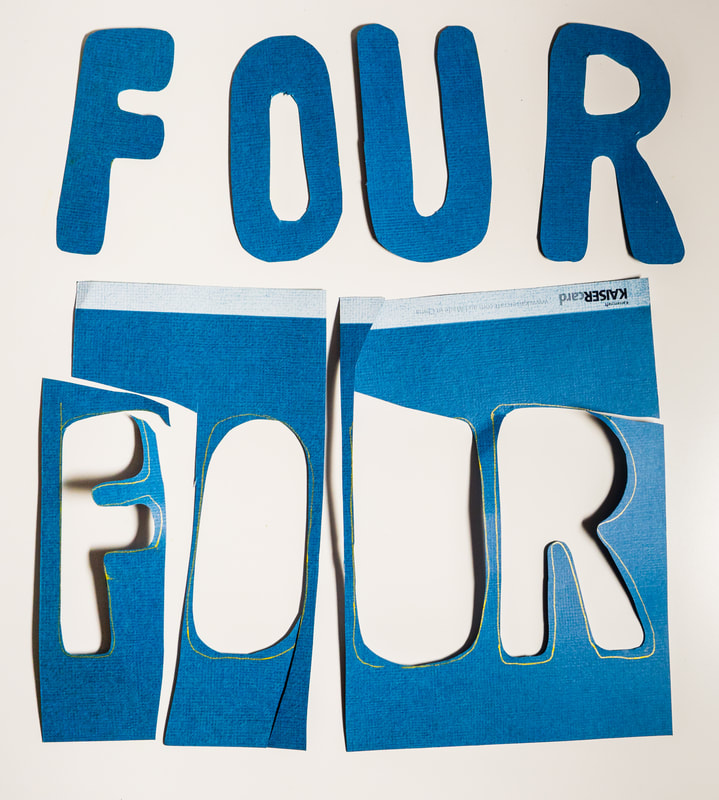
1. Hand write your required number onto the solid coloured card using bubble letters. Remember that you will need to cut these out just INSIDE the line you draw (so the line isn't in your finished product) so make sure that the letters are slightly bigger than what you need, and that the parts to be cut out of your letters - like the inside of an 'O' or the hole in the top of an 'R' - are drawn slightly smaller than your desired finished product. BEFORE you start drawing, think about what size your letters should be - does the finished card need to fit in a particular sized envelope, or does it need to be posted and be within certain size limitations? Whatever size of the finished card needs to be, your letters will need to fit comfortably onto that card.
2. Use scissors or a craft knife to cut out the letters.
1. Light card or paper from which to cut out the letters. Dark, solid colours work well for the letters.
2. A piece of patterned backing paper, which should match the colour of the card used for the letters
3. Pen or pencil
4. Scissors or a craft knife
5. Craft glue or double sided sticky tape
6. Base card stock, from which to make the card
Instructions:
1. Hand write your required number onto the solid coloured card using bubble letters. Remember that you will need to cut these out just INSIDE the line you draw (so the line isn't in your finished product) so make sure that the letters are slightly bigger than what you need, and that the parts to be cut out of your letters - like the inside of an 'O' or the hole in the top of an 'R' - are drawn slightly smaller than your desired finished product. BEFORE you start drawing, think about what size your letters should be - does the finished card need to fit in a particular sized envelope, or does it need to be posted and be within certain size limitations? Whatever size of the finished card needs to be, your letters will need to fit comfortably onto that card.
2. Use scissors or a craft knife to cut out the letters.
3. Make a card base to the size you require. Cut a piece of the patterned backing paper to fit onto the front of the card, leaving a margin on 2-3mm around the edges. Use the tape or glue to attach this to the front of the card.
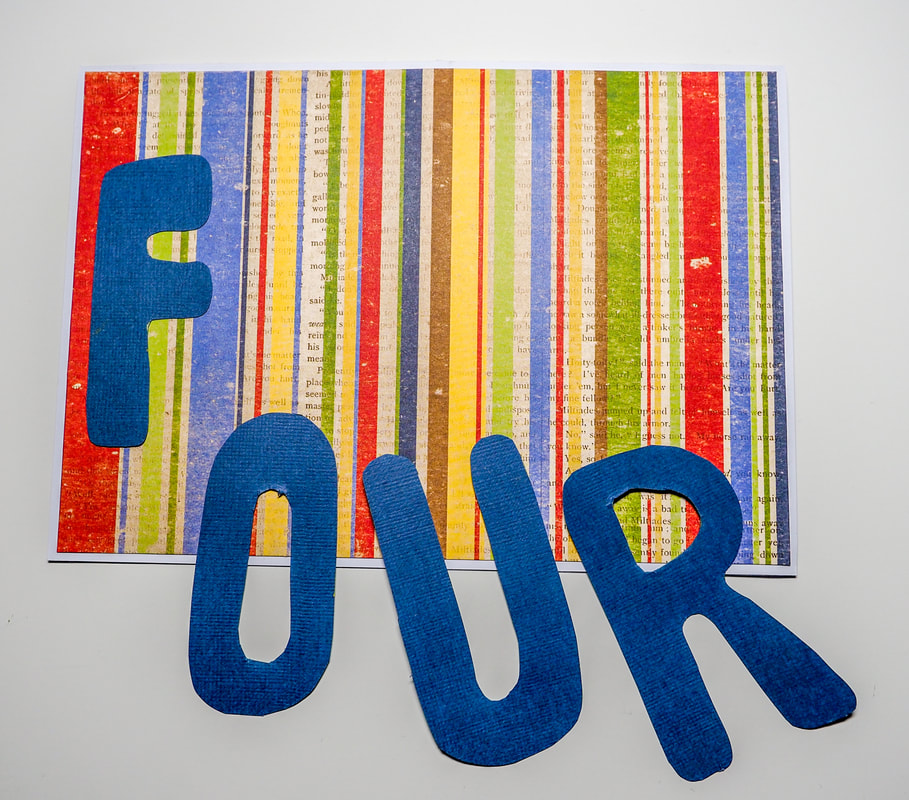
4. Position the letters onto the front of your card. Once you have worked out how they look best, stick them down using the glue or tape. I find it best to do this one letter at a time, leaving the loose letters sitting on the card while you attach each letter. This helps me to position each letter in the place I had determined for it, and gets me a better result at the end.