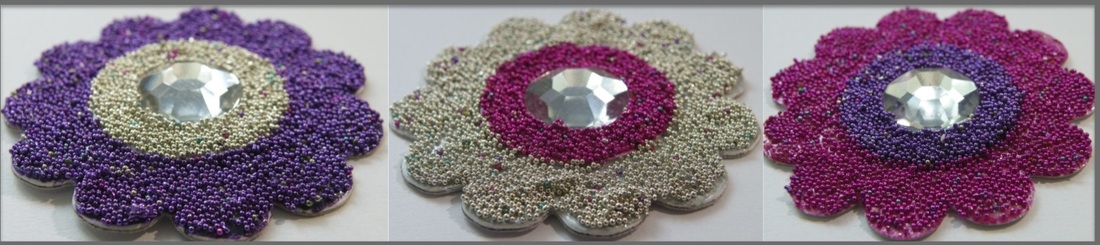
Micro-bead Embellishments
Thanks for your support!
|
|
Make your own micro-bead embellishments for your scrapbooking pages or greeting cards using micro-beads.
Make these embellishments into a striking card
Suggested Materials
Dies
Make these embellishments into a striking card
Suggested Materials
- Micro-beads (or you could try glitter or coloured sand)
- Craft glue (dries clear) with a fine tip applicator
- Die-cut machine with dies.
- White Chipboard (thick card)
- Colouring pens the same colours as your micro-beads.
- Self-adhesive Rhinestones.
- Scrap paper to work on.
- Double-sided sticky tape.
- Bead collection tray or a low-sided container to collect excess microbreads
- Paint brush
- Mod Podge
Dies
- You need a die that is able to cut through thick card.
- I used Sizzix "bigz" and "originals" dies for my embellishments as they easily cut through chipboard (thick cardstock).
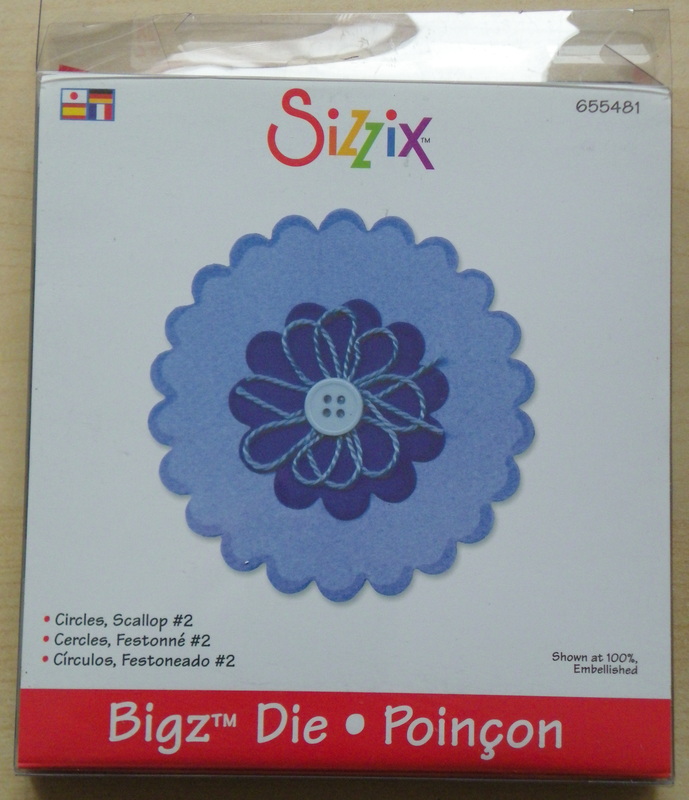
Sizzix Bigz Die Circles, Scallop #2
|
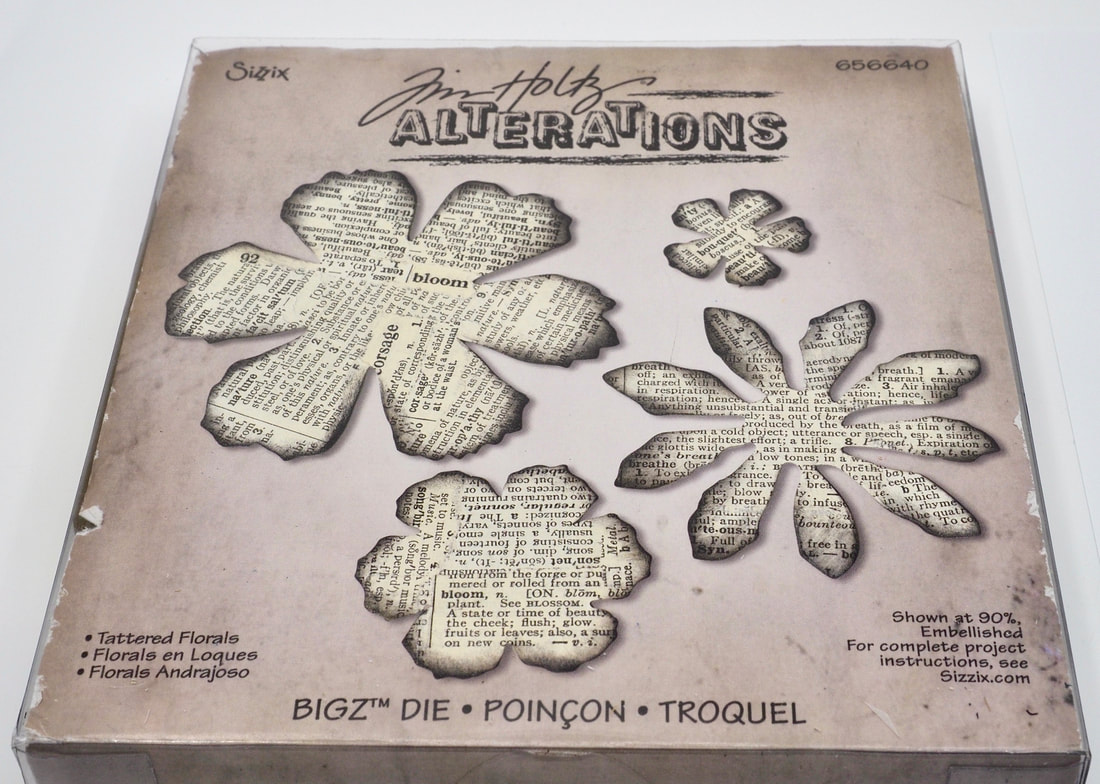
Sizzix Bigz Tim Holtz Tattered Flowers
|
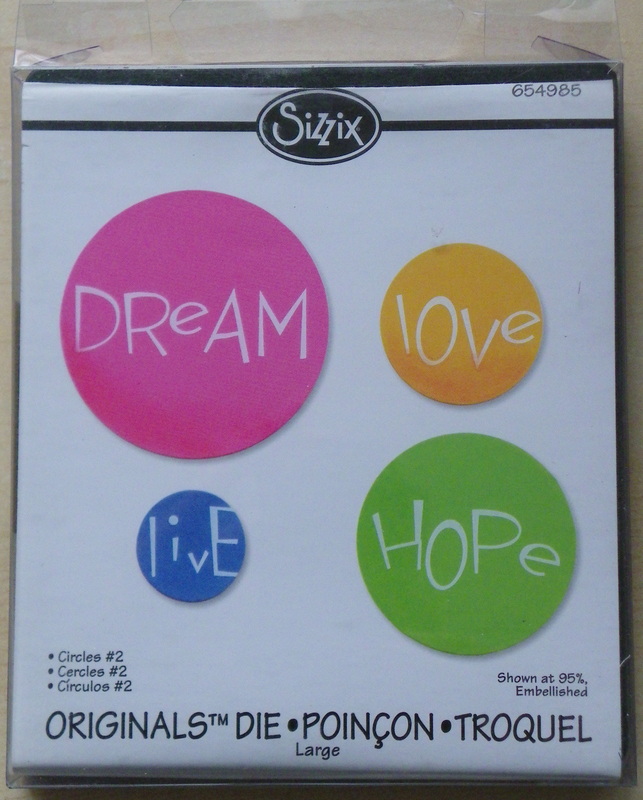
Sizzix ORIGINALS DIE - Circles #2
|
|
Instructions:
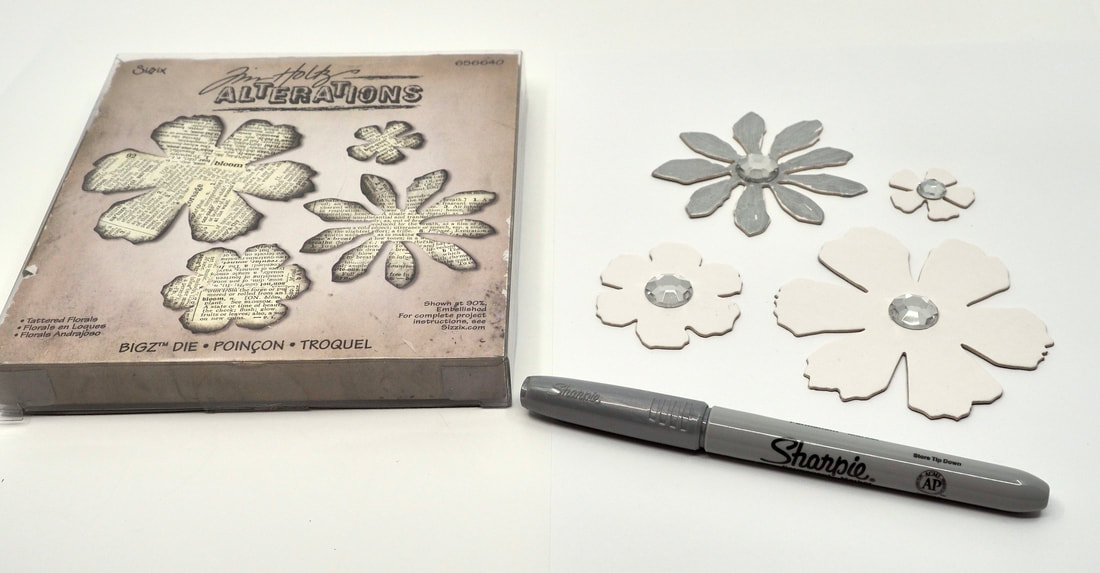
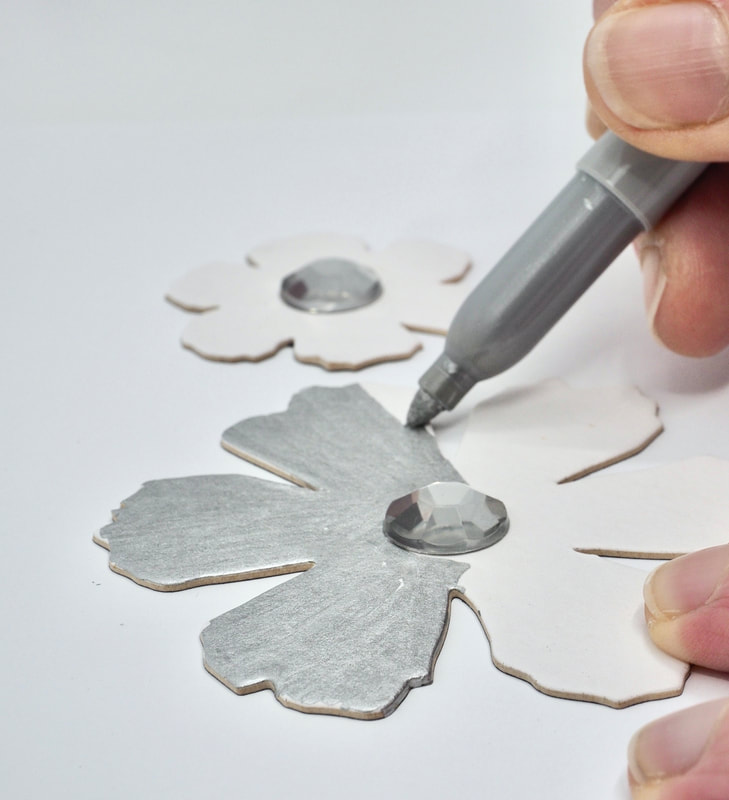
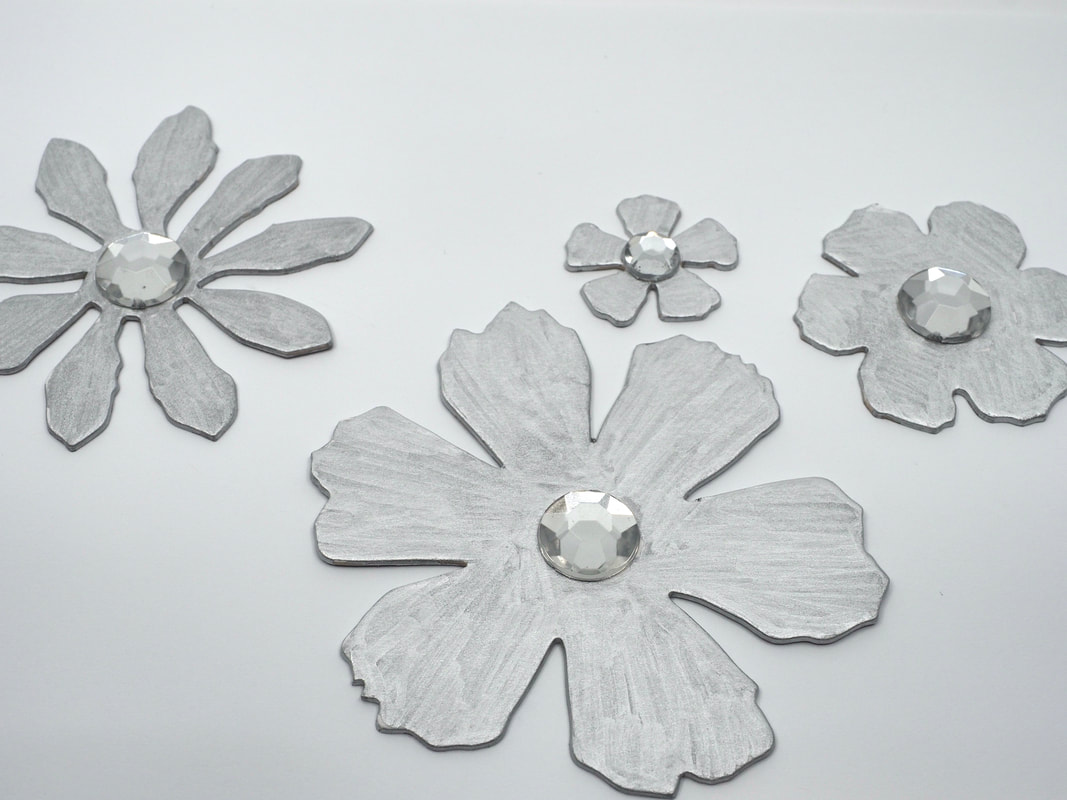
1. Use your dies and die-cut machine to cut out your embellishments from chipboard (thick cardstock) Add the self-adhesive Rhinestones and then colour in the die-cuts in the same colours of the micro-beads you plan to use. Don't forget to colour the sides as well. |
|

|
|
|
|
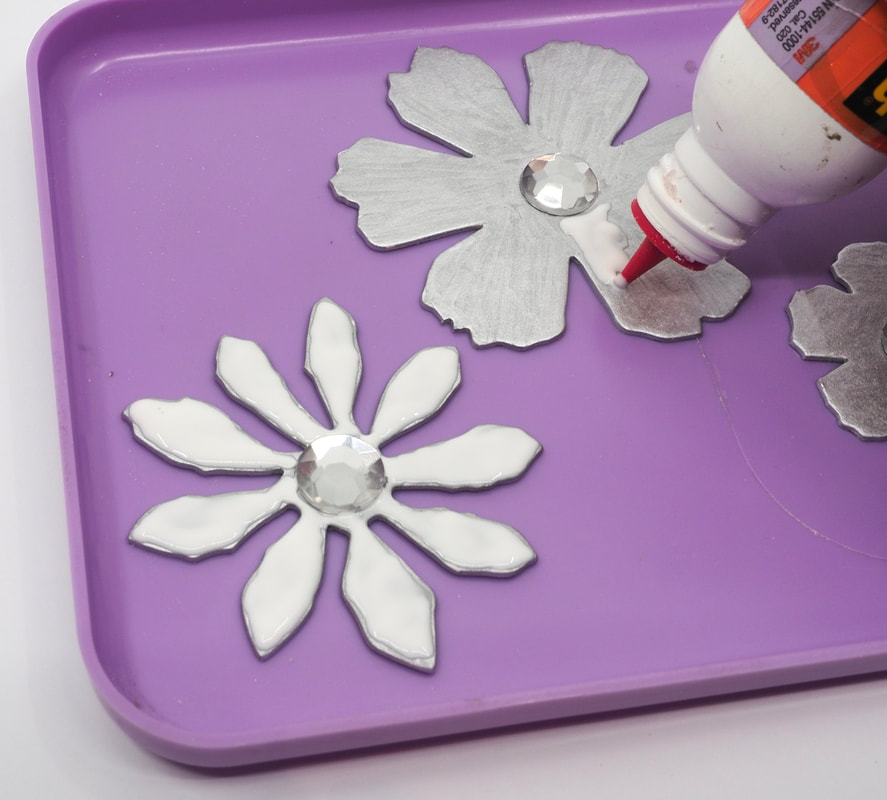
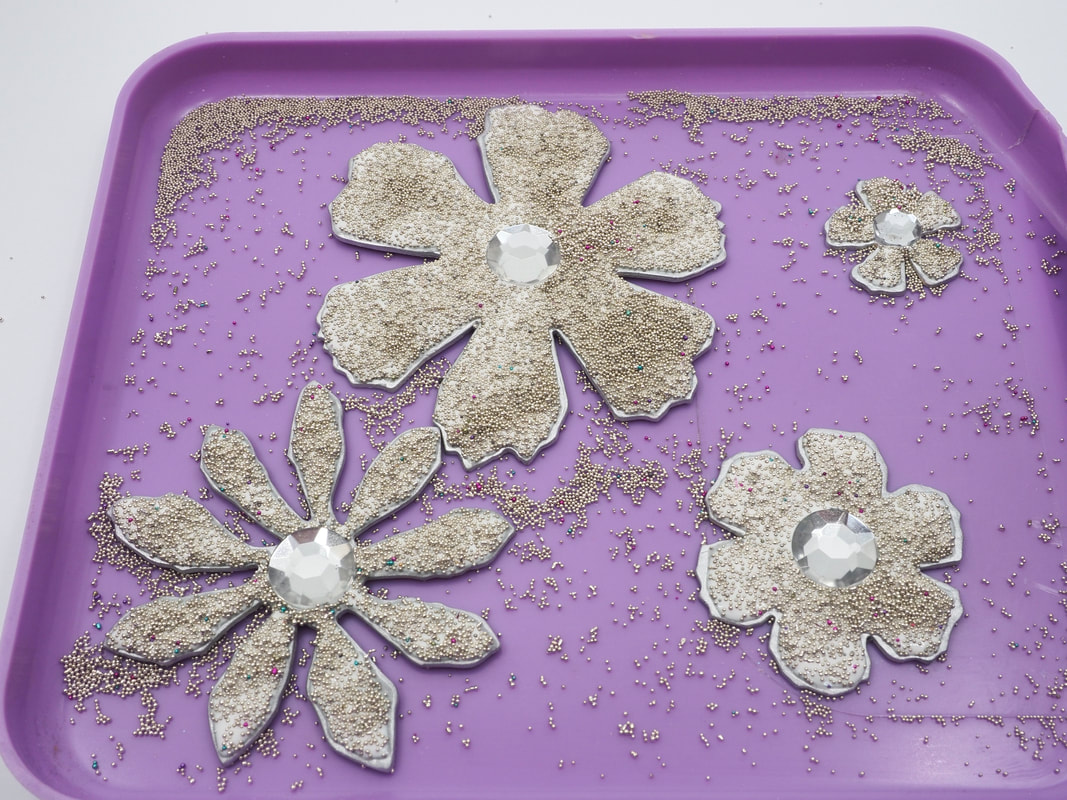
2. Put the die-cuts into a bead collection tray (or any low-sided tray)
|

|
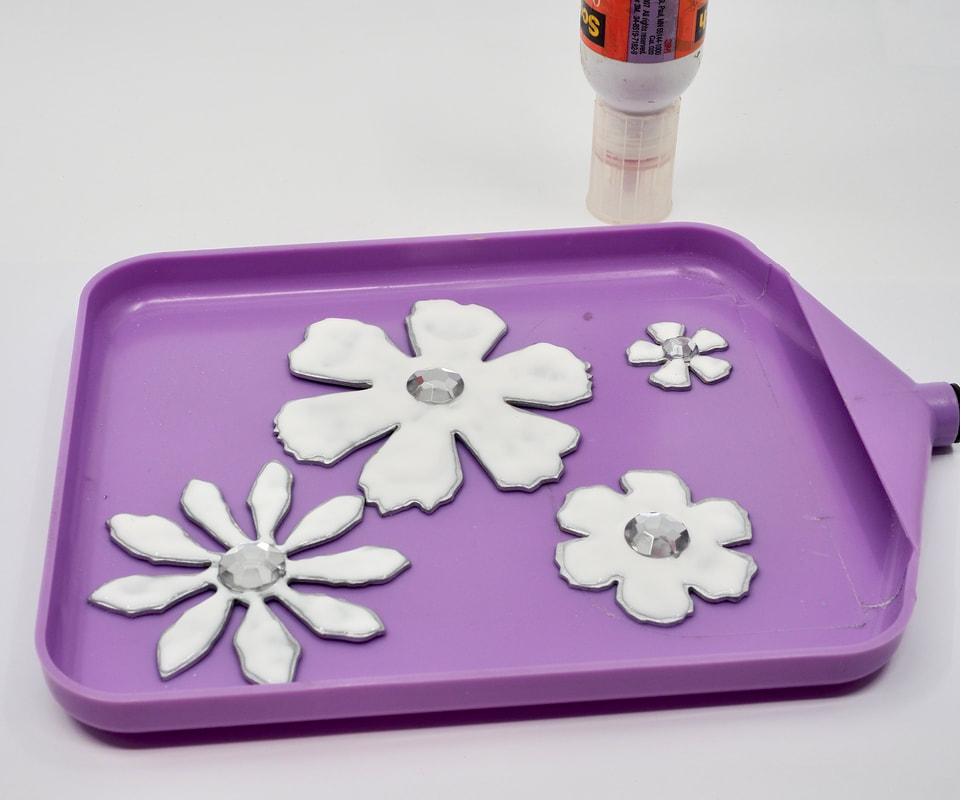
3. Cover the die-cuts, as close to the edges as possible, with an even layer of white glue.
|
|
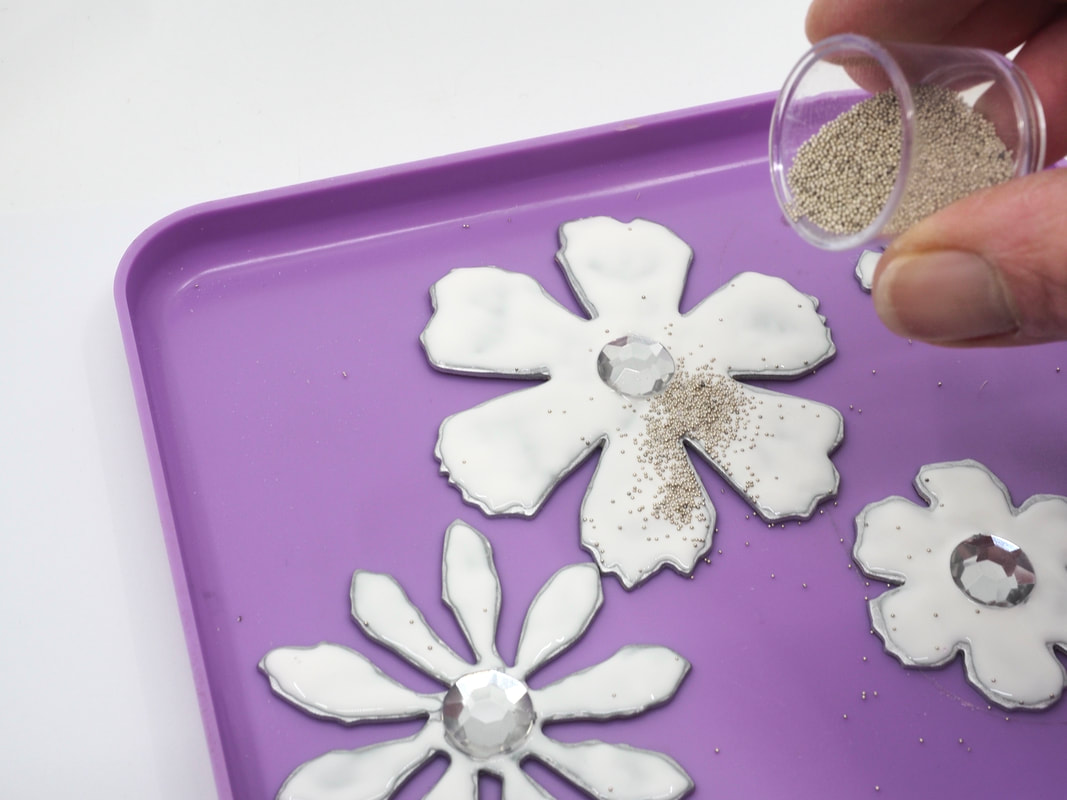
4. Pour the micro-beads over the die-cuts, trying to cover the whole surface as well as possible. Set aside to dry. Collect up the remaining micro-beads and return to their container.
|
|
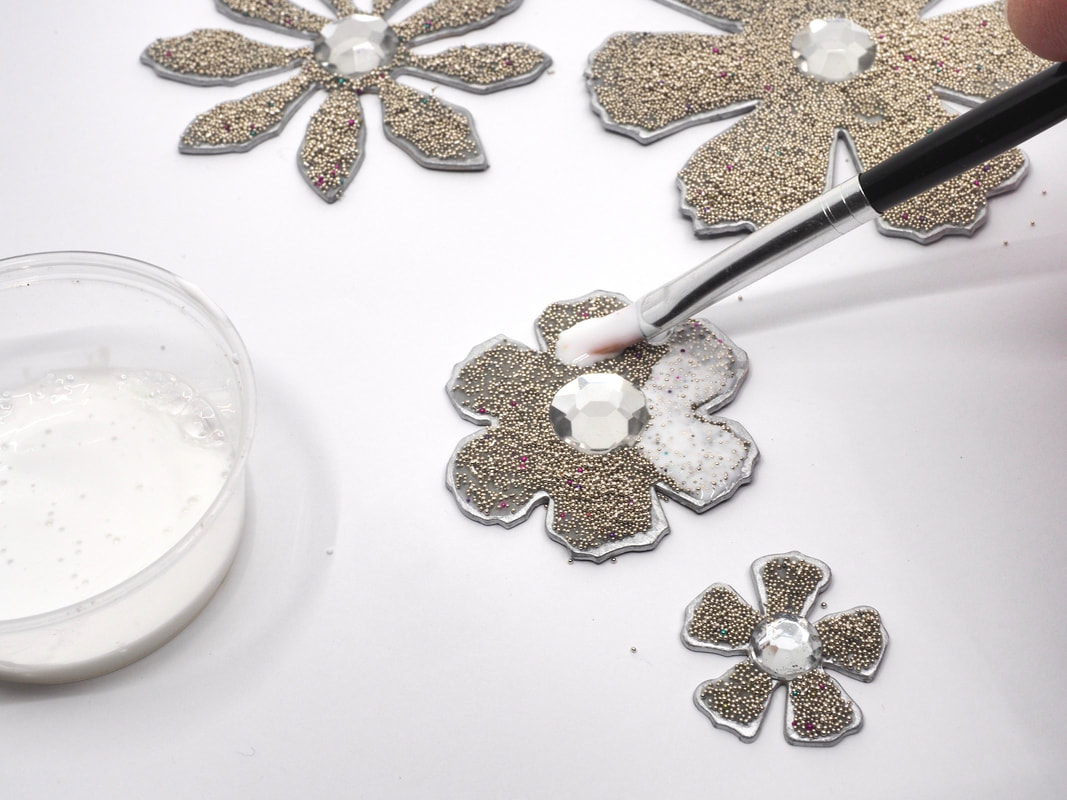
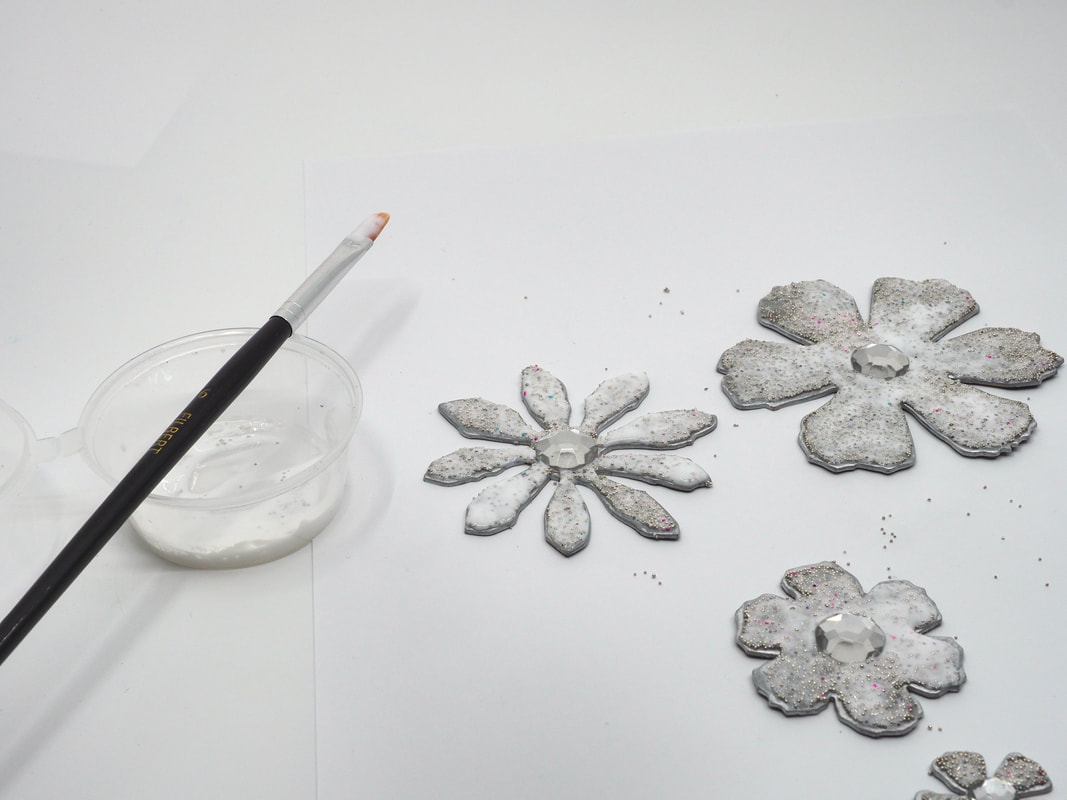
5. Once they are dry, coat the micro-beads with a thin layer of Mod Podge or slightly watered down shite glue.
This is to seal the micro-beads onto the embellishment and prevent them from rubbing off. Set aside to dry.
This is to seal the micro-beads onto the embellishment and prevent them from rubbing off. Set aside to dry.
|
|
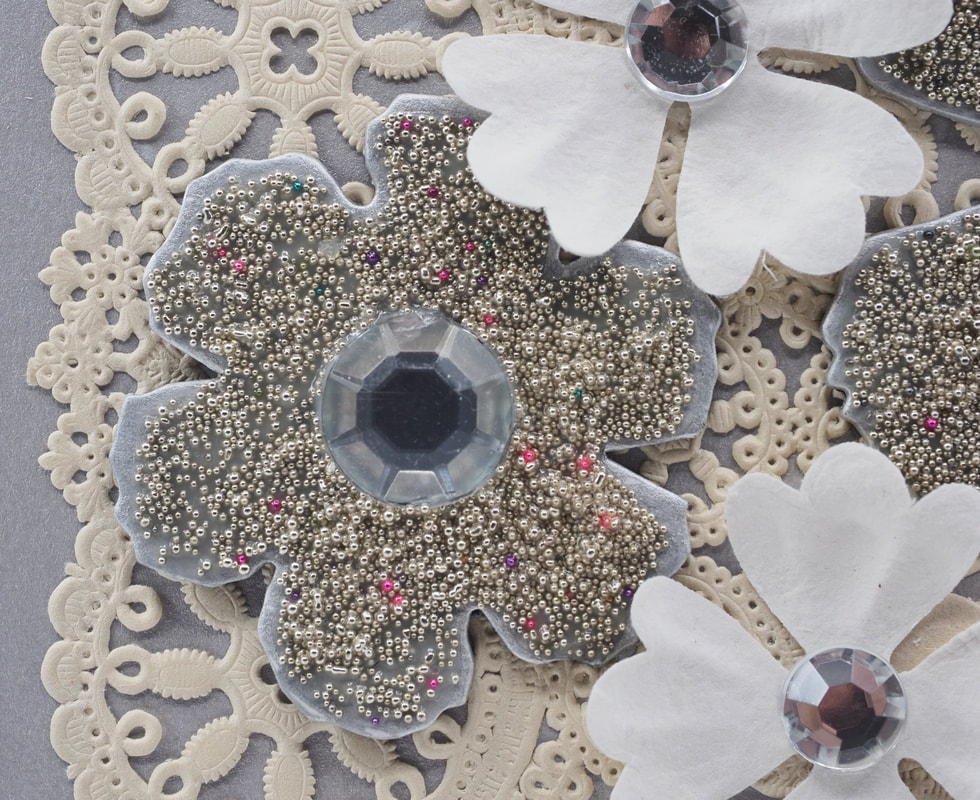
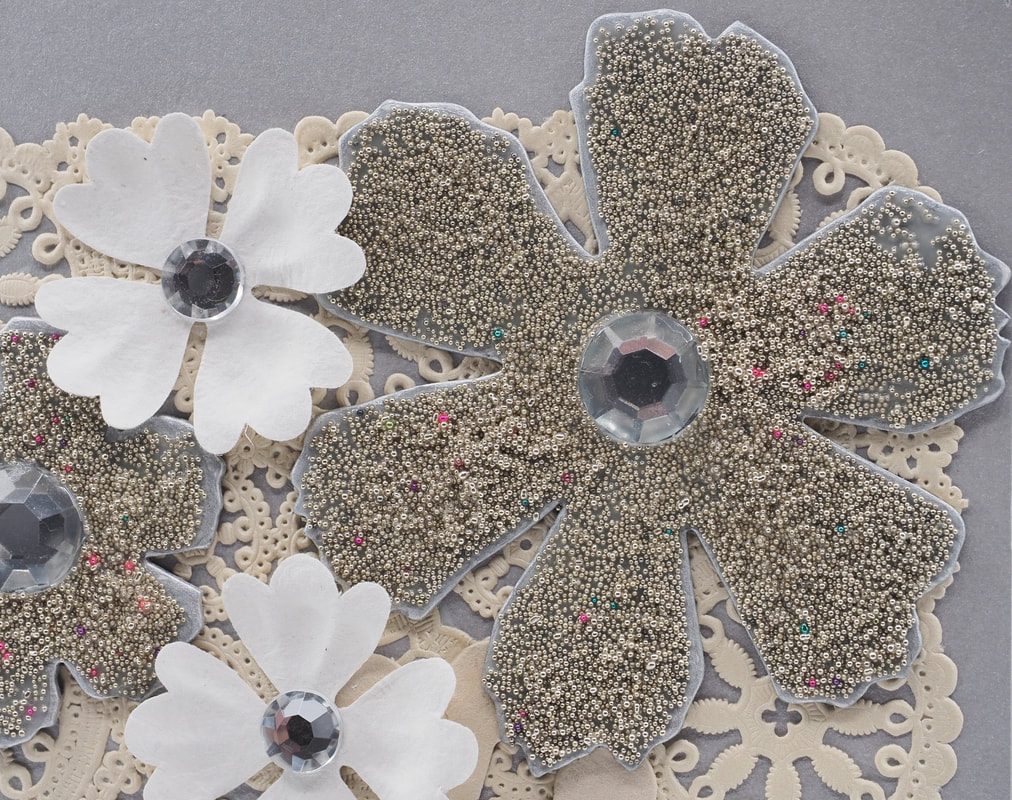
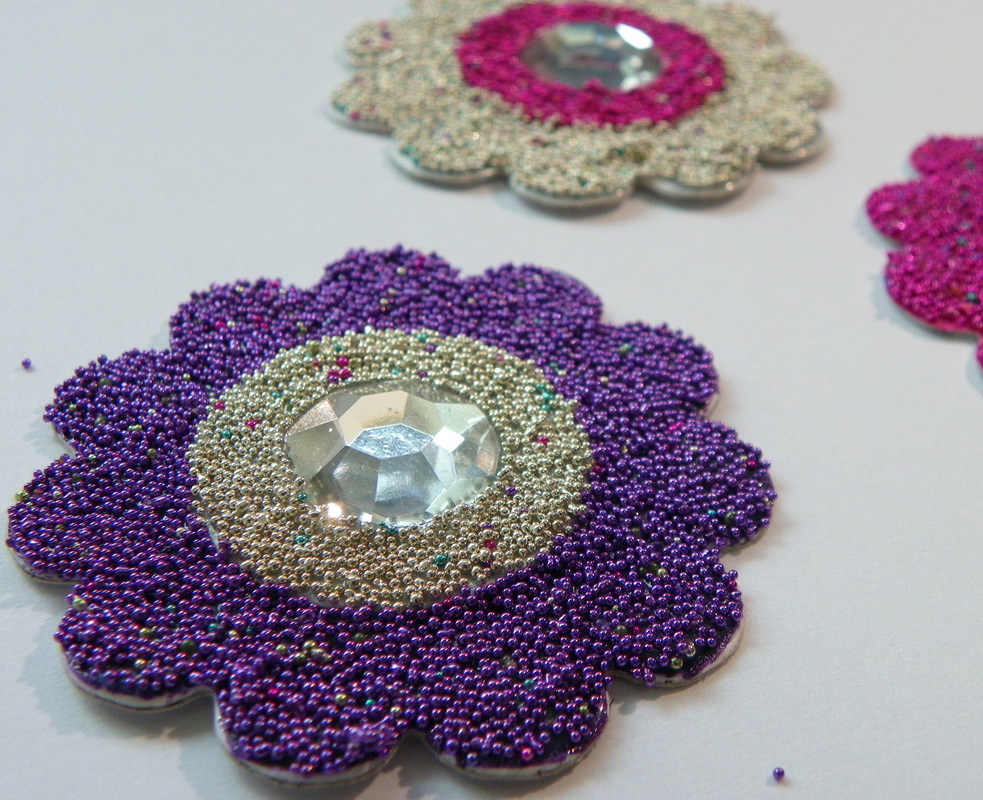
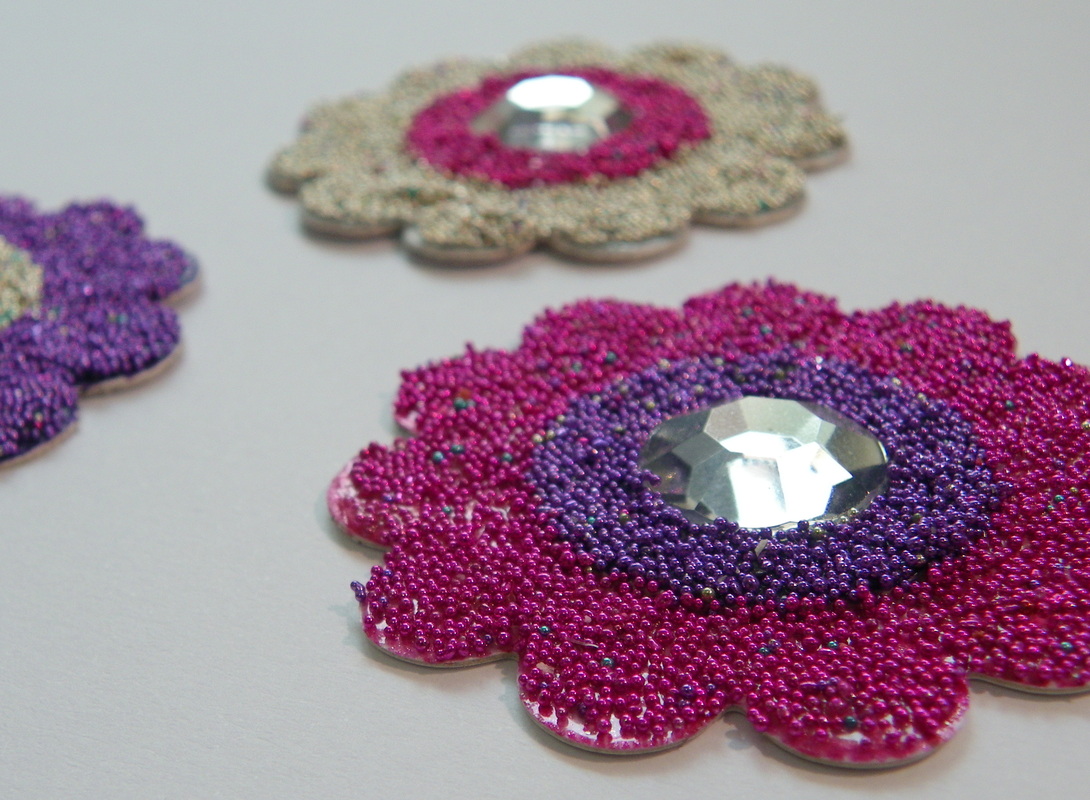
6. The finished embellishments are ready to use.
|
|
|
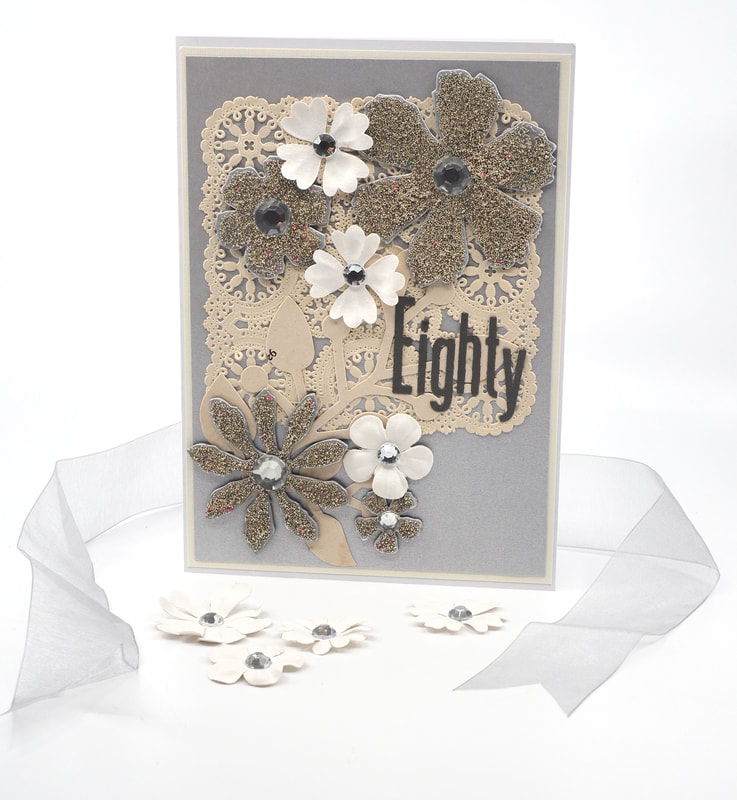
Micro-bead Embellishments made using this method used in the "Beaded Flower Card"
|
|