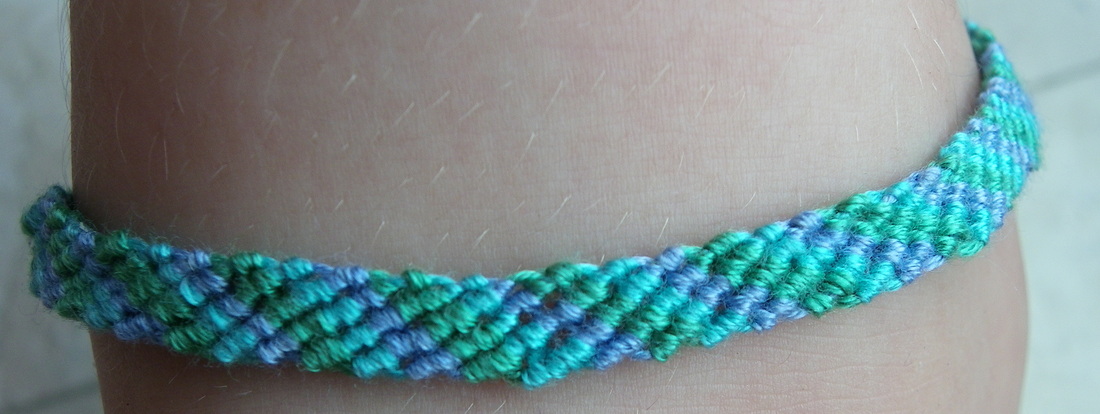
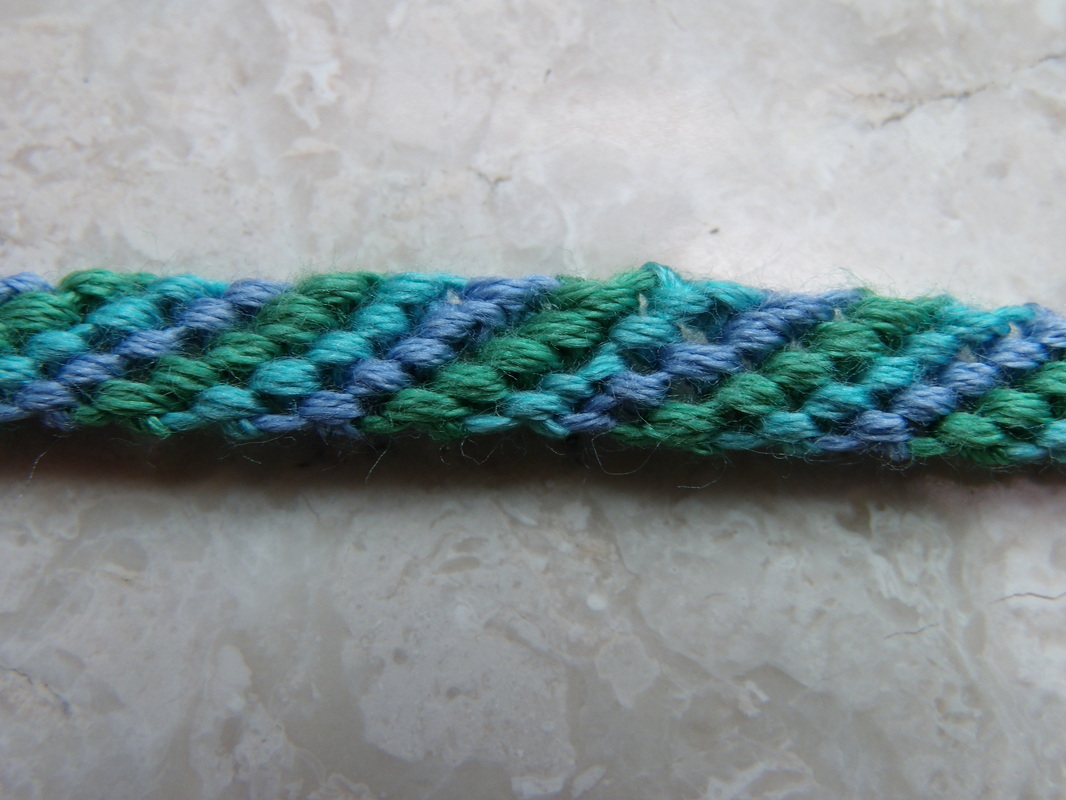
Friendship Bracelets
Thanks for your support!
Materials
1. A piece of sturdy cardboard (often called chipboard) measuring at least 29 cm long and approximately 15cm wide.
2. Sticky tape (wide is best, I used clear packing tape)
3. Craft knife
4. Embroidery cottons in colours of your choice.
5. Large safety pin.
6. Scissors
7. Ruler
8. Lead pencil
1. A piece of sturdy cardboard (often called chipboard) measuring at least 29 cm long and approximately 15cm wide.
2. Sticky tape (wide is best, I used clear packing tape)
3. Craft knife
4. Embroidery cottons in colours of your choice.
5. Large safety pin.
6. Scissors
7. Ruler
8. Lead pencil
|
Instructions
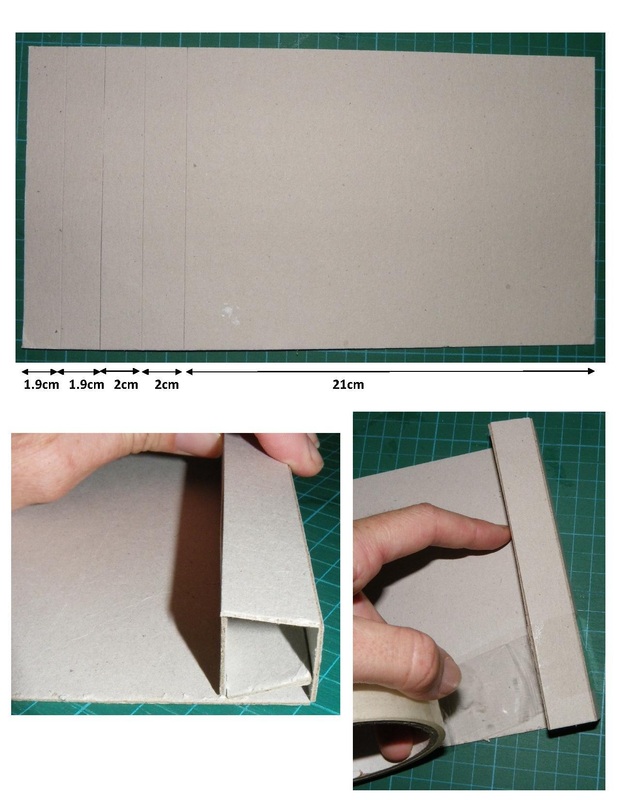
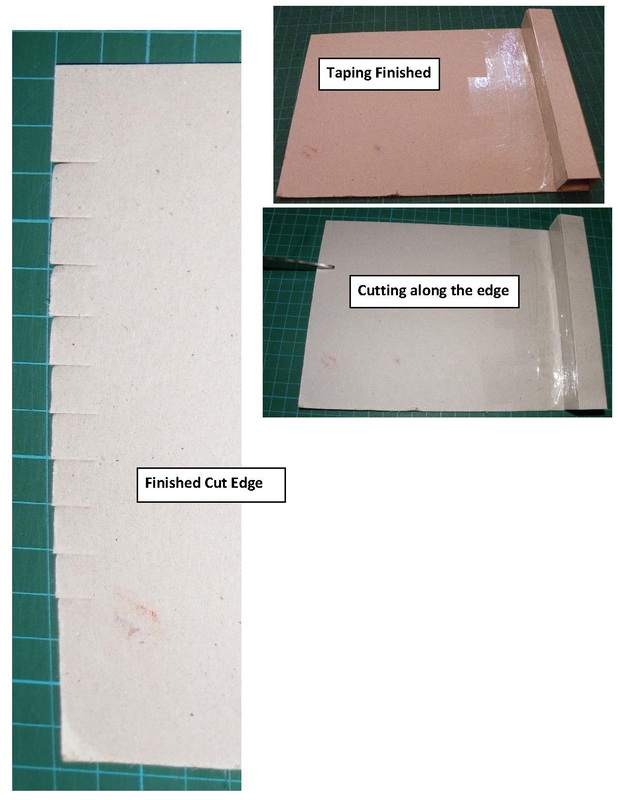
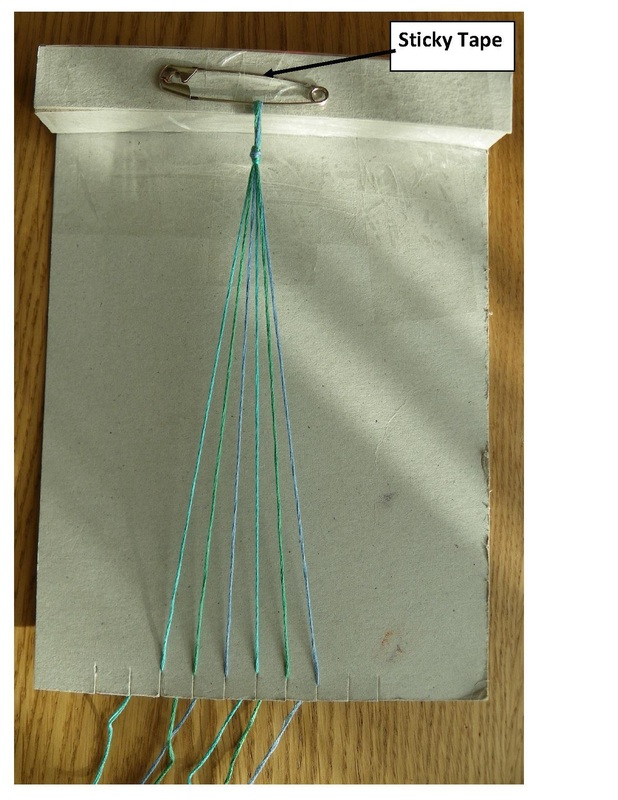
FIRSTLY MAKE YOUR LOOM 1. Measuring from one end of the cardboard, mark the edge at 1.9cm, 3.8cm, 5.8cm and 7.8cm. Use the ruler and craft knife to make shallow cuts across the cardboard at these points (see picture below for details). Do not cut all the way through the cardboard. Roll the cut card end up to make a square tube, and use the tape to secure it in place. |
|
NOW YOU CAN MAKE YOUR BRACELET
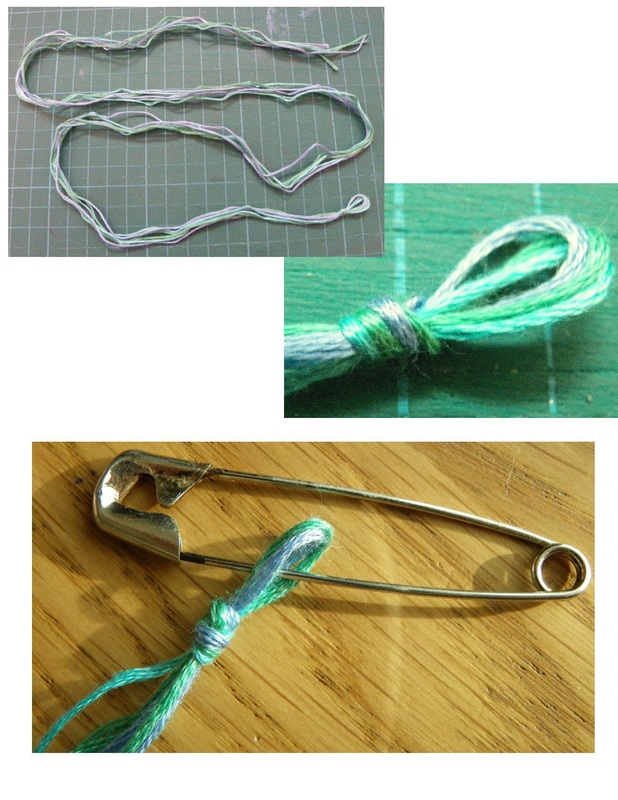
3. Cut three long pieces of embroidery thread in your chosen colours. (I used green, turquoise and blue). They will need to be approx 1.7m in length to ensure that you have enough thread to complete a bracelet. Align the three pieces together, then fold them in half, and tie a knot at the centre, approximately 1.5cm from the folded end. (see picture for guidance). This will leave you with 6 threads coming out from the knot. This loop is important for both securing your bracelet while you are working on it, and you will also need it to tie the bracelet on once you have finished. Thread the loop onto a safety pin (as shown). |
|
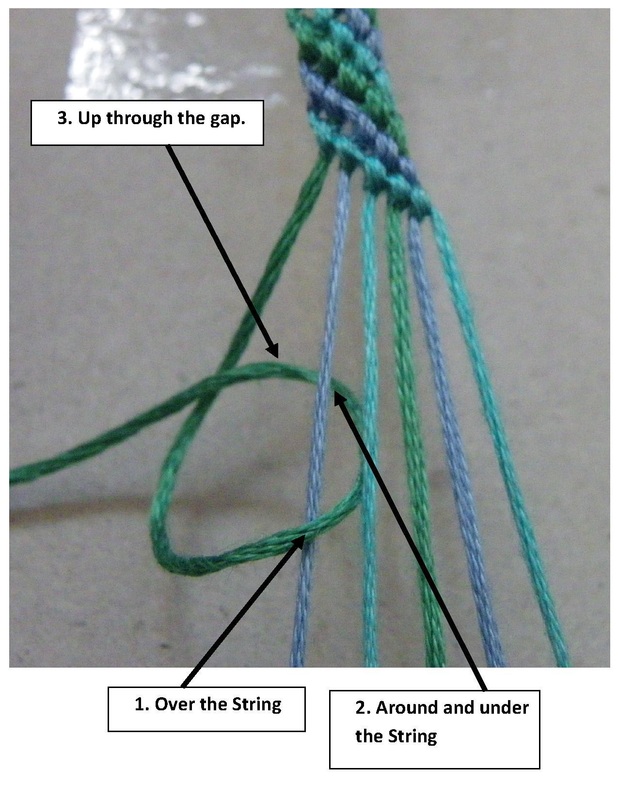
5. The friendship bracelet is woven by tying a knot around all the other strings, with each string in turn.
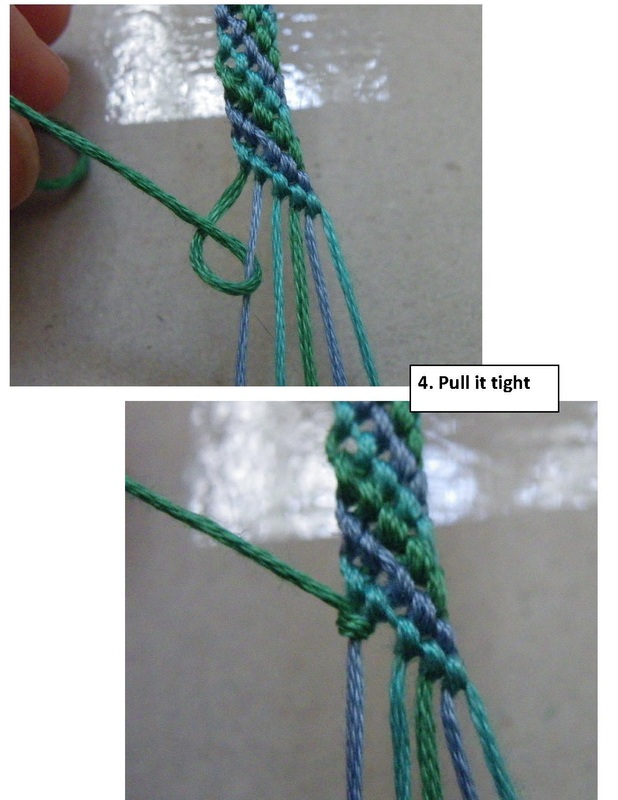
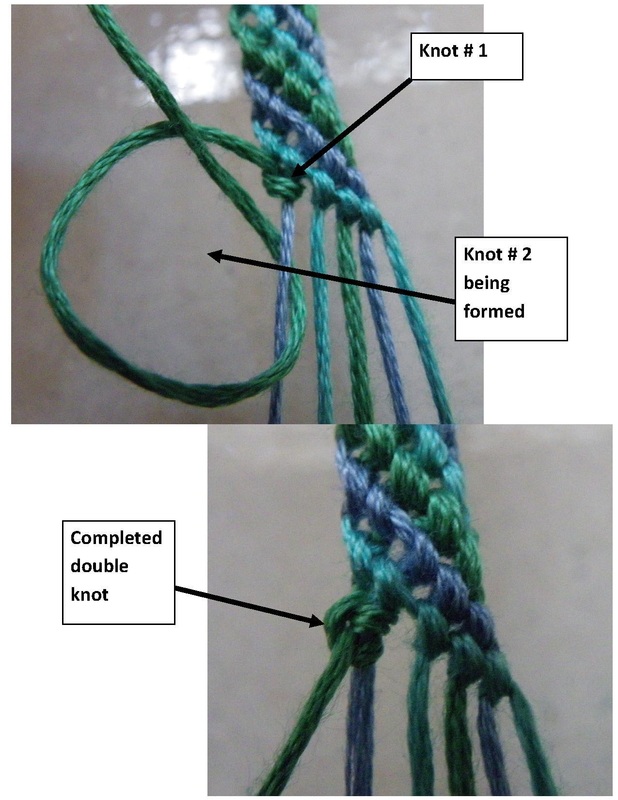
Take the left most string. To tie a knot move it OVER the closest string to it's right, then loop it AROUND and UNDER that string, before bringing it UP through the gap. Then pull it TIGHT up to the top of that string. (See pictures below for guide) Repeat this over the same string a second time to form a proper knot. (see picture) |
|
6. Using the same string, you tie a double knot (the same as above) over each string in turn, from left to right. When you have knotted over the right-most string, place the string in the next available slit on the loom.
7. Then repeat the process again, picking up the left-most string and knotting it around the next string, left to right, in turn. When you reach the right-most slit on your loom, you will need to move each string, one by one, back into the left-most slots on the loom, making sure that you keep them in order. |
|
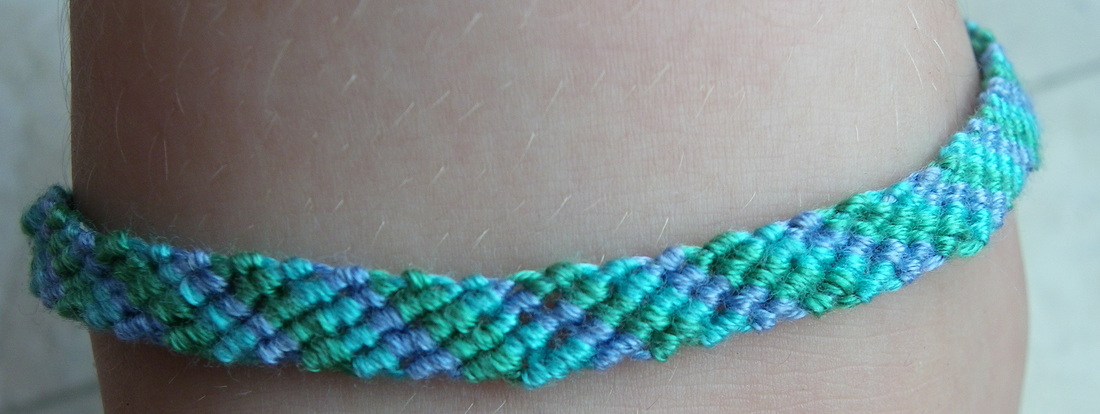
8. Repeat the process again and again until your bracelet is as long as you require it to be.
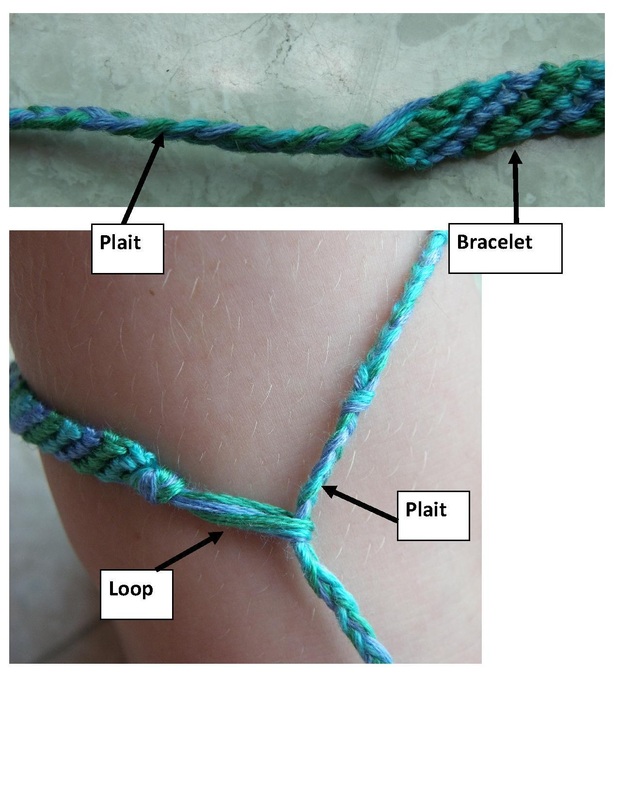
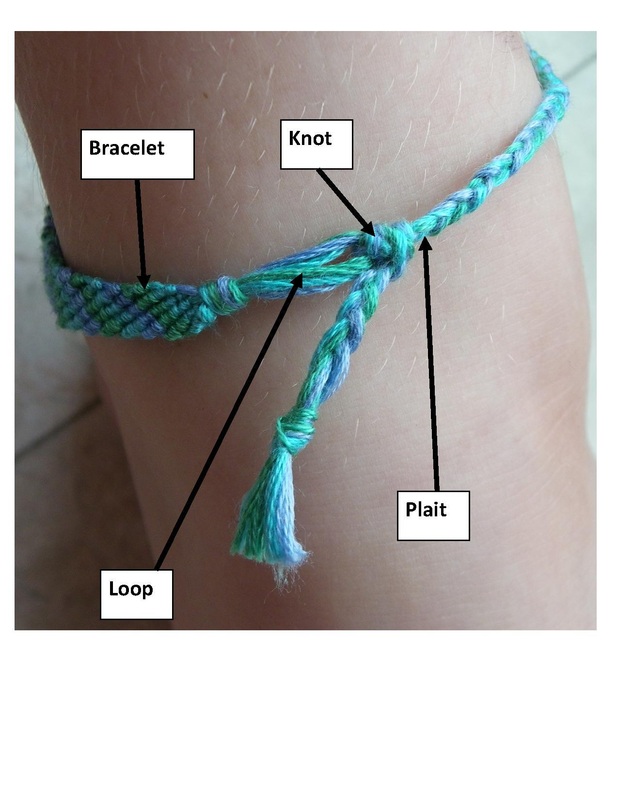
9. Separate the remaining loose threads into their three colours, then tightly plait the remaining string, knotting it when you reach the end. 10. To wear the bracelet, thread the plaited end through the loop (with the bracelet around your wrist or ankle). |
|
|
All Crafts, Printables and Site Content are free for personal use only. Stock photos are free. If you find Craft n Home helpful, please buy me a coffee!
© craftnhome Privacy Policy |
