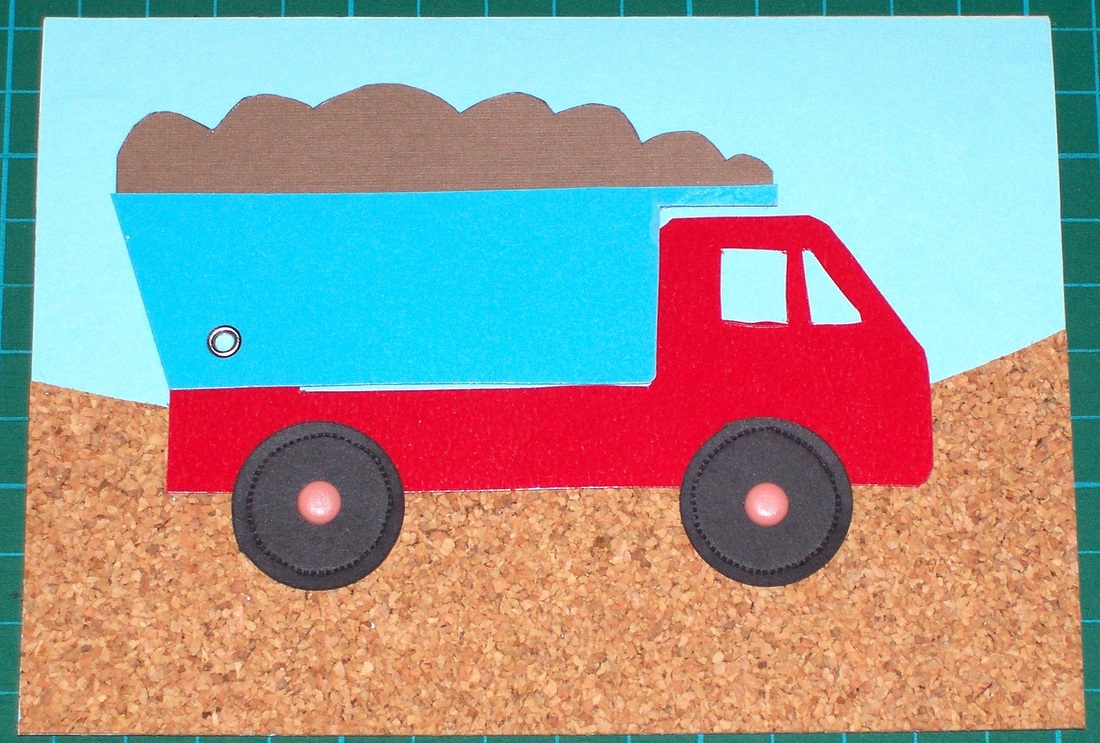
Dump Truck Card
Thanks for your support!
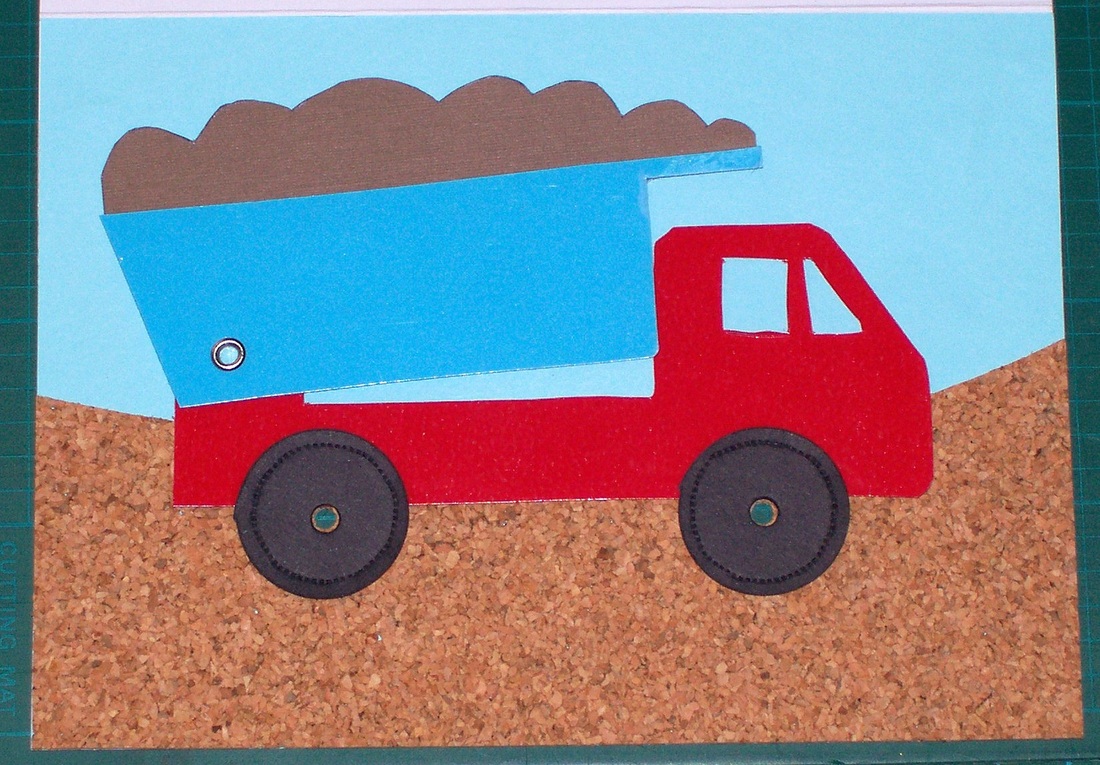
Young kids will love this card - the wheels go around, and the tipper actually tips.
Materials Required
1. Blue card - 21cm x 15cm, scored and folded in half to make a gretting card.
2. Cork sheet - approx 15cm x 6cm
3. Red card - A4 sheet
4. Darker Blue Card - A4 Sheet
5. Brown Card - A4 Sheet
6. Black Card approx 6cm x 3cm
7. Two or three large circle brown brads (split pins) - or other colour if desired
8. One small eyelet and Eyelet setter (Optional - you can use a split pin instead )
9.Craft knife
10. Double-sided tape
11. Punch (Tracing) Wheel (optional)
12. Circle Hole Punch (approx 2.5cm diameter circle)
|
Instructions
Step 1. Print out the template onto the three sheets of card. Print the template onto the BACK of your card so that the ink is hidden in the final result. To Print - open the pdf doc (below) or jpg image (right) and print it out.
|
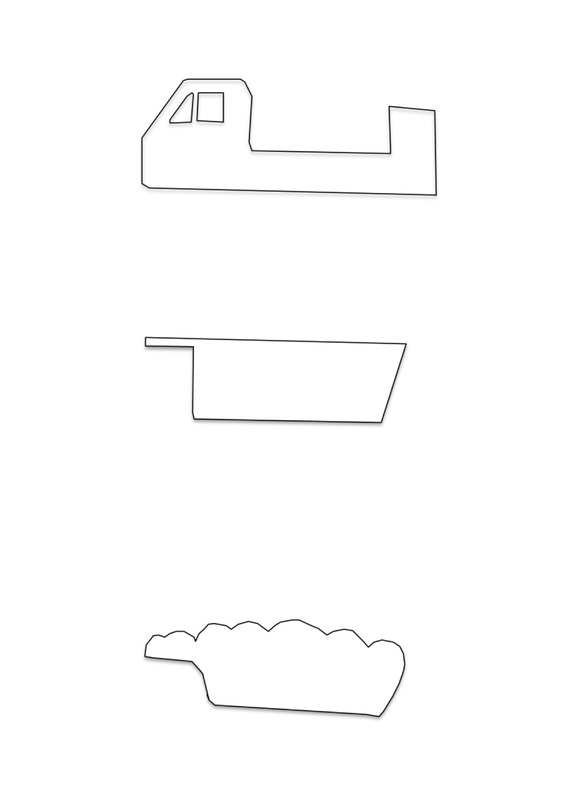
Template
| ||
|
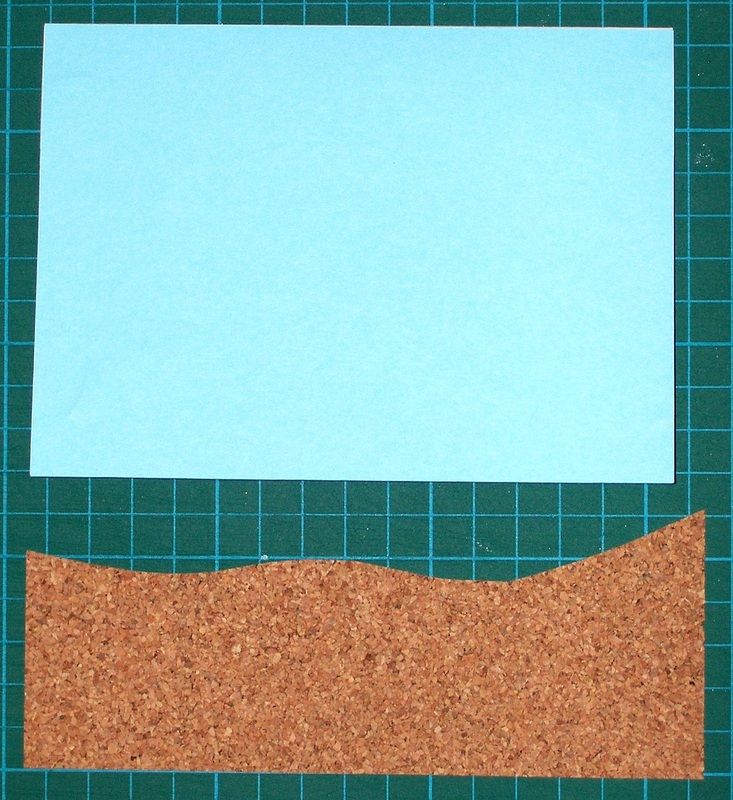
Step 2.
Cut along the top of the piece of cork to make it slightly wavy (see picture). Use double-sided tape or glue to adhere the cork along the bottom of the light blue card. If you have a sticker maker, you can use that as an easy way to adhere the cork. (NB: the fold of the card is at the top). |

|
|
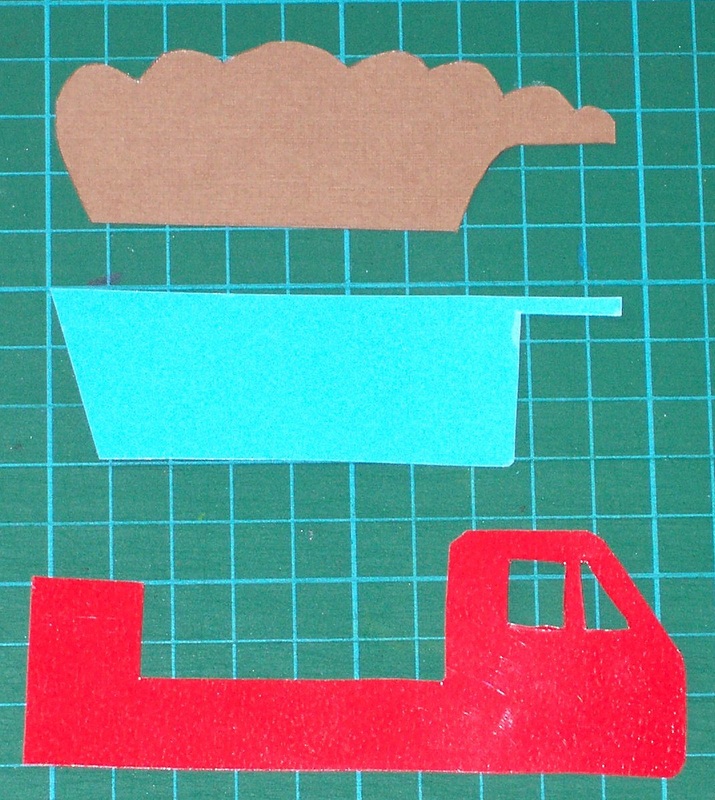
Step 3.
Cut out the dump truck from the red card, it's tipper from the blue card and it's load from the brown card using scissors and / or a craft knife. |
|
|
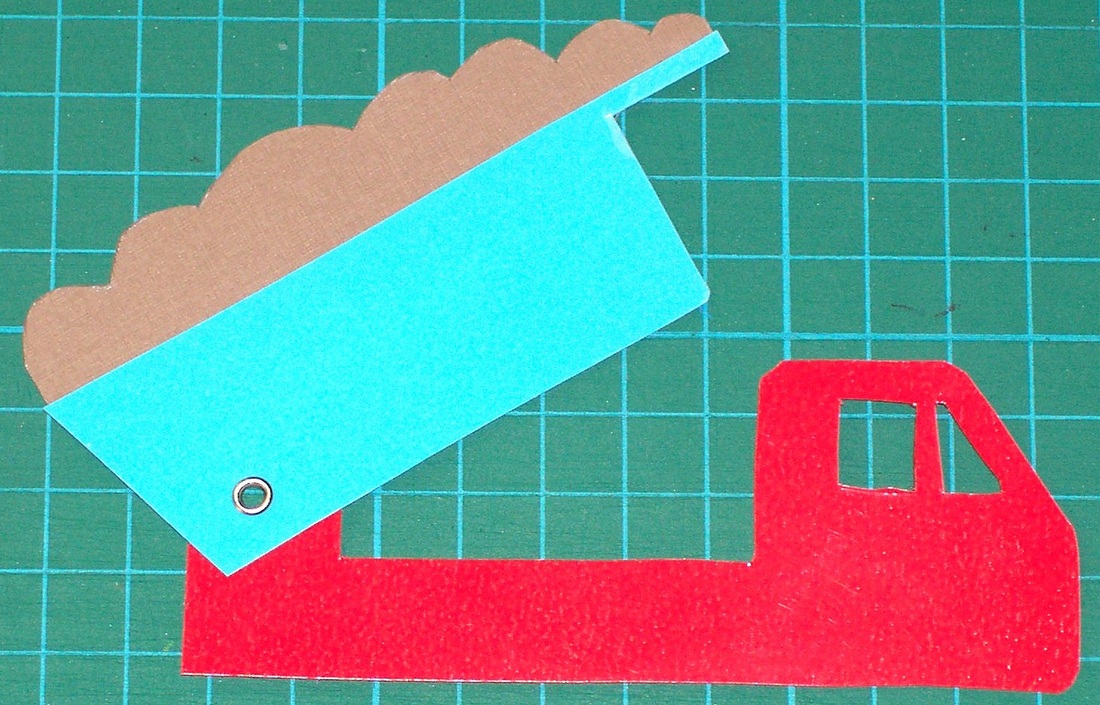
Step 4.
Adhere the load to the back of the tipper using double-sided tape or glue: Put your adhesive on the front of the dirt load, but only on the lower part that will go behind the tipper. Then attach it to the back-side of the tipper (as shown). This helps to avoid getting extra adhesive on the tipper. |

|
|
Step 5.
Set an eyelet (see picture right for positioning) to hold the tipper onto the dump truck. Don't set it too tight or the tipper will not be able to move freely. Alternately you can use a split pin to attach the tipper. To do this, you punch the hole and attach the tipper at the same time as you do the holes for the wheels (below). |
|
|
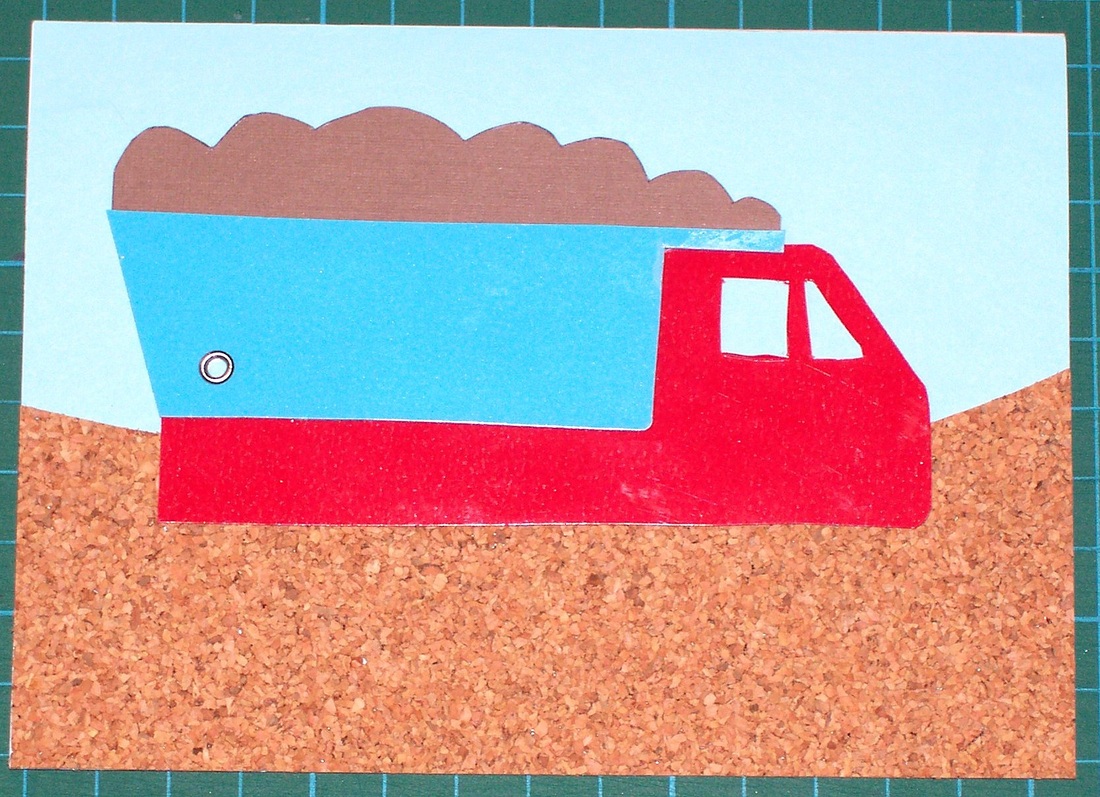
Step 6.
Use double-sided tape or glue to adhere the dump truck body only (do not get glue on the tipper) to the card. See picture (right) for positioning. The tipper must be kept free of adhesive. If you are using a split pin to attach the tipper, adhere only the dump truck body at this stage. |
|
|
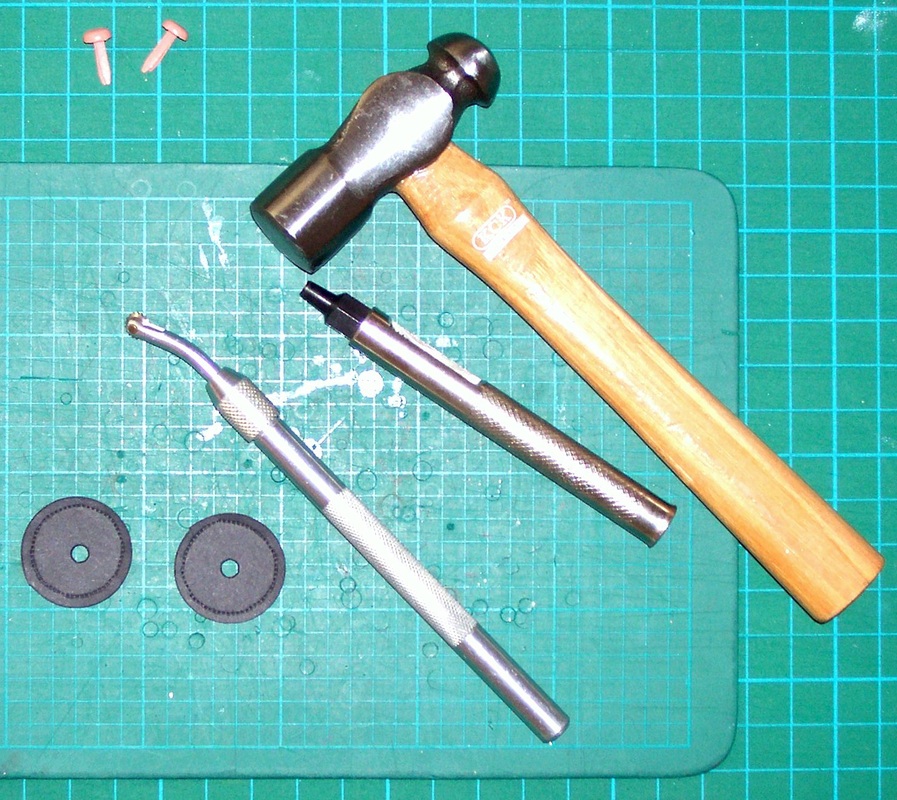
Step 7.
Use a round hole punch to cut the two wheels out of black card. If you do not have a punch, you could use a compass to draw two circles of diameter approximately 2.5cm, or trace around a bottle lid, and cut them out by hand. If you have a punch wheel, use it to mark around the outside of the wheels to look like tyre tread. Then use the hole punch from the eyelet setting kit to punch a small hole in the middle of each wheel. |
|
|
Step 8.
Using the picture (right), work out the placement of the wheels on the truck. Then punch holes, (using the eyelet hole punch), in the position of the wheel holes, through the card. Make sure you only punch through the front of the card - open the card up before punching. If you are attaching the tipper with a split pin, make the hole for the tipper to attach now. Position the tipper in place, and then punch through it and all the layers of the card front. Use the picture as a guide for the hole placement. |
|
Step 9.
Attach the wheels (and tipper) using the split pins.
Attach the wheels (and tipper) using the split pins.