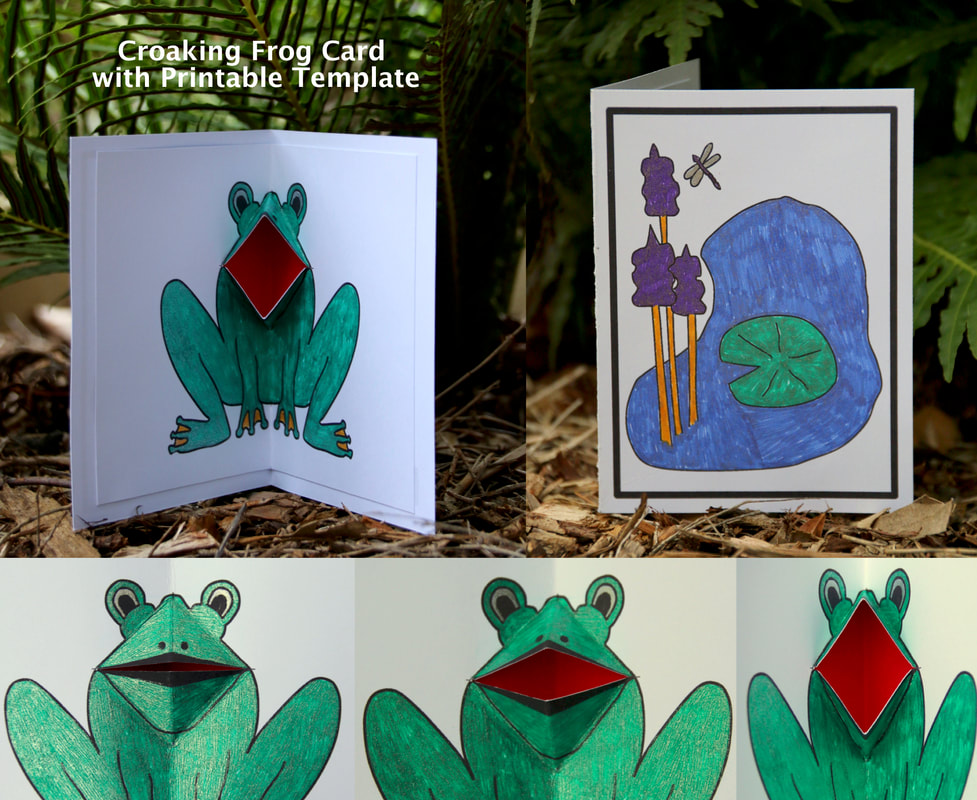
Croaking Frog Card
|
Thanks for your support!

|
|
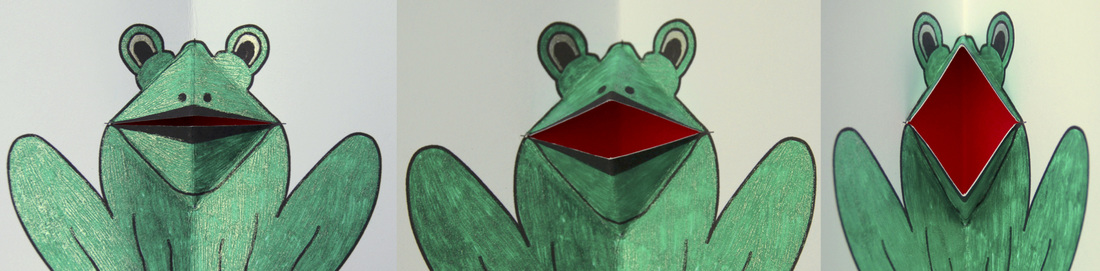
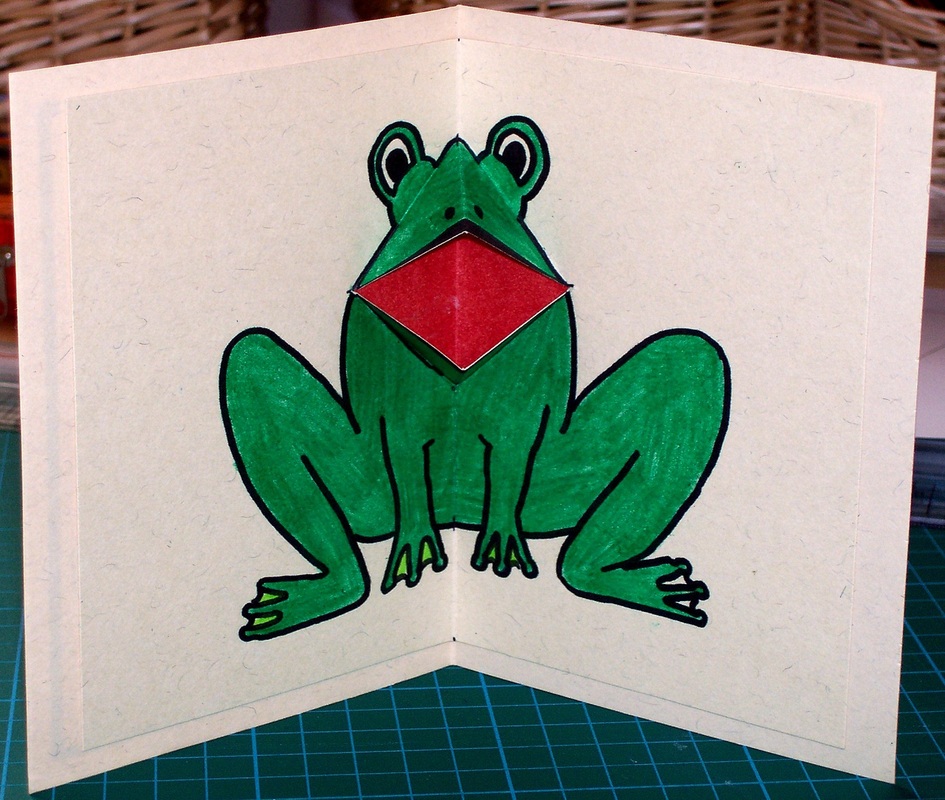
This cute card has a frog with a moving mouth inside. There are two printable template versions - Hand drawn and an updated computer drawn version.
The instructions look long, but it's just because I've shown every step in detail.
The instructions look long, but it's just because I've shown every step in detail.
|
|
|
Materials Required
1. Piece of light A4 Card (I used cream coloured card) 2. Small piece of red paper, approx 10cm x 10cm 3. Colouring tools - like crayons, pens, pencils, paints 4. Sharp pointed object to make pin holes in paper (eg pin or needle) 5. Ruler and pencil 6. Glue or double-sided tape 7. Scissors Instructions Step 1. Print out the template onto a light coloured piece of A4 Card. There are two templates to choose from: the original Hand drawn template and an updated computer drawn template. To print the template open the pdf document (below) or jpg image (right) and select print. The template prints to A4 size paper.
|

Hand Drawn Croaking Frog Card Template
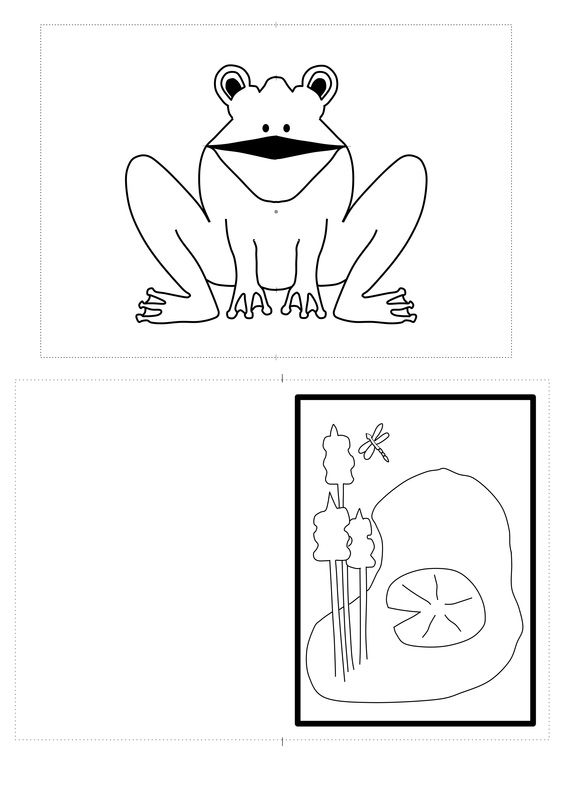
Computer Drawn Croaking Frog Card Template
| ||||
|
Step 2.
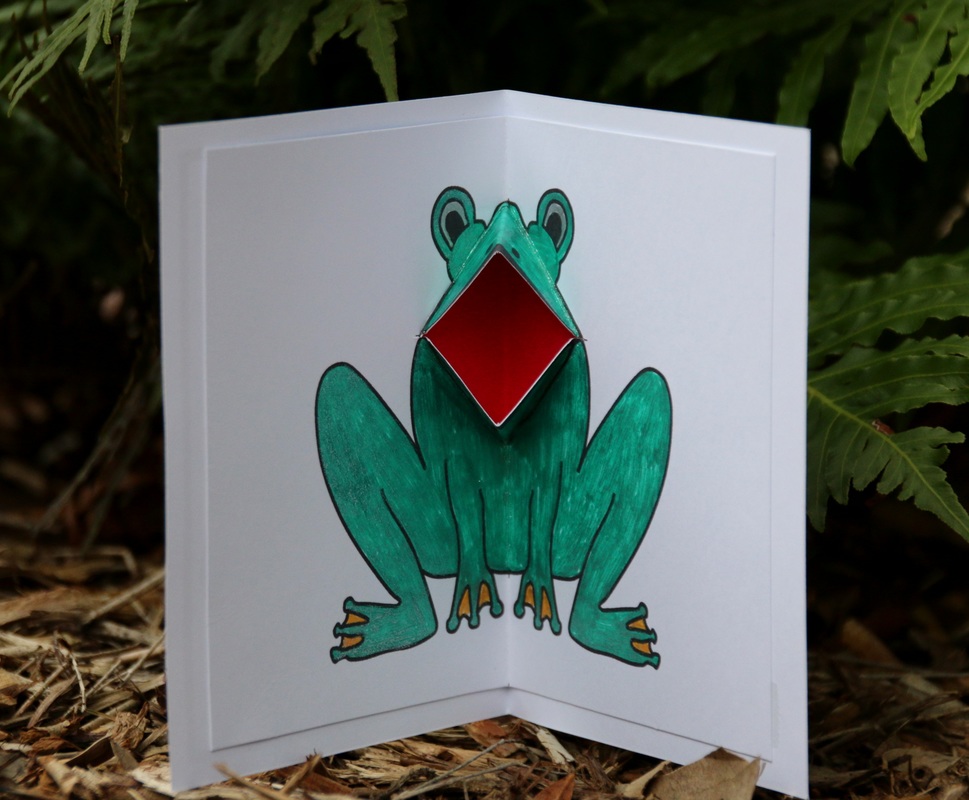
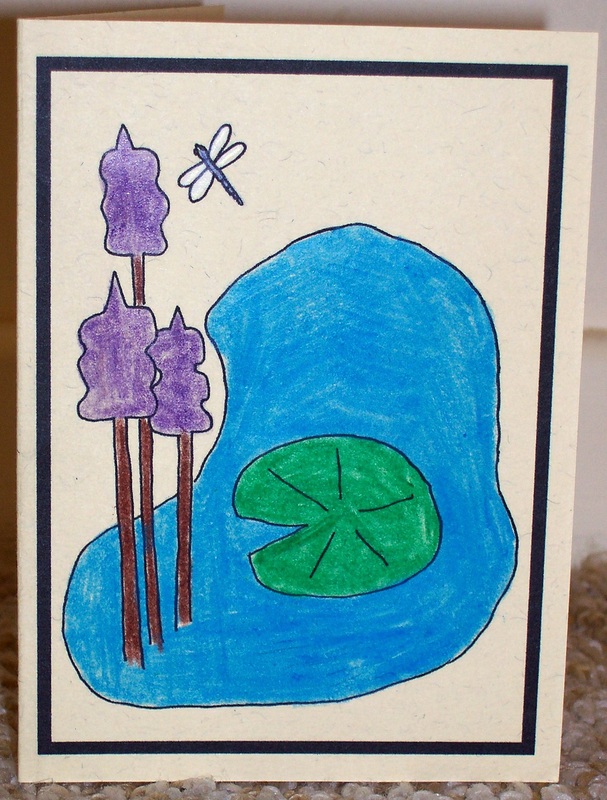
Colour in the Frog and the Pond scene. Then cut the paper in half above the pond scene so that your card base and inside image are now on different pieces of card. For the Hand Drawn Template : When you cut, leave an EVEN BORDER around the pond scene frame (as shown in the picture to the right). For the Computer Drawn Template: I've added in a border to cut the card to size, and small markers to show where to fold the card. Fold the base card with the pond scene in half, creating your card. |

Step 2
|
|
Step 3.
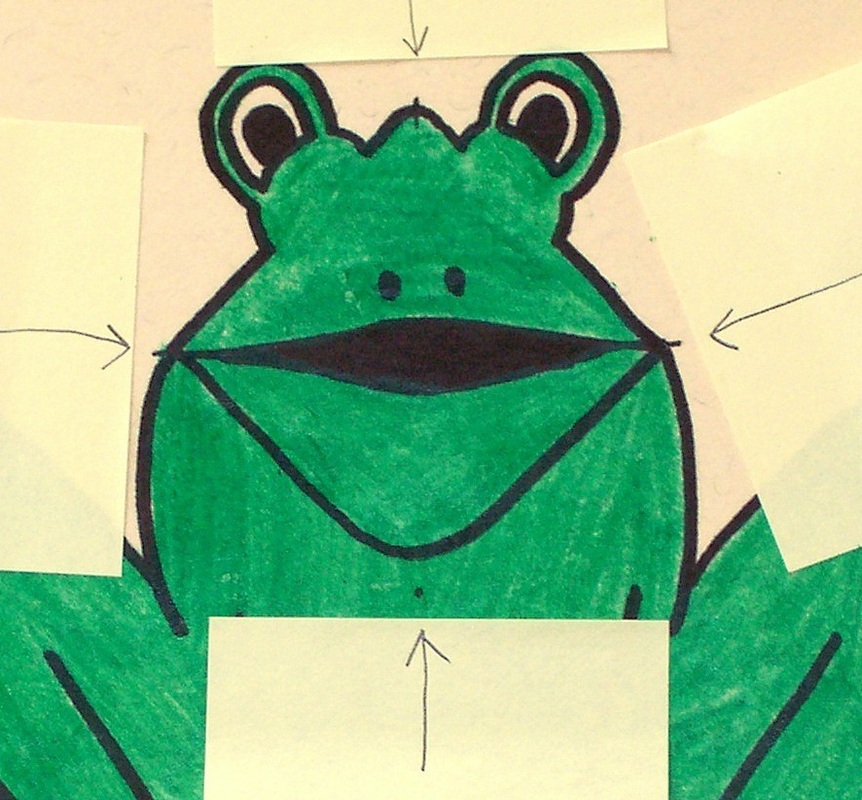
Using a pin, needle or other sharp pointed object, make pin holes in the places on the frog image indicated below (ie. the dot below the chin, where the sides of the mouth meet the outside line, and the bump on the face between the eyes.) Small crossing lines have been drawn to indicate where to place your holes. These holes will help you determine where to cut on the back of the image. |
Step 3
|
|
Step 4.
Pierce two more holes at the points on the border around the frog, indicated by crossing lines and shown in the image to the right. |

Step 4
|
|
Step 5.
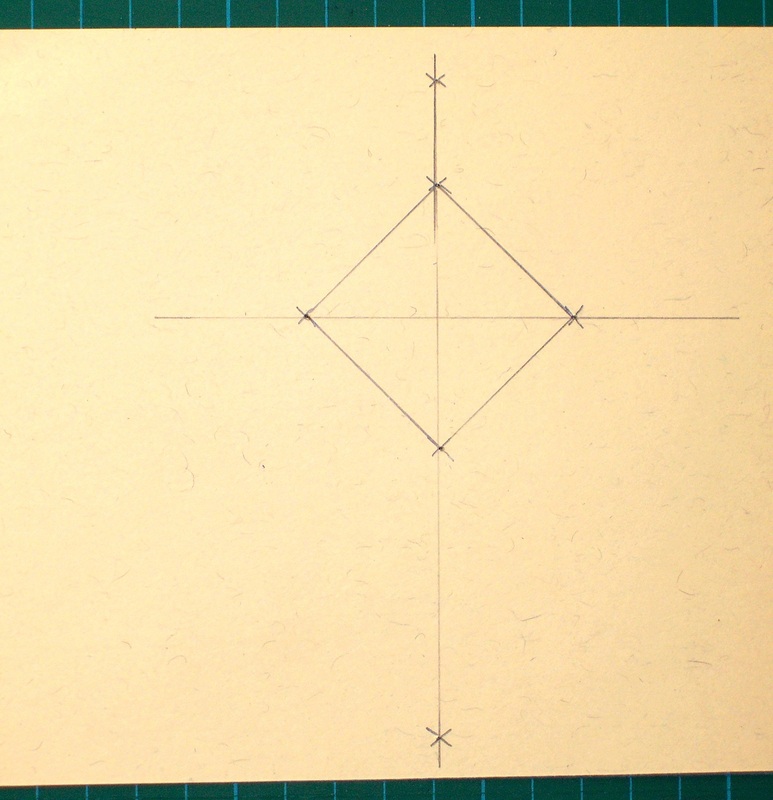
Turn the frog picture over. Using a pencil and ruler draw the cross and diamond created by the pin holes. (see image on right) - I have put a small pencil cross over each of the pin holes so you can see their position. |
Step 5
|
|
Step 6.
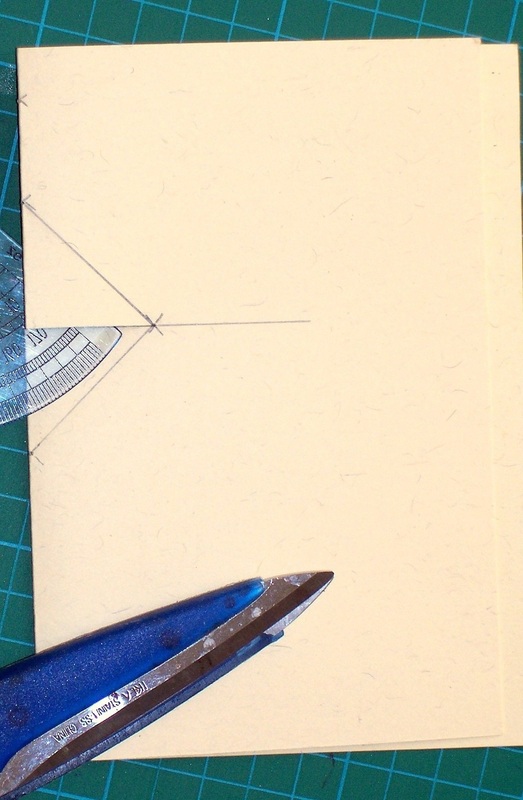
Fold the card down the vertical line (This symmetrically folds the frog in half on the other side). Using scissors, cut along the horizontal line you marked cutting from the folded edge into the card to the edge of the diamond. This cut will be approximately 2.5cm long. I have placed a protracter through the cut so you can see where it is in the photo. |
Step 6
|
|
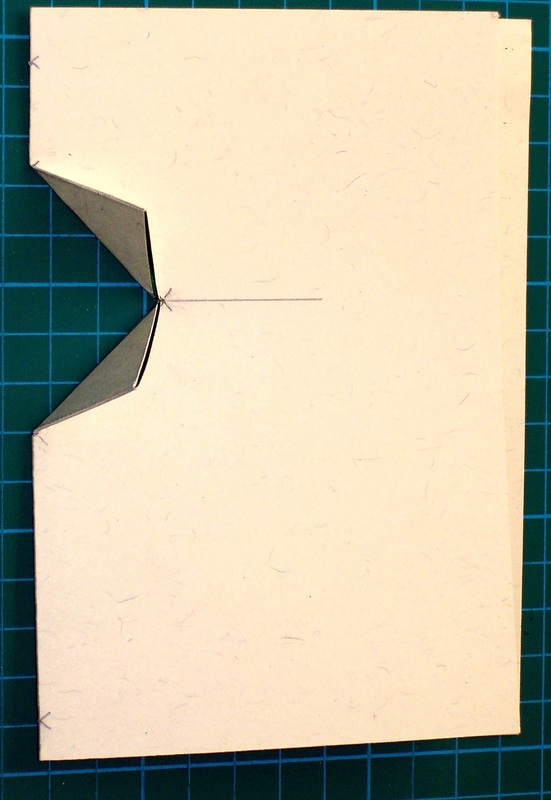
Step 7.
Fold the card from the end of the cut. The fold lines run along the sides of the diamond (see picture on right). |
Step 7
|
|
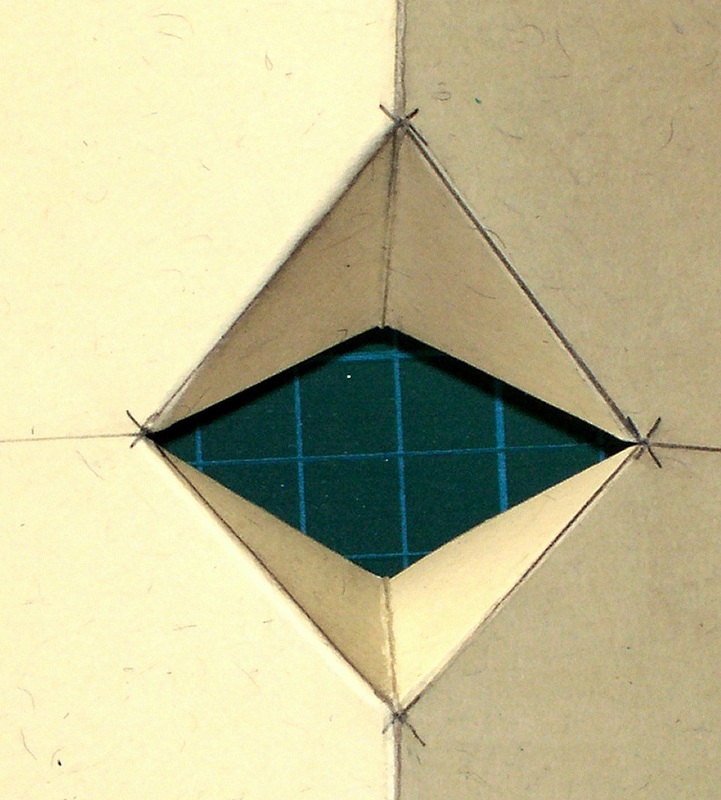
Step 8.
Open out the card, and using the folded lines as a guide, push through the folds to form the frogs mouth. |
Step 8
|
|
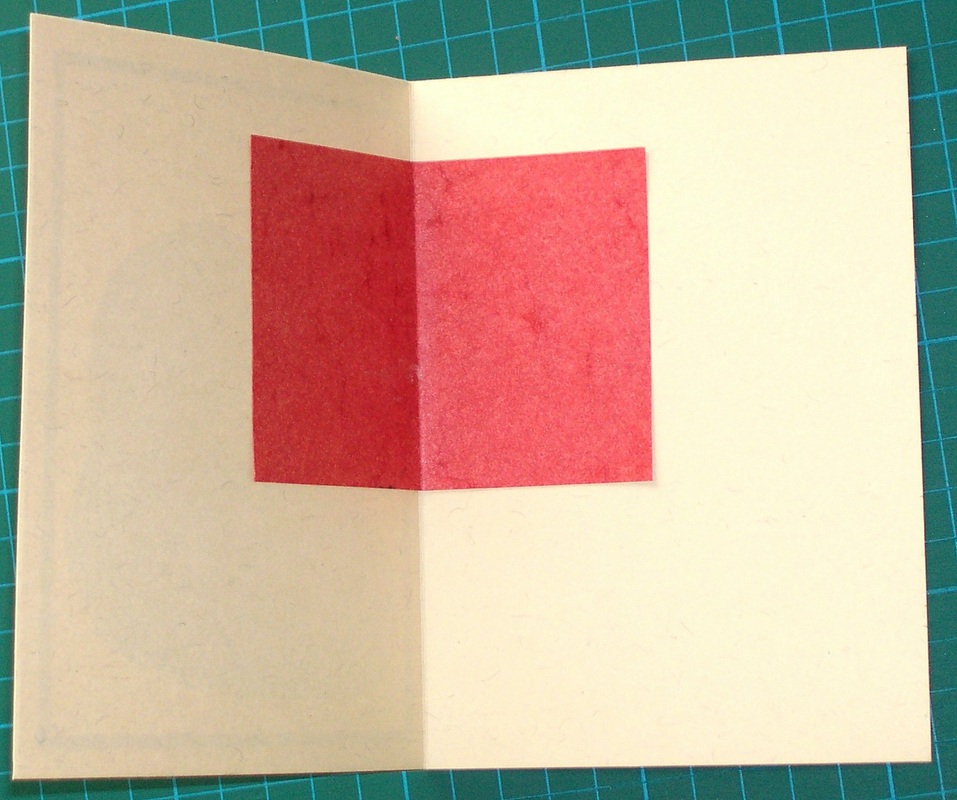
Step 9.
Turn the card over. Trim the frog picture to the size of the drawn border. Place it inside your card to work out where you will need to adhere the piece of red paper (this will sit behind the mouth of the frog, and red will be seen when the mouth opens). You don't want the red paper poke out from behind the edges of the frog card. |
Step 9. The border has been removed. Positioning the red paper.
|
|
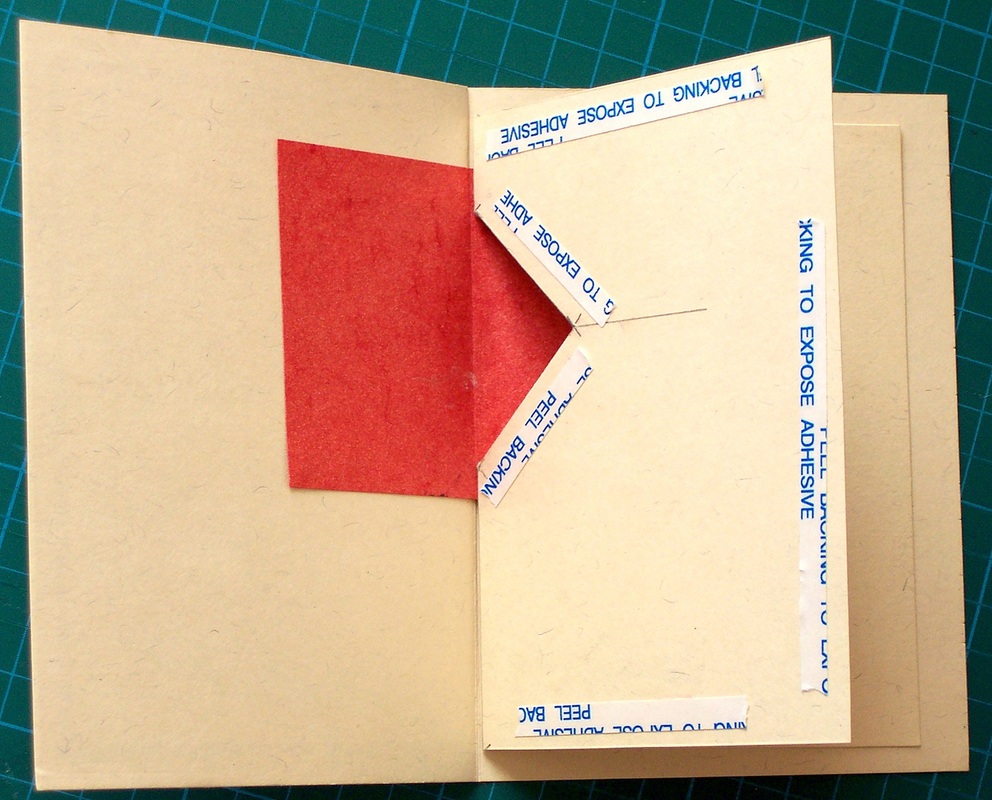
Step 10.
Paste the red paper onto the inside of your card, (where you determined it should be placed). Use double-sided tape or glue. |
Step 10
|
|
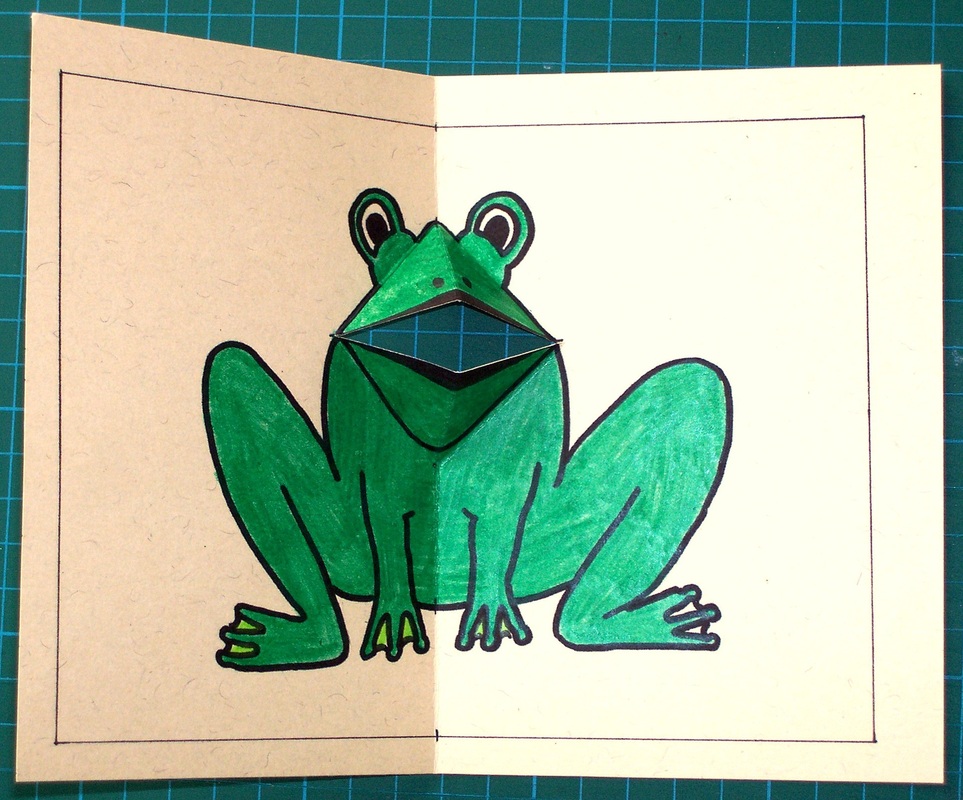
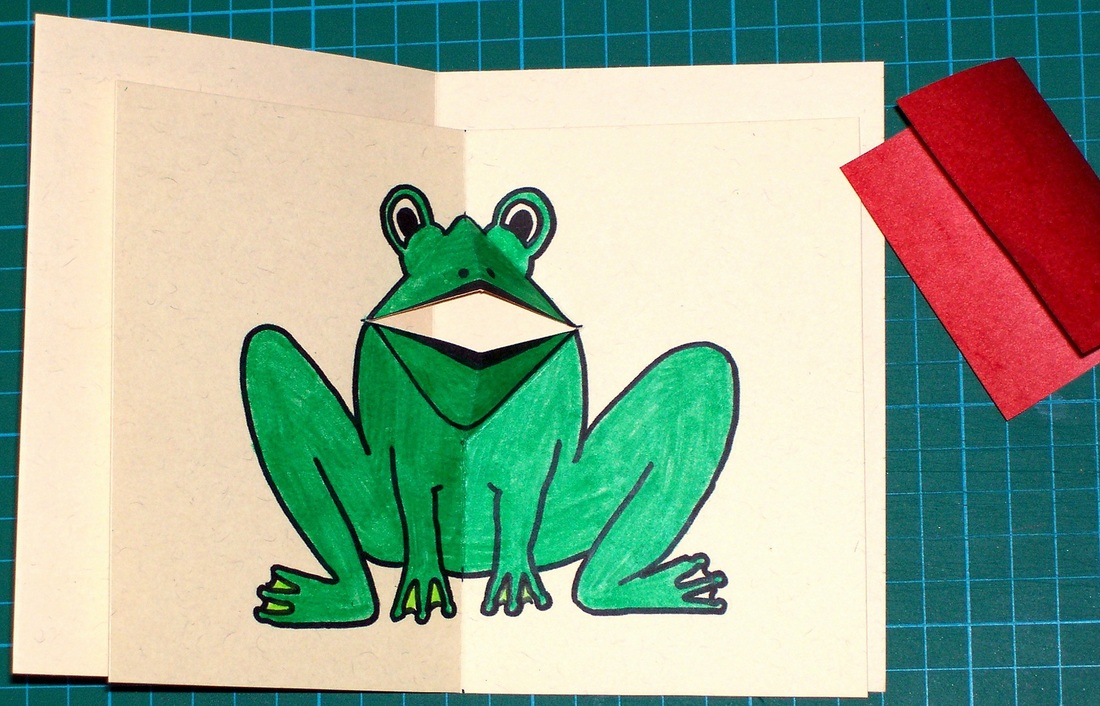
Step 11.
Use double-sided tape (recommended) or glue to paste the frog into the centre of your card. It is best to do this one side at a time, making sure that the frog is fitted snugly into your card. Open and shut the card to see your frog croak!! |
Step 11
|